

Prerequisites
- An Okta account with admin access to create applications
- Bifrost Enterprise deployed and accessible
- Your Bifrost callback URL:
https://<your-bifrost-domain>/login
Step 1: Create an OIDC App
Open the Okta admin console
https://<your-tenant>-admin.okta.com.In the left navigation, go to Applications → Applications and click Create App Integration.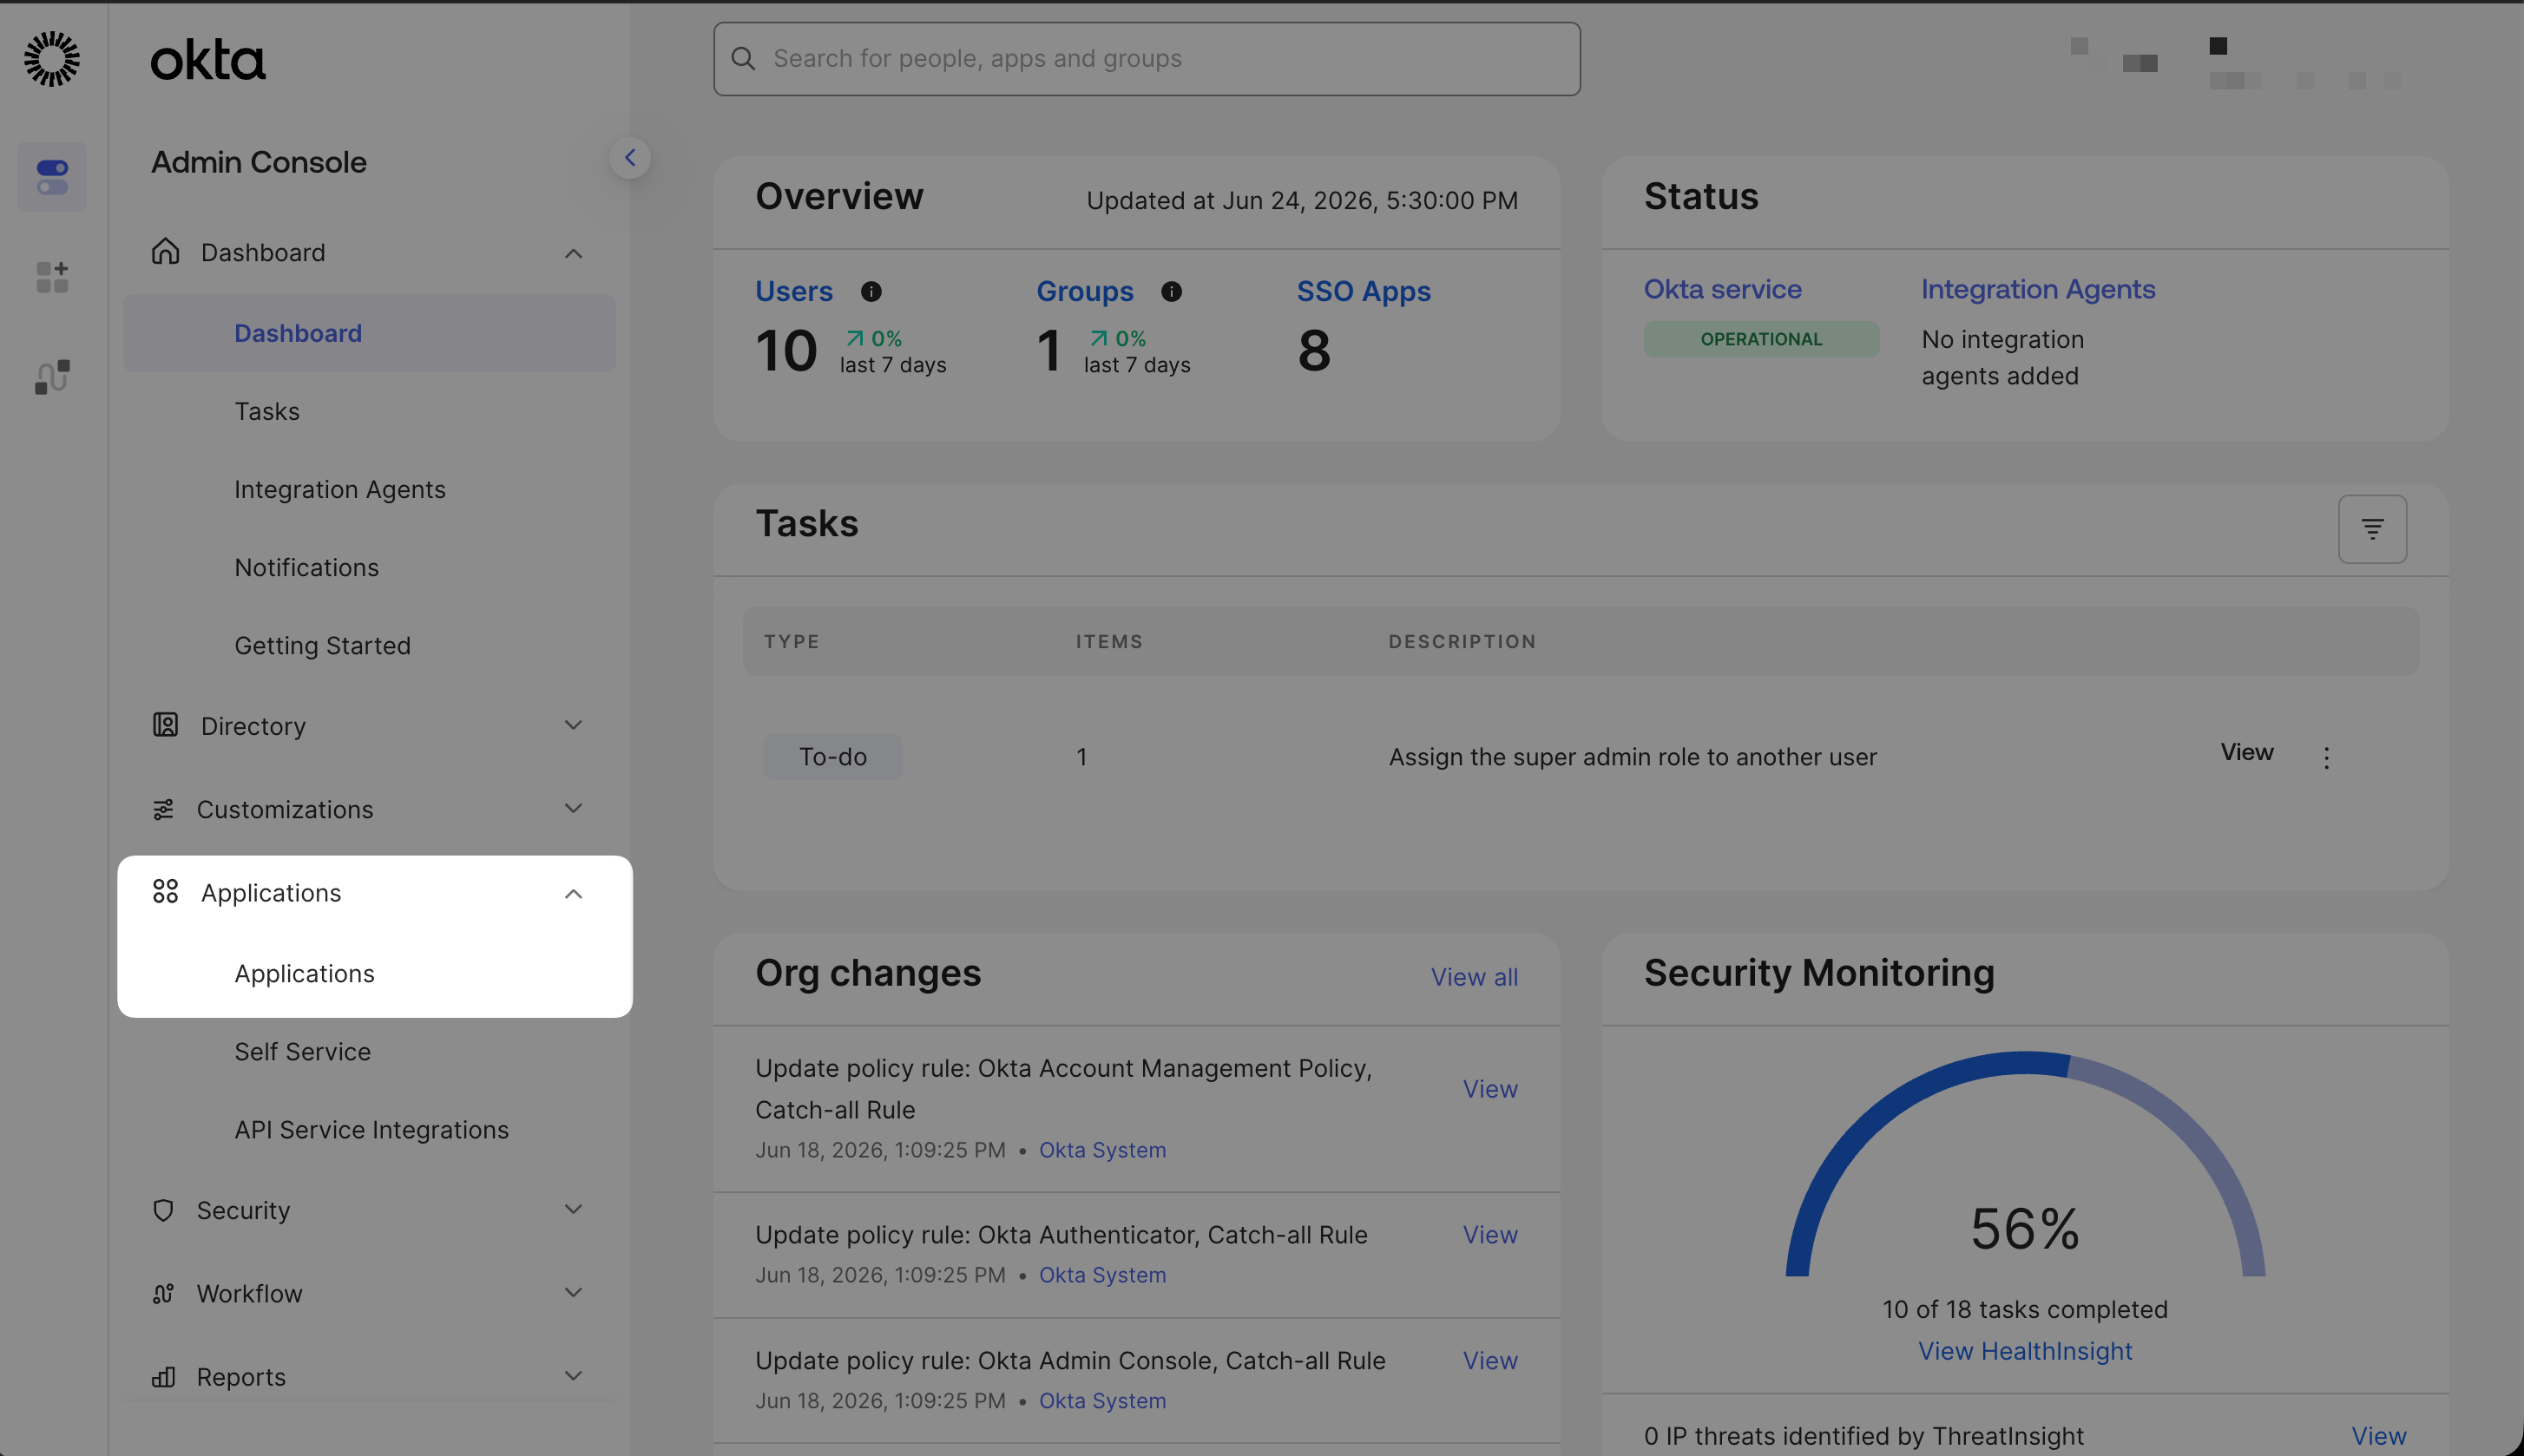
Open Applications from the left nav of the Okta admin console.
Select the app type
- Sign-in method: OIDC – OpenID Connect
- Application type: Web Application
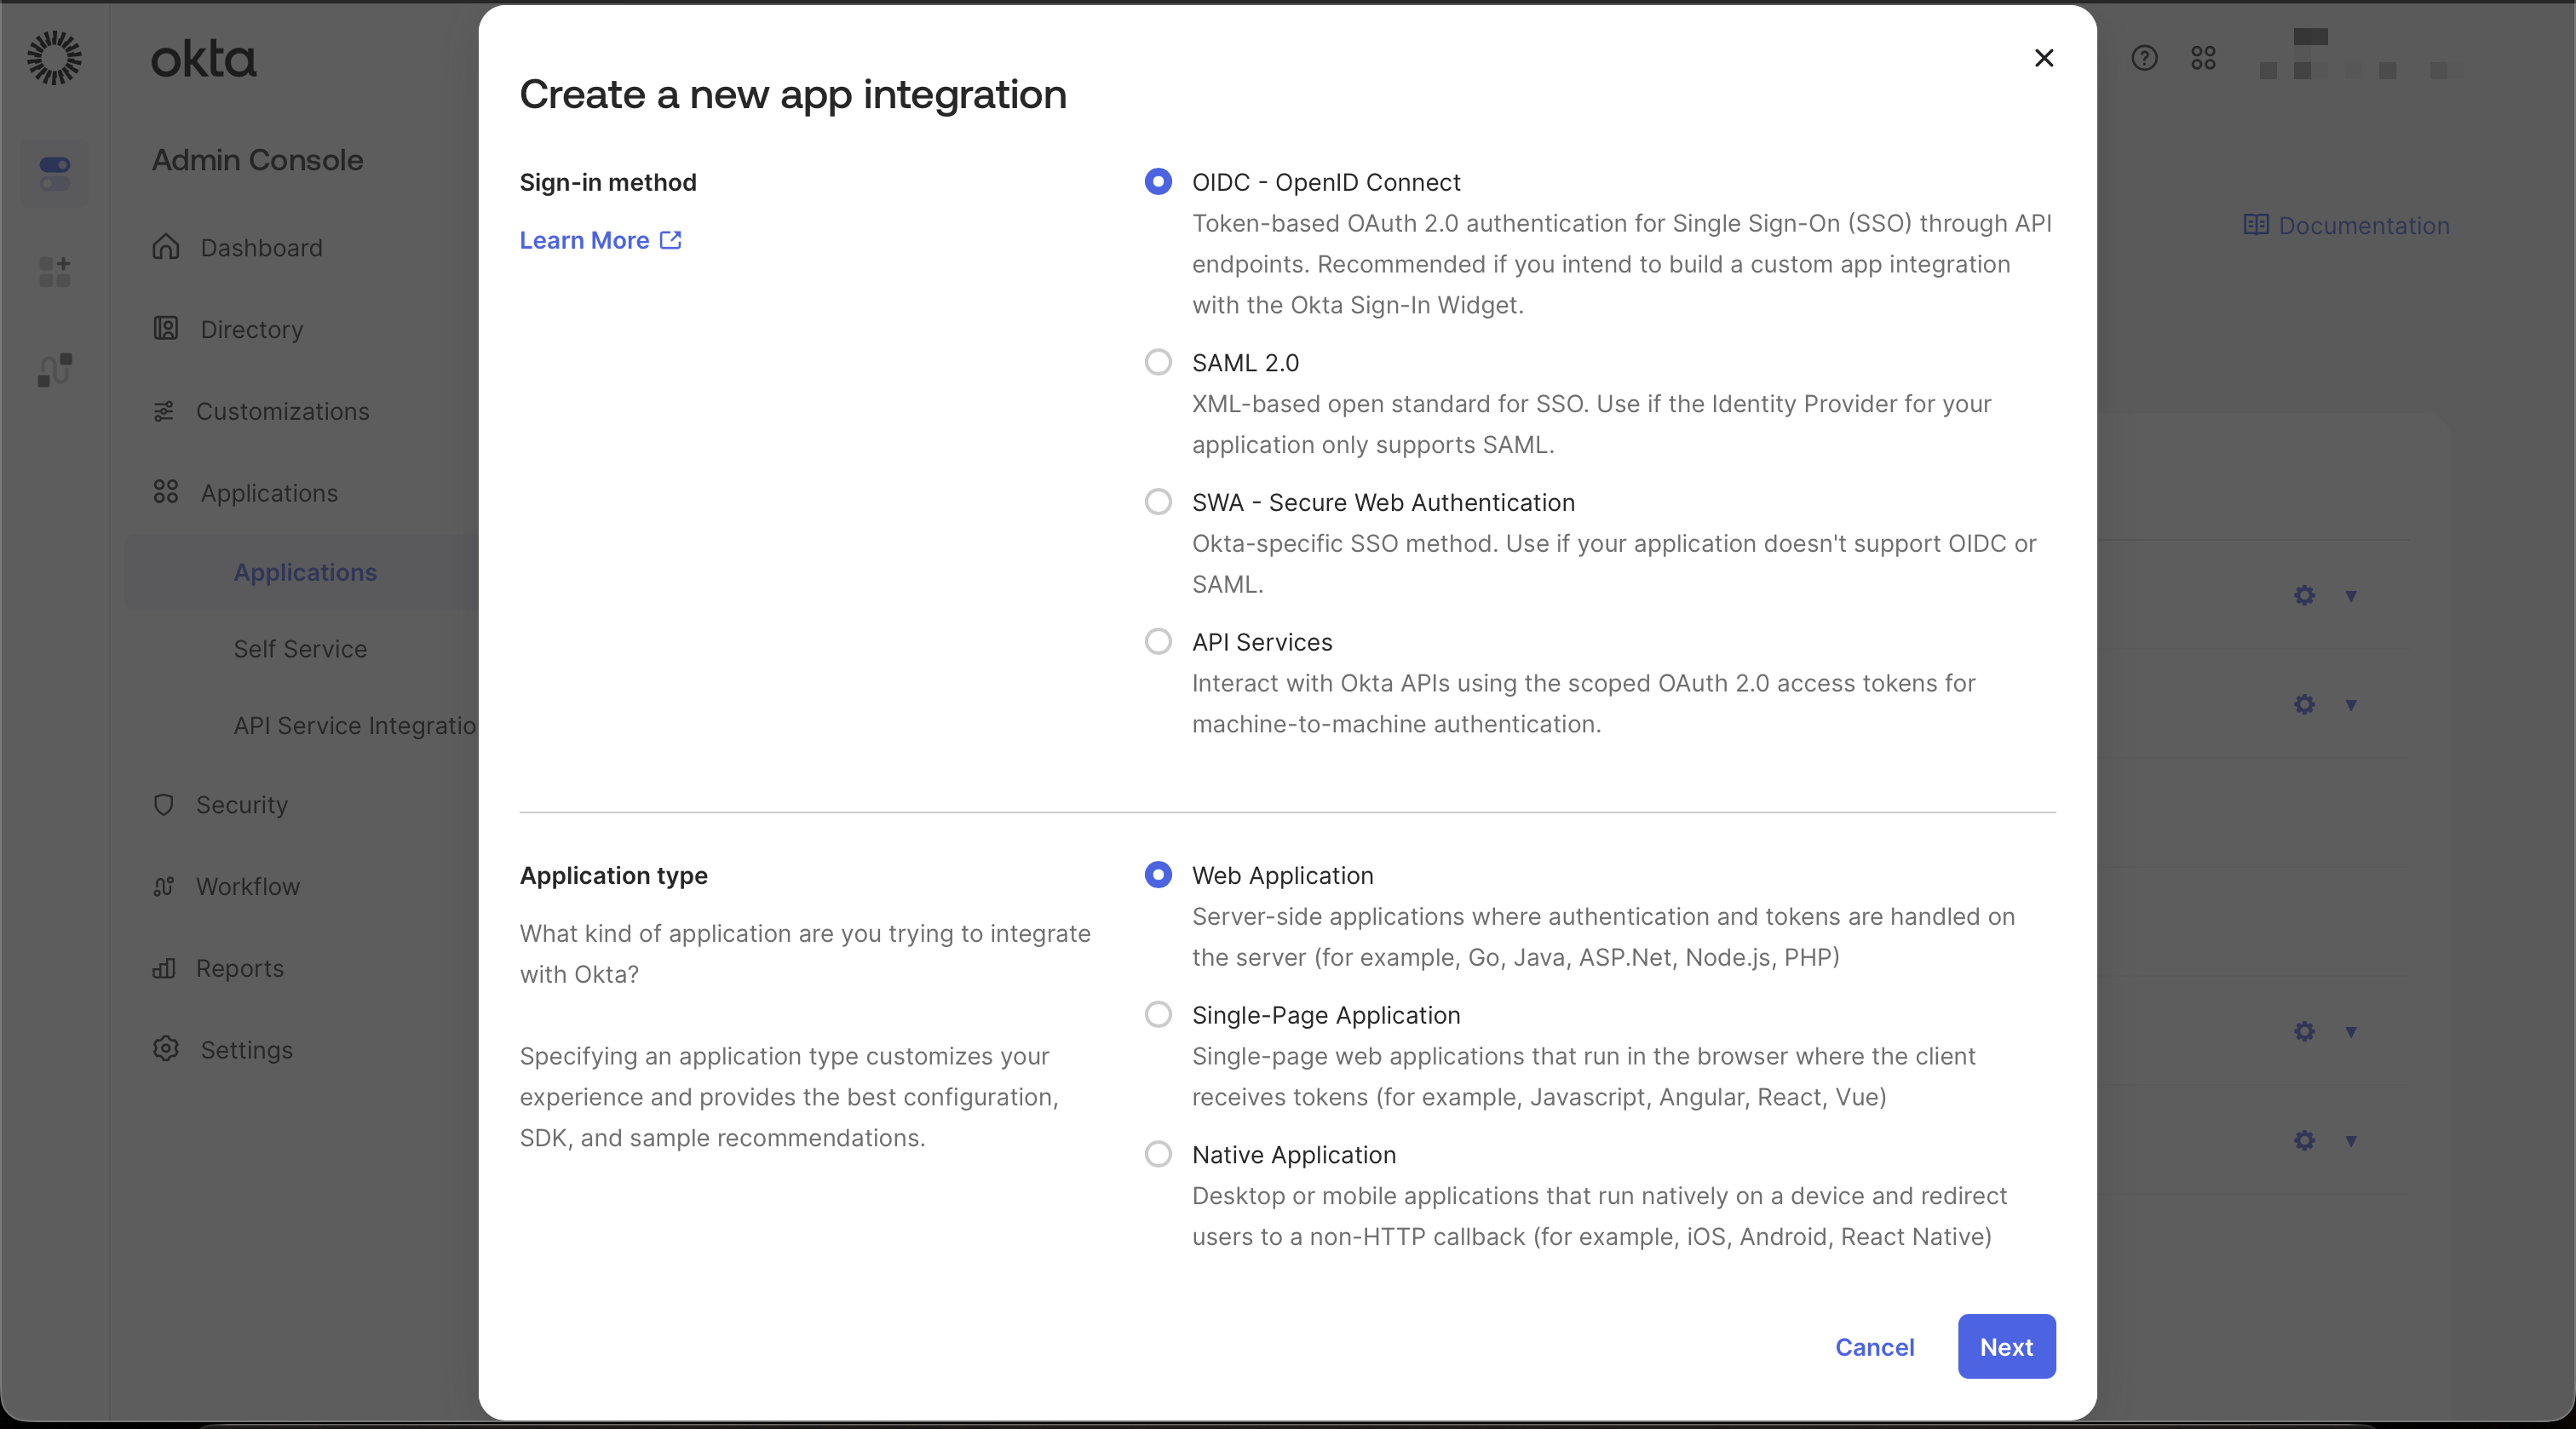
Select OIDC – Web Application.
Fill in the app settings
Bifrost Enterprise.Under Grant type, enable Authorization Code only.In Sign-in redirect URIs, add: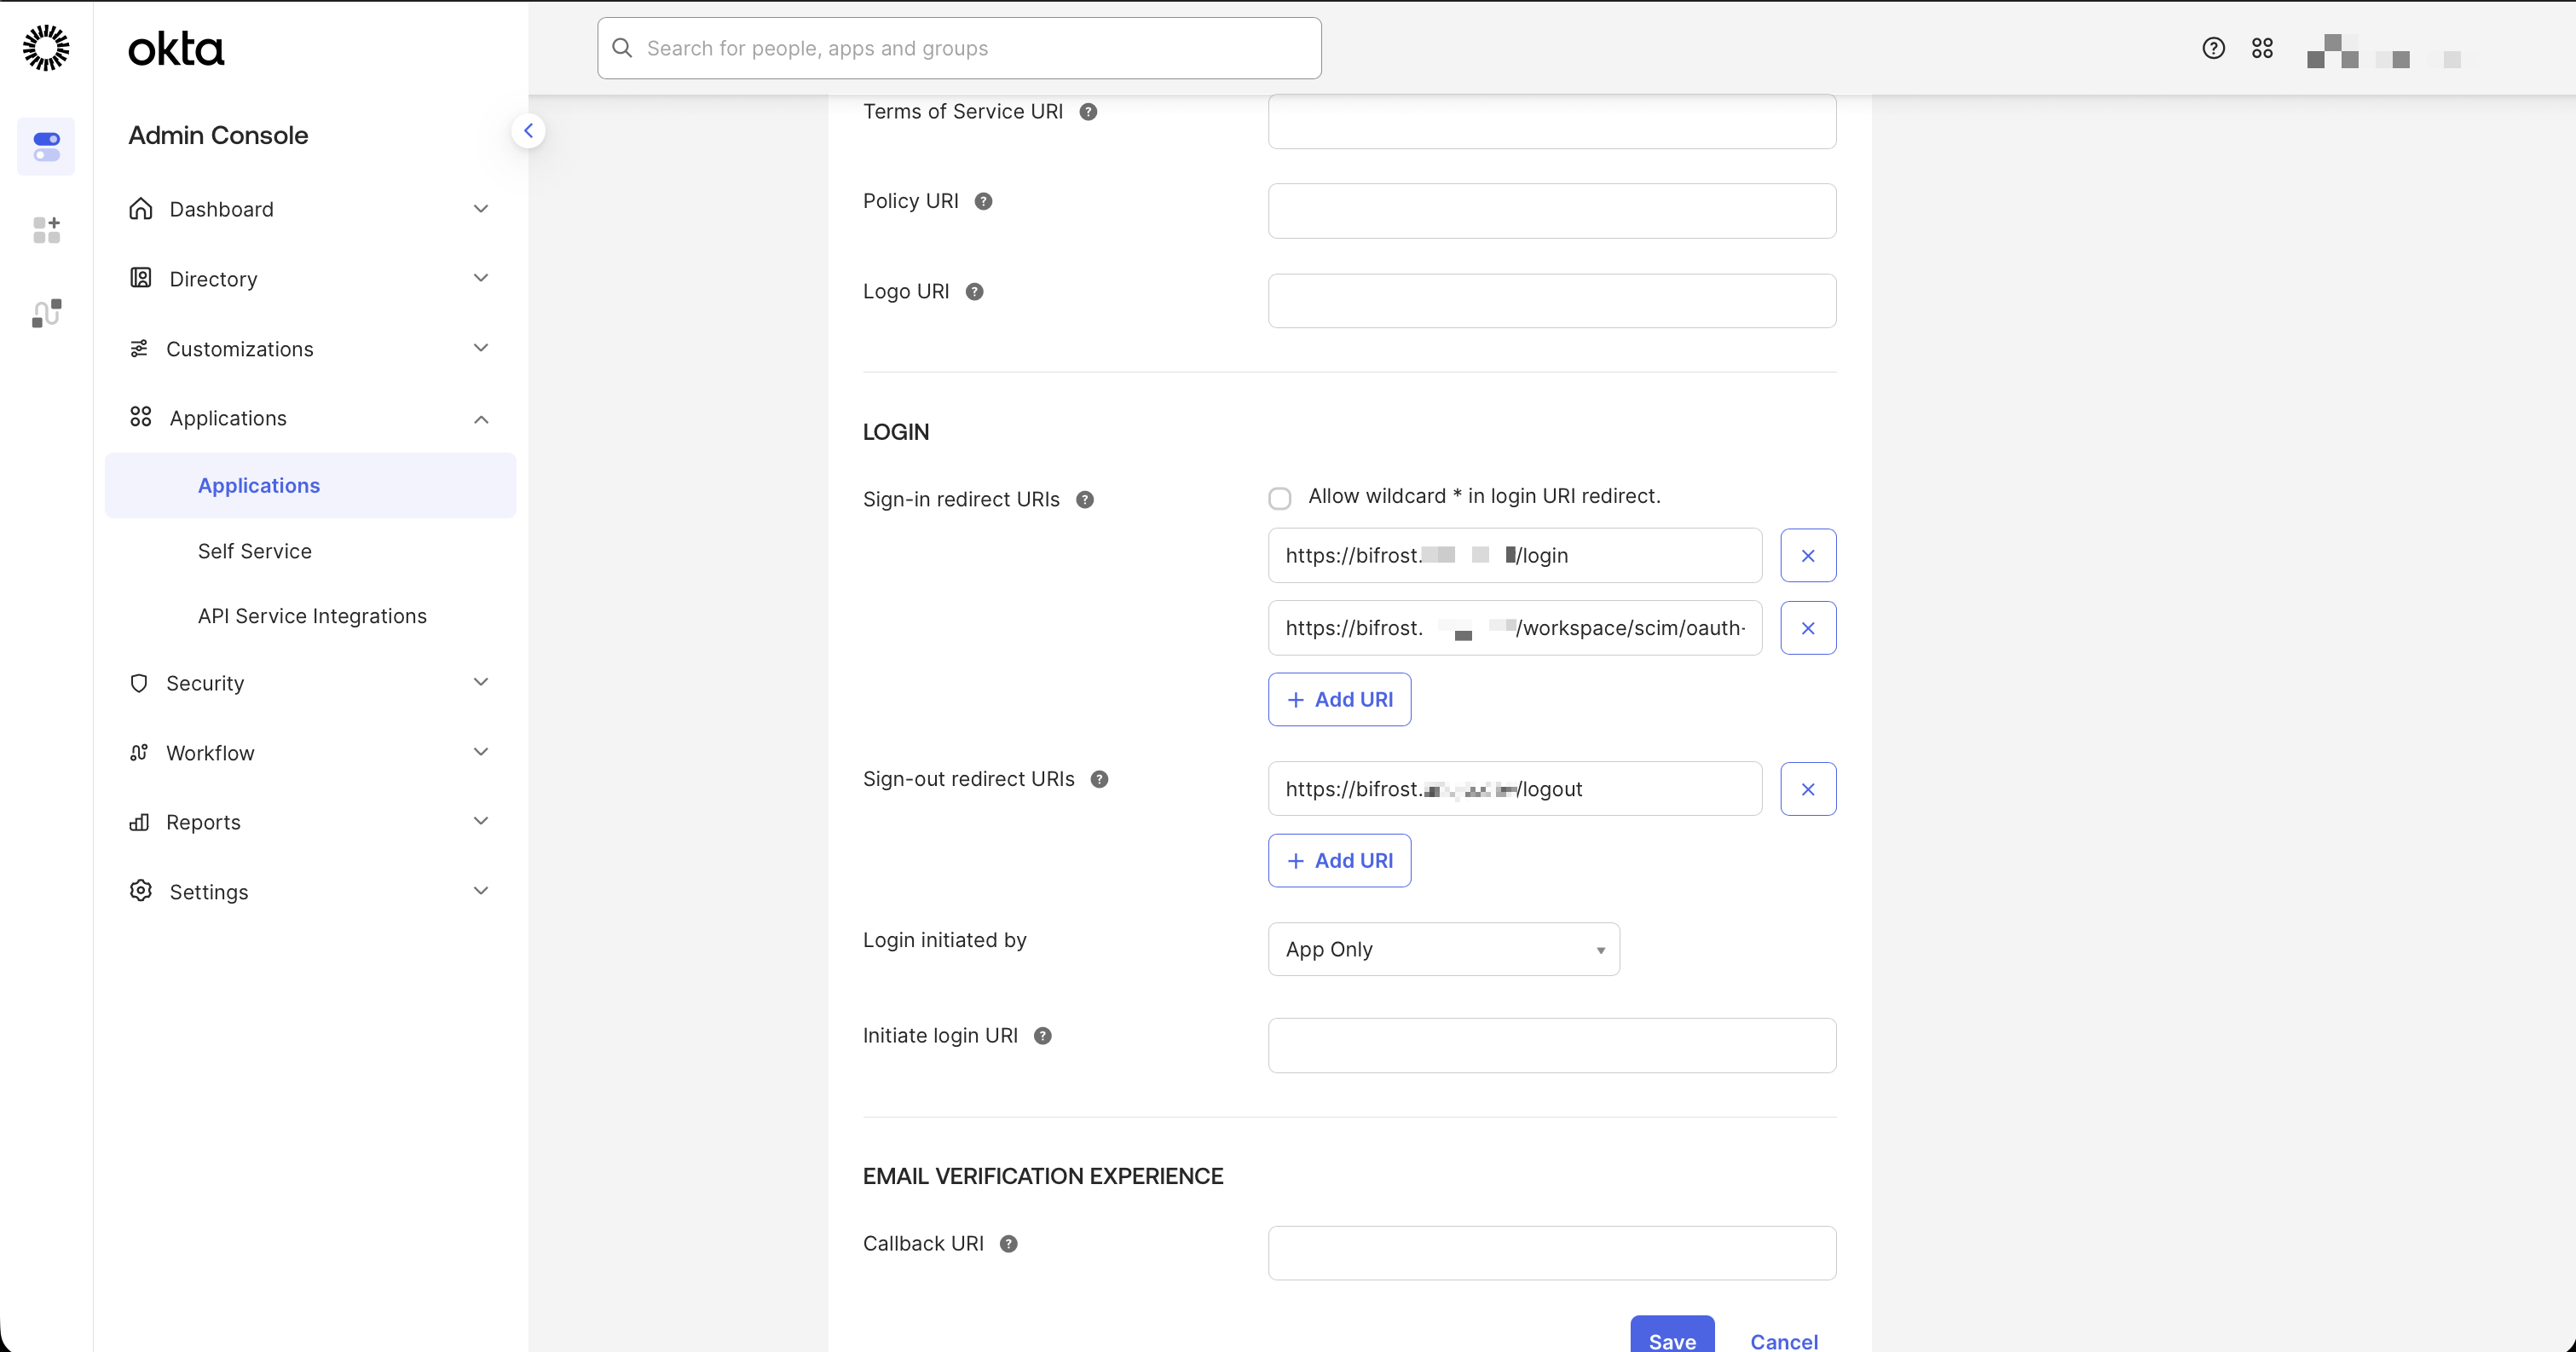
New Web App Integration settings.
Step 2: Configure Claim Attributes
Open the Sign On tab
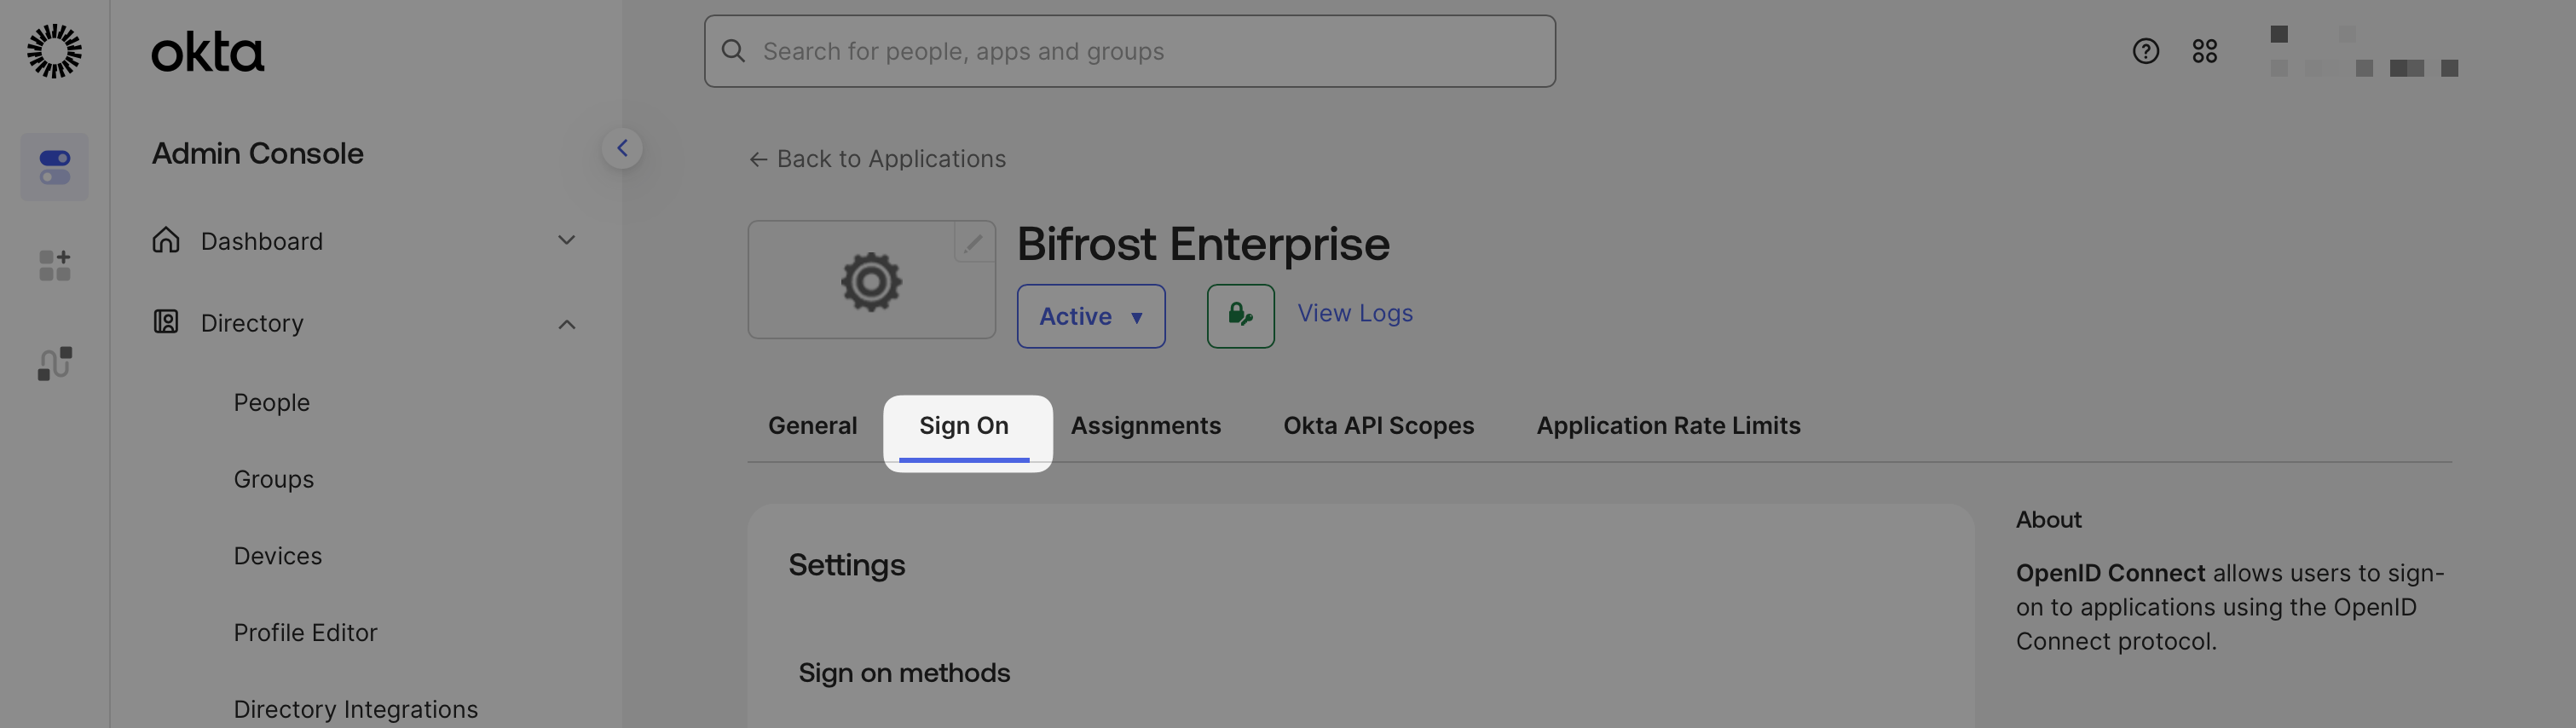
Sign On tab in the Okta app settings.
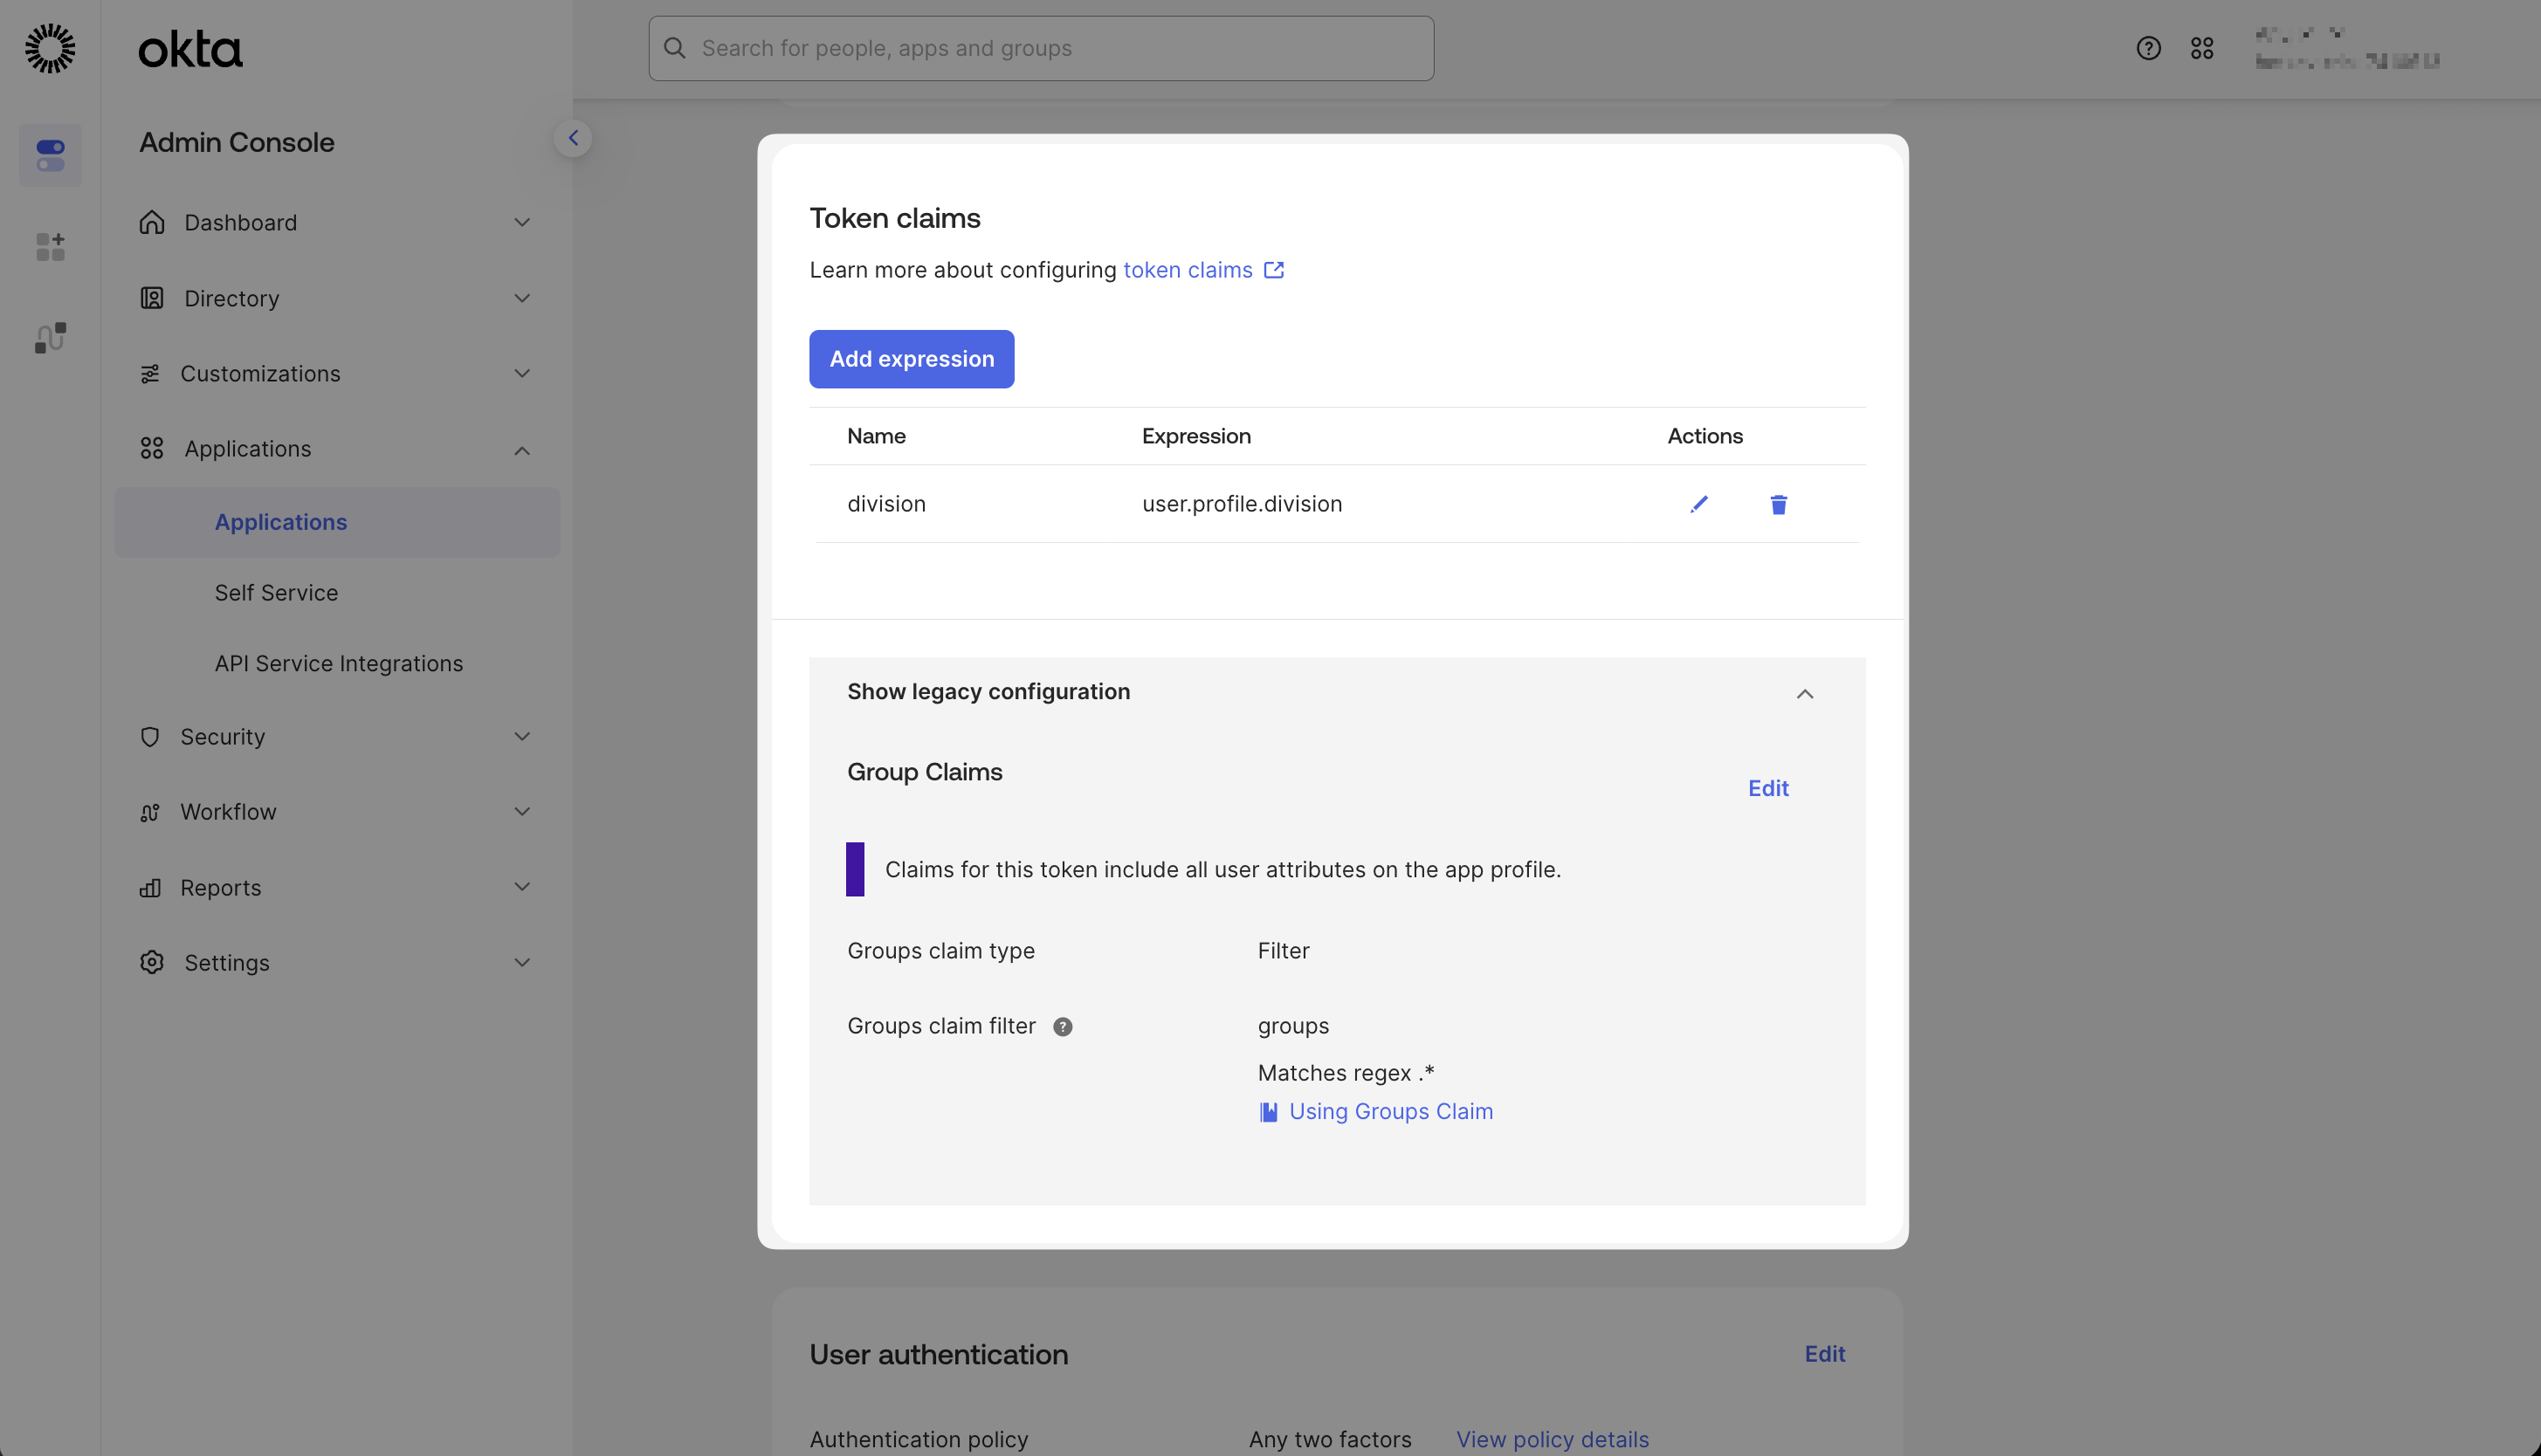
Token claims - each row is a claim Okta will include in the JWT.
The Value column uses an Okta expression to pull from the user profile in the above example (e.g. user.division)
Add a groups claim
- Claim name:
groups - Value type: Groups
- Filter: Matches regex
.*(or a tighter prefix likebifrost-.*)
- Navigate to Security → API → Authorization Servers
- Select your authorization server (e.g.
default)
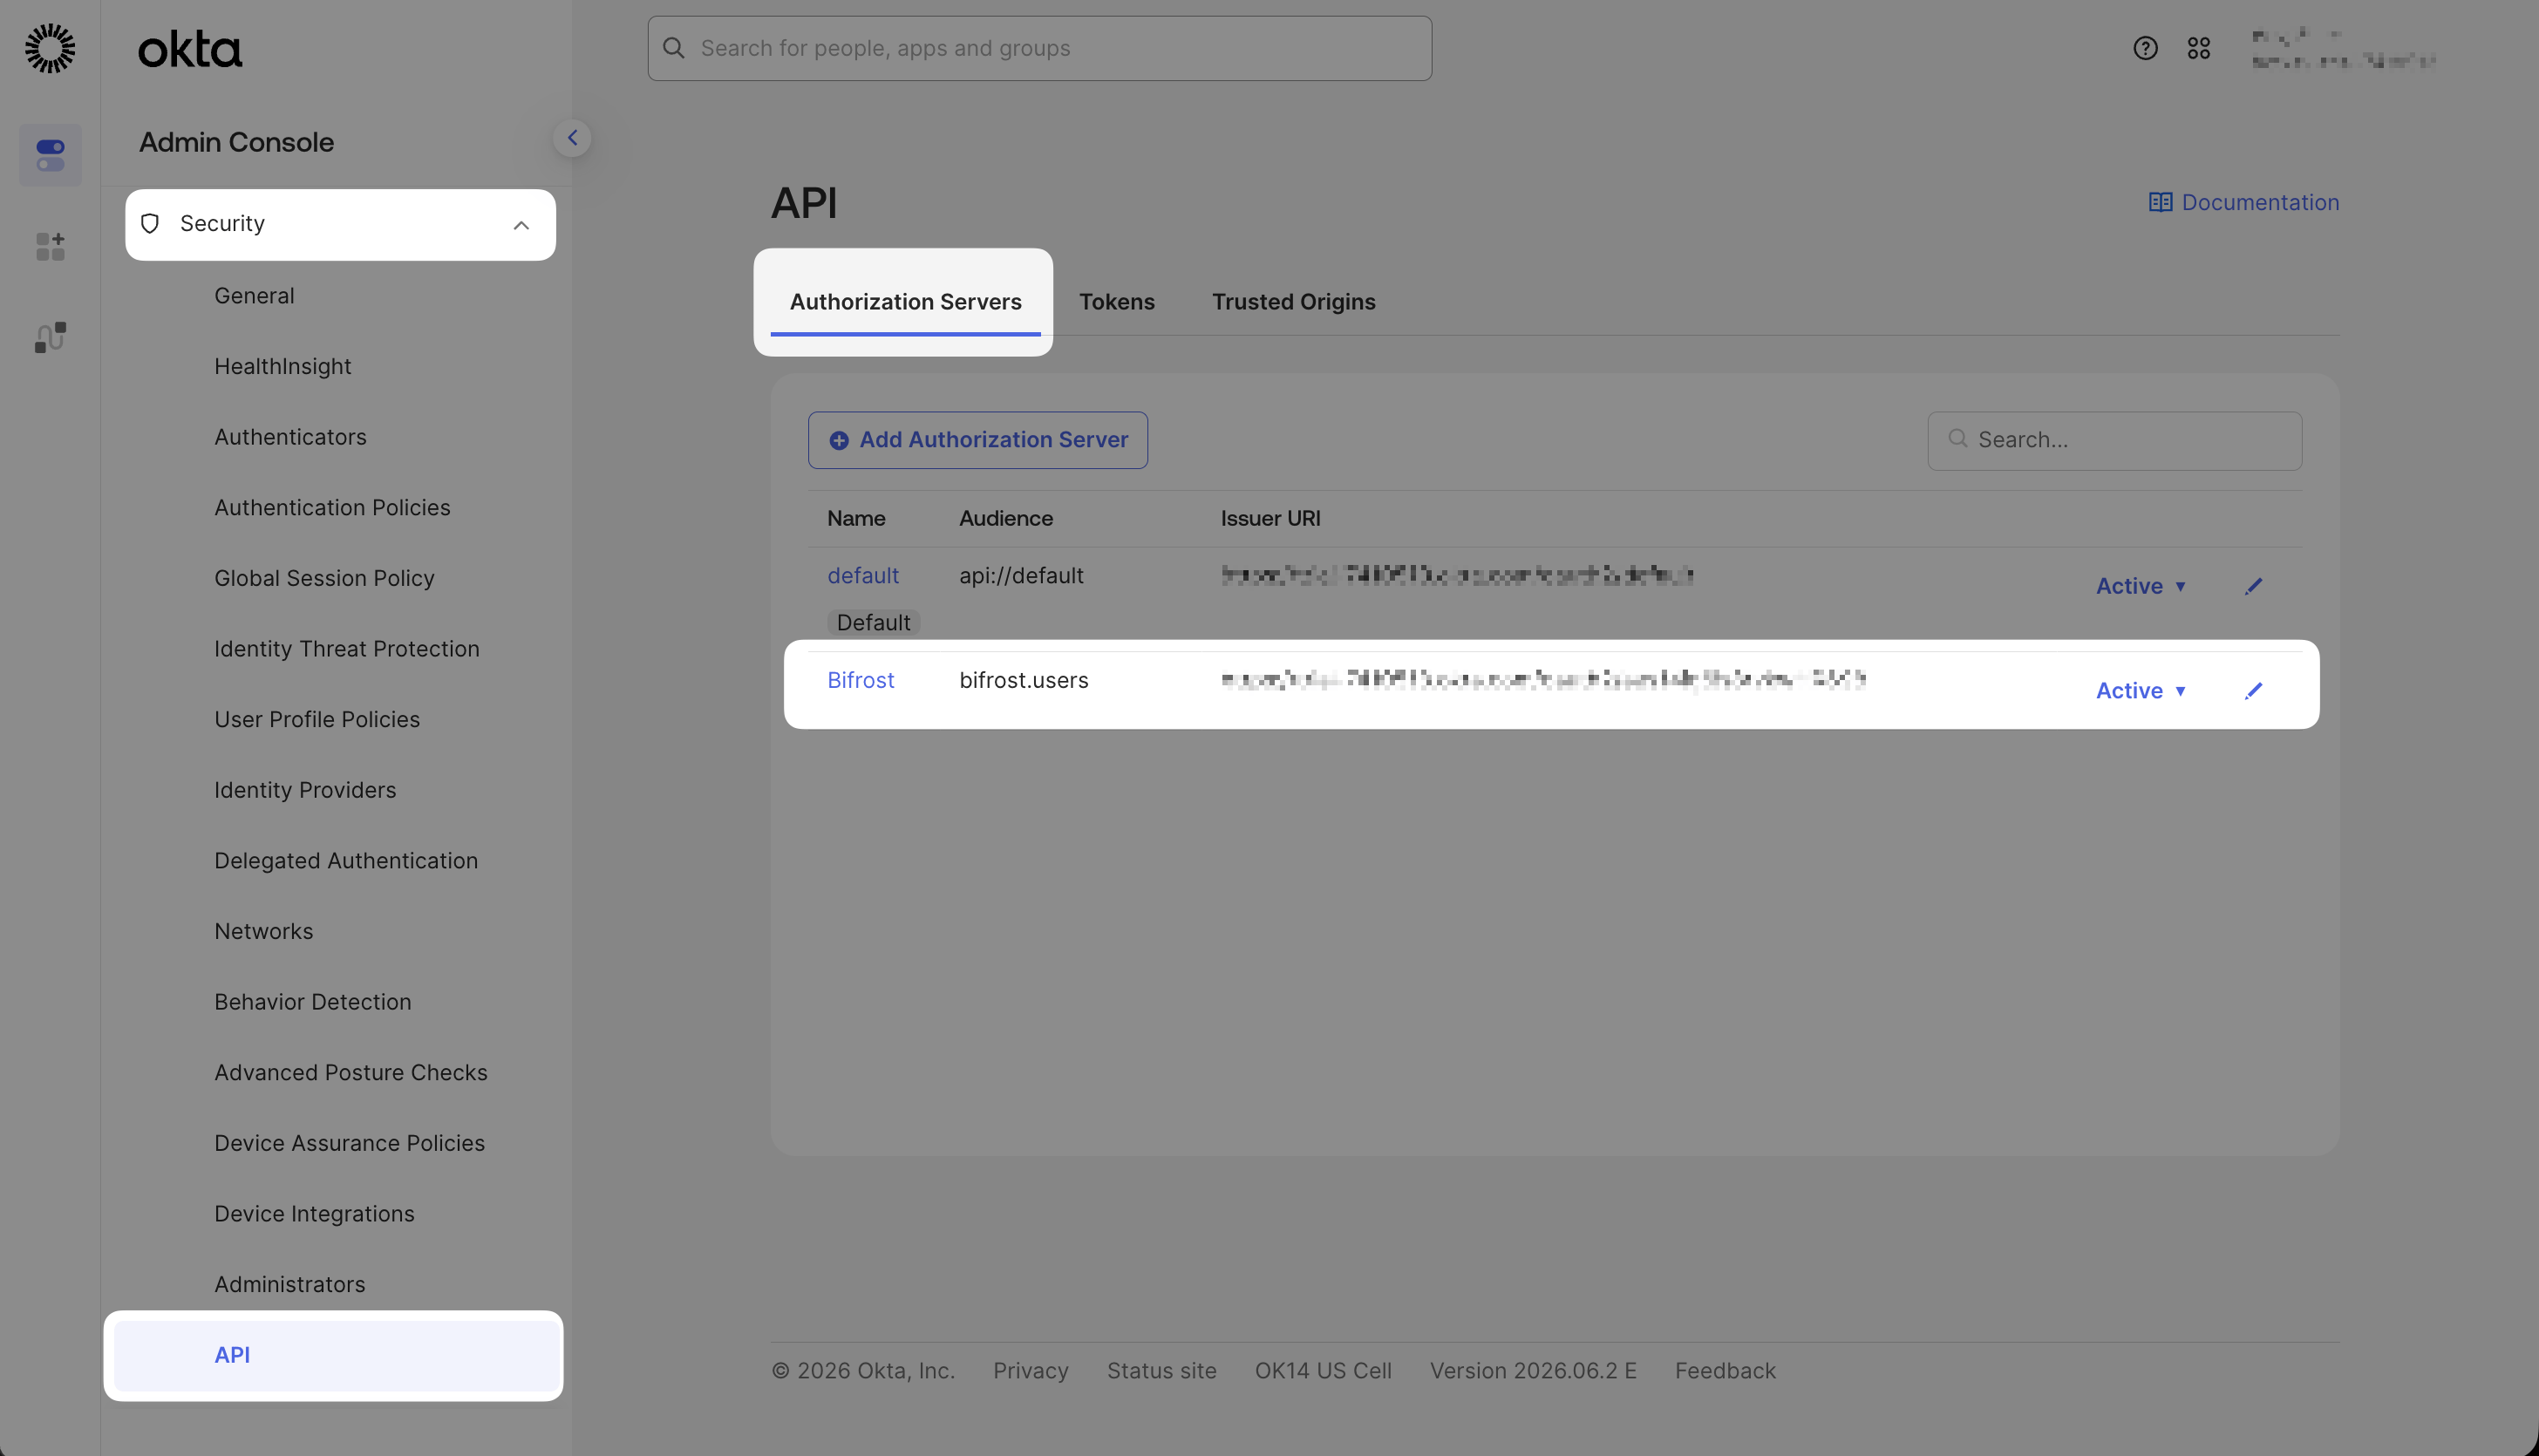
Authorization Servers list in the Okta Security API settings.
- Go to the Claims tab and click Add Claim
- Configure the claim:
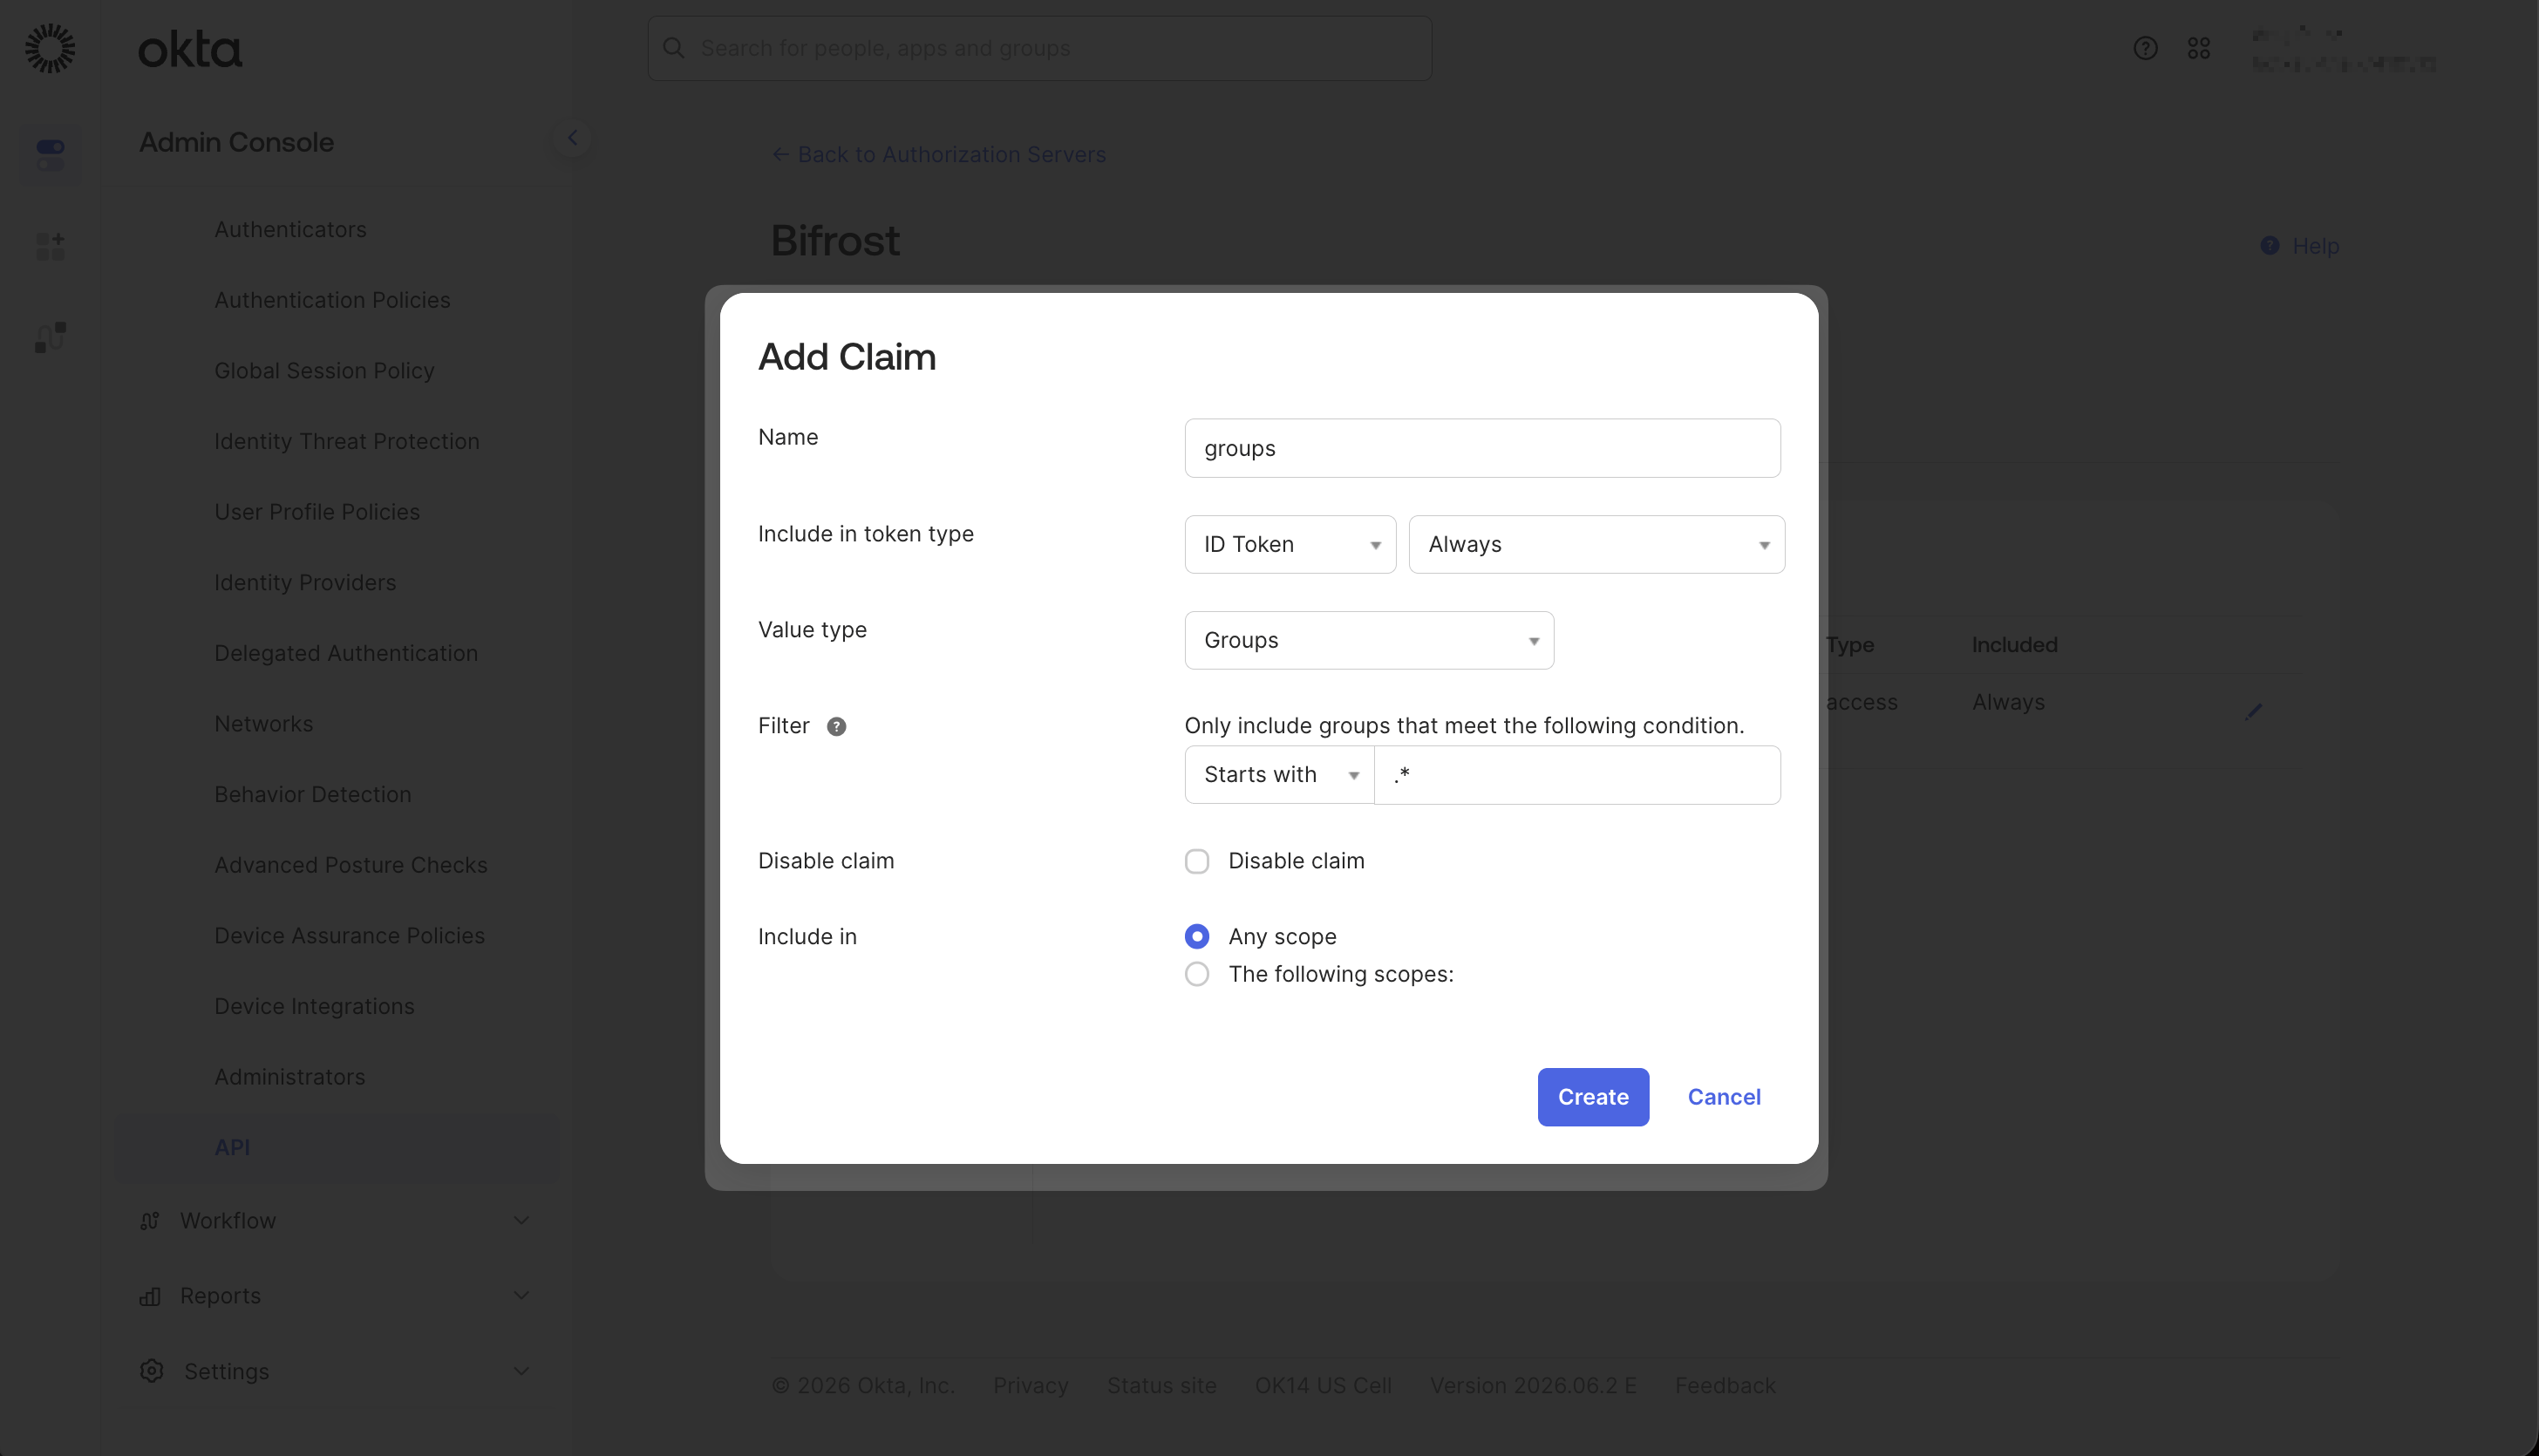
Add Claim dialog configured for the groups claim on a Custom Authorization Server.
- Click Create
Step 3: Assign Users in Okta
Open the Assignments tab
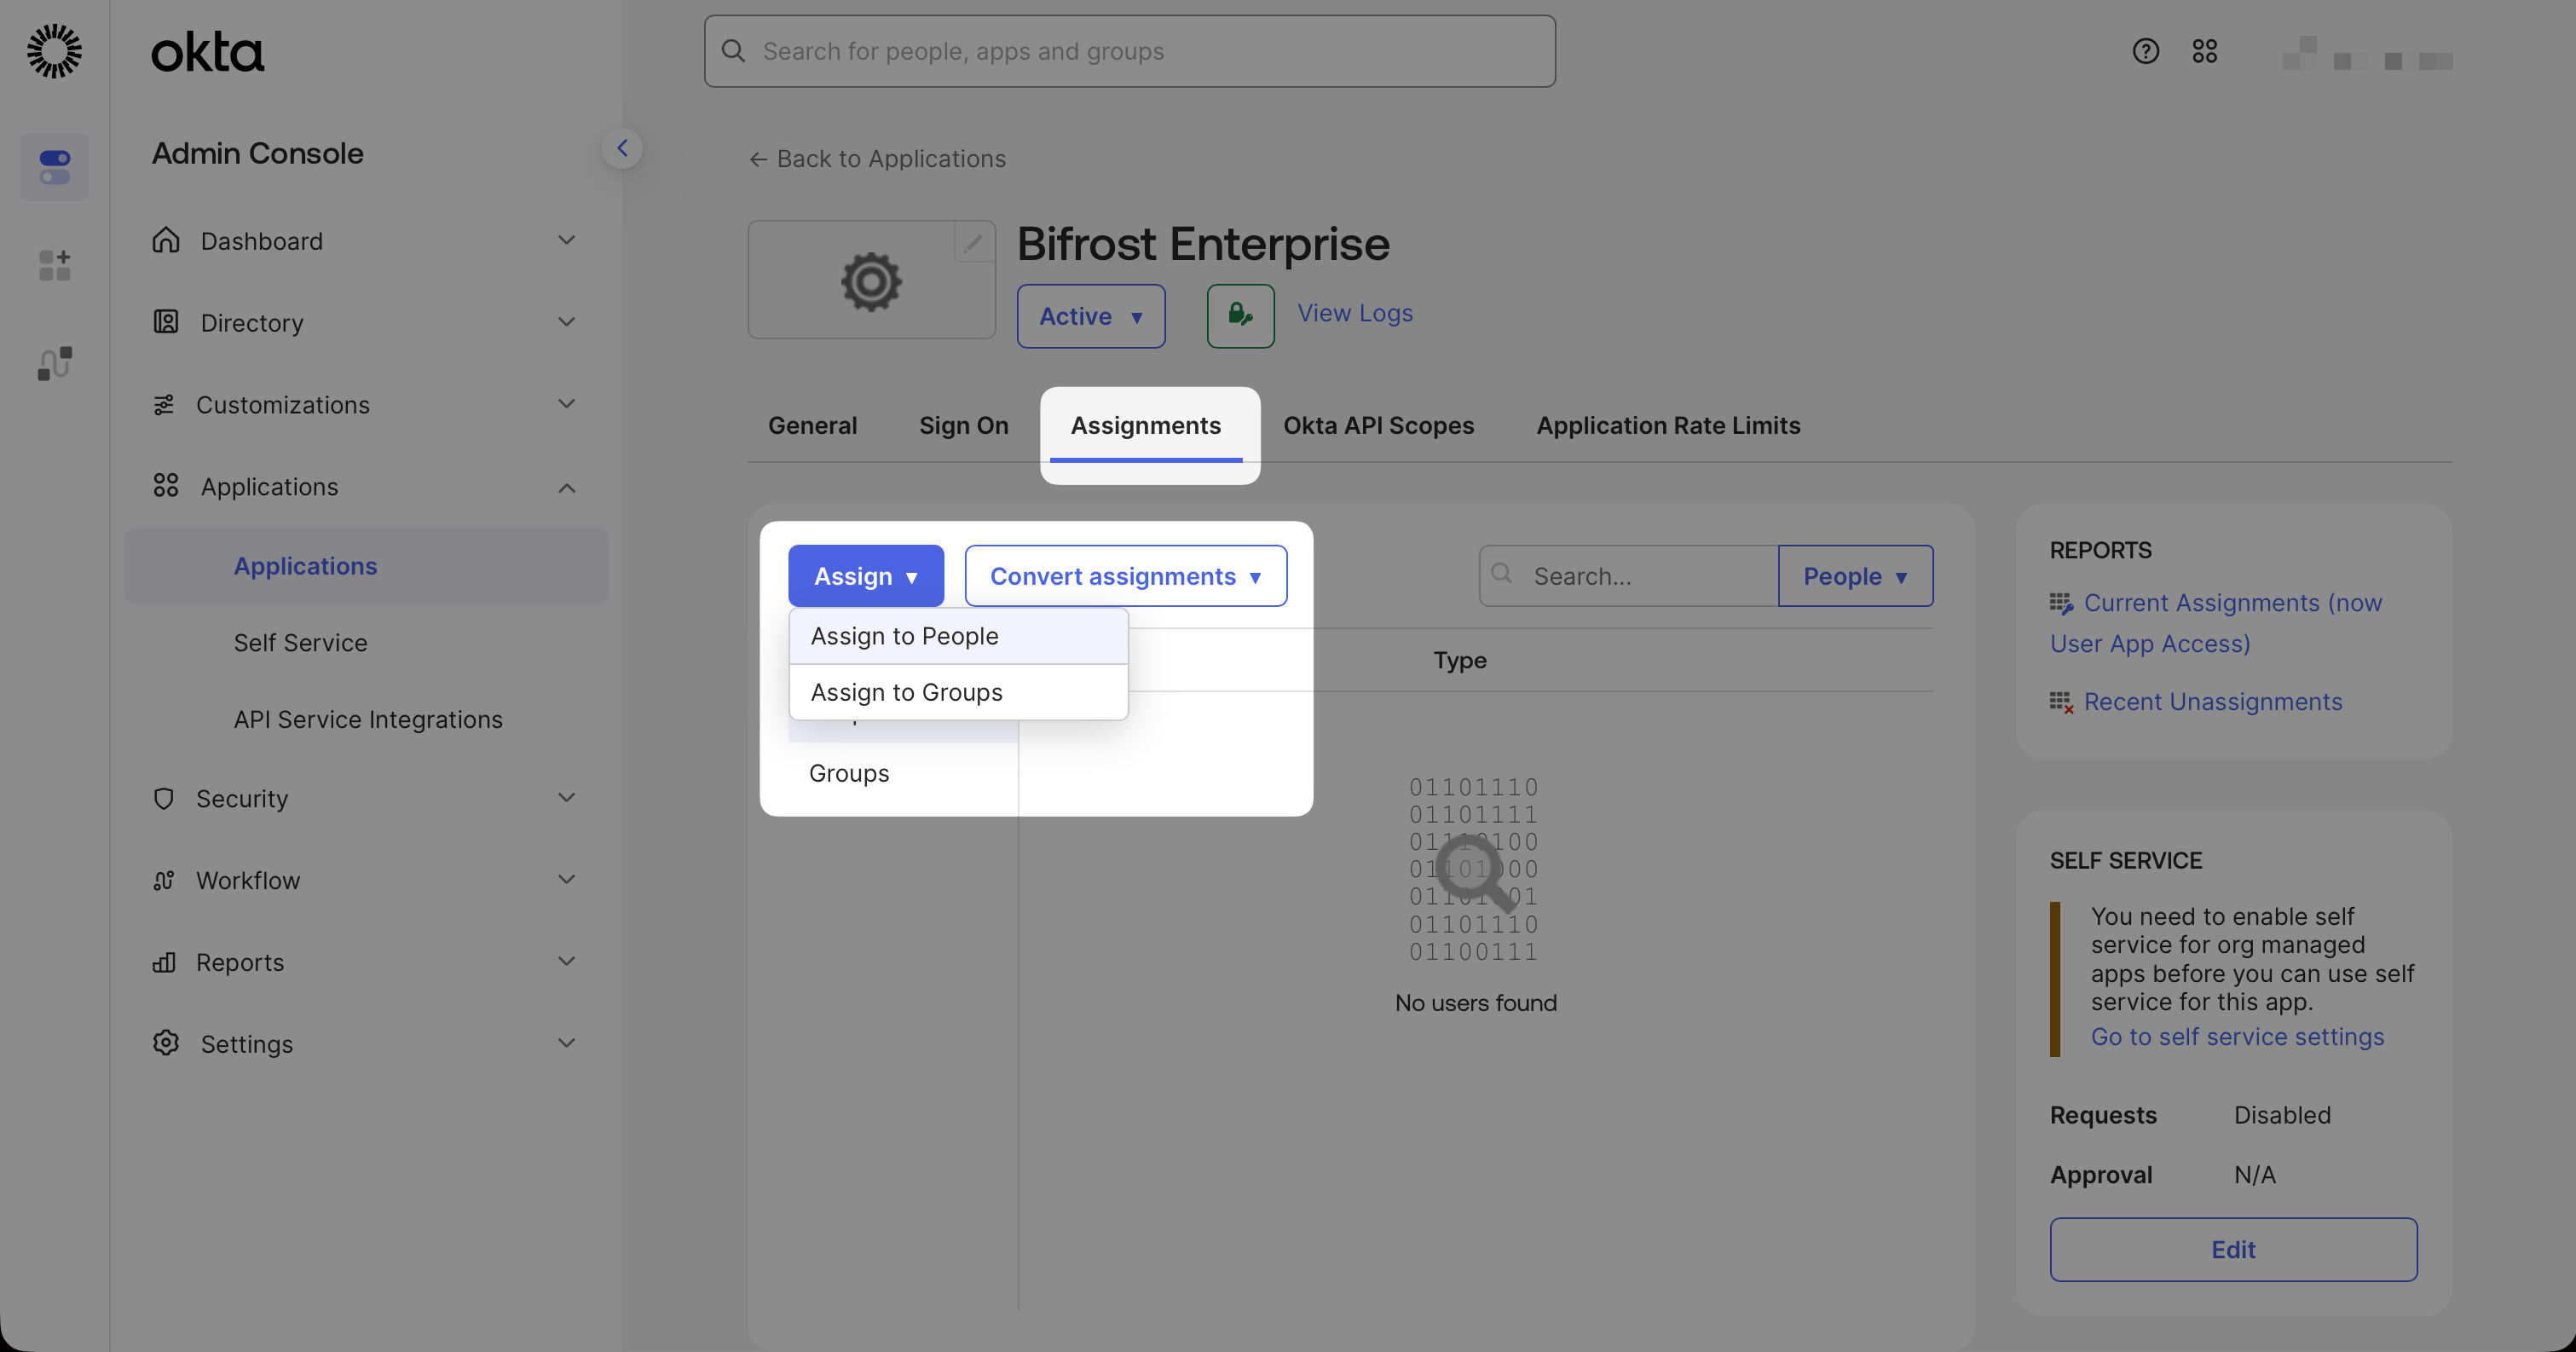
Assigning users or groups to the Bifrost Enterprise application.
Select users or groups
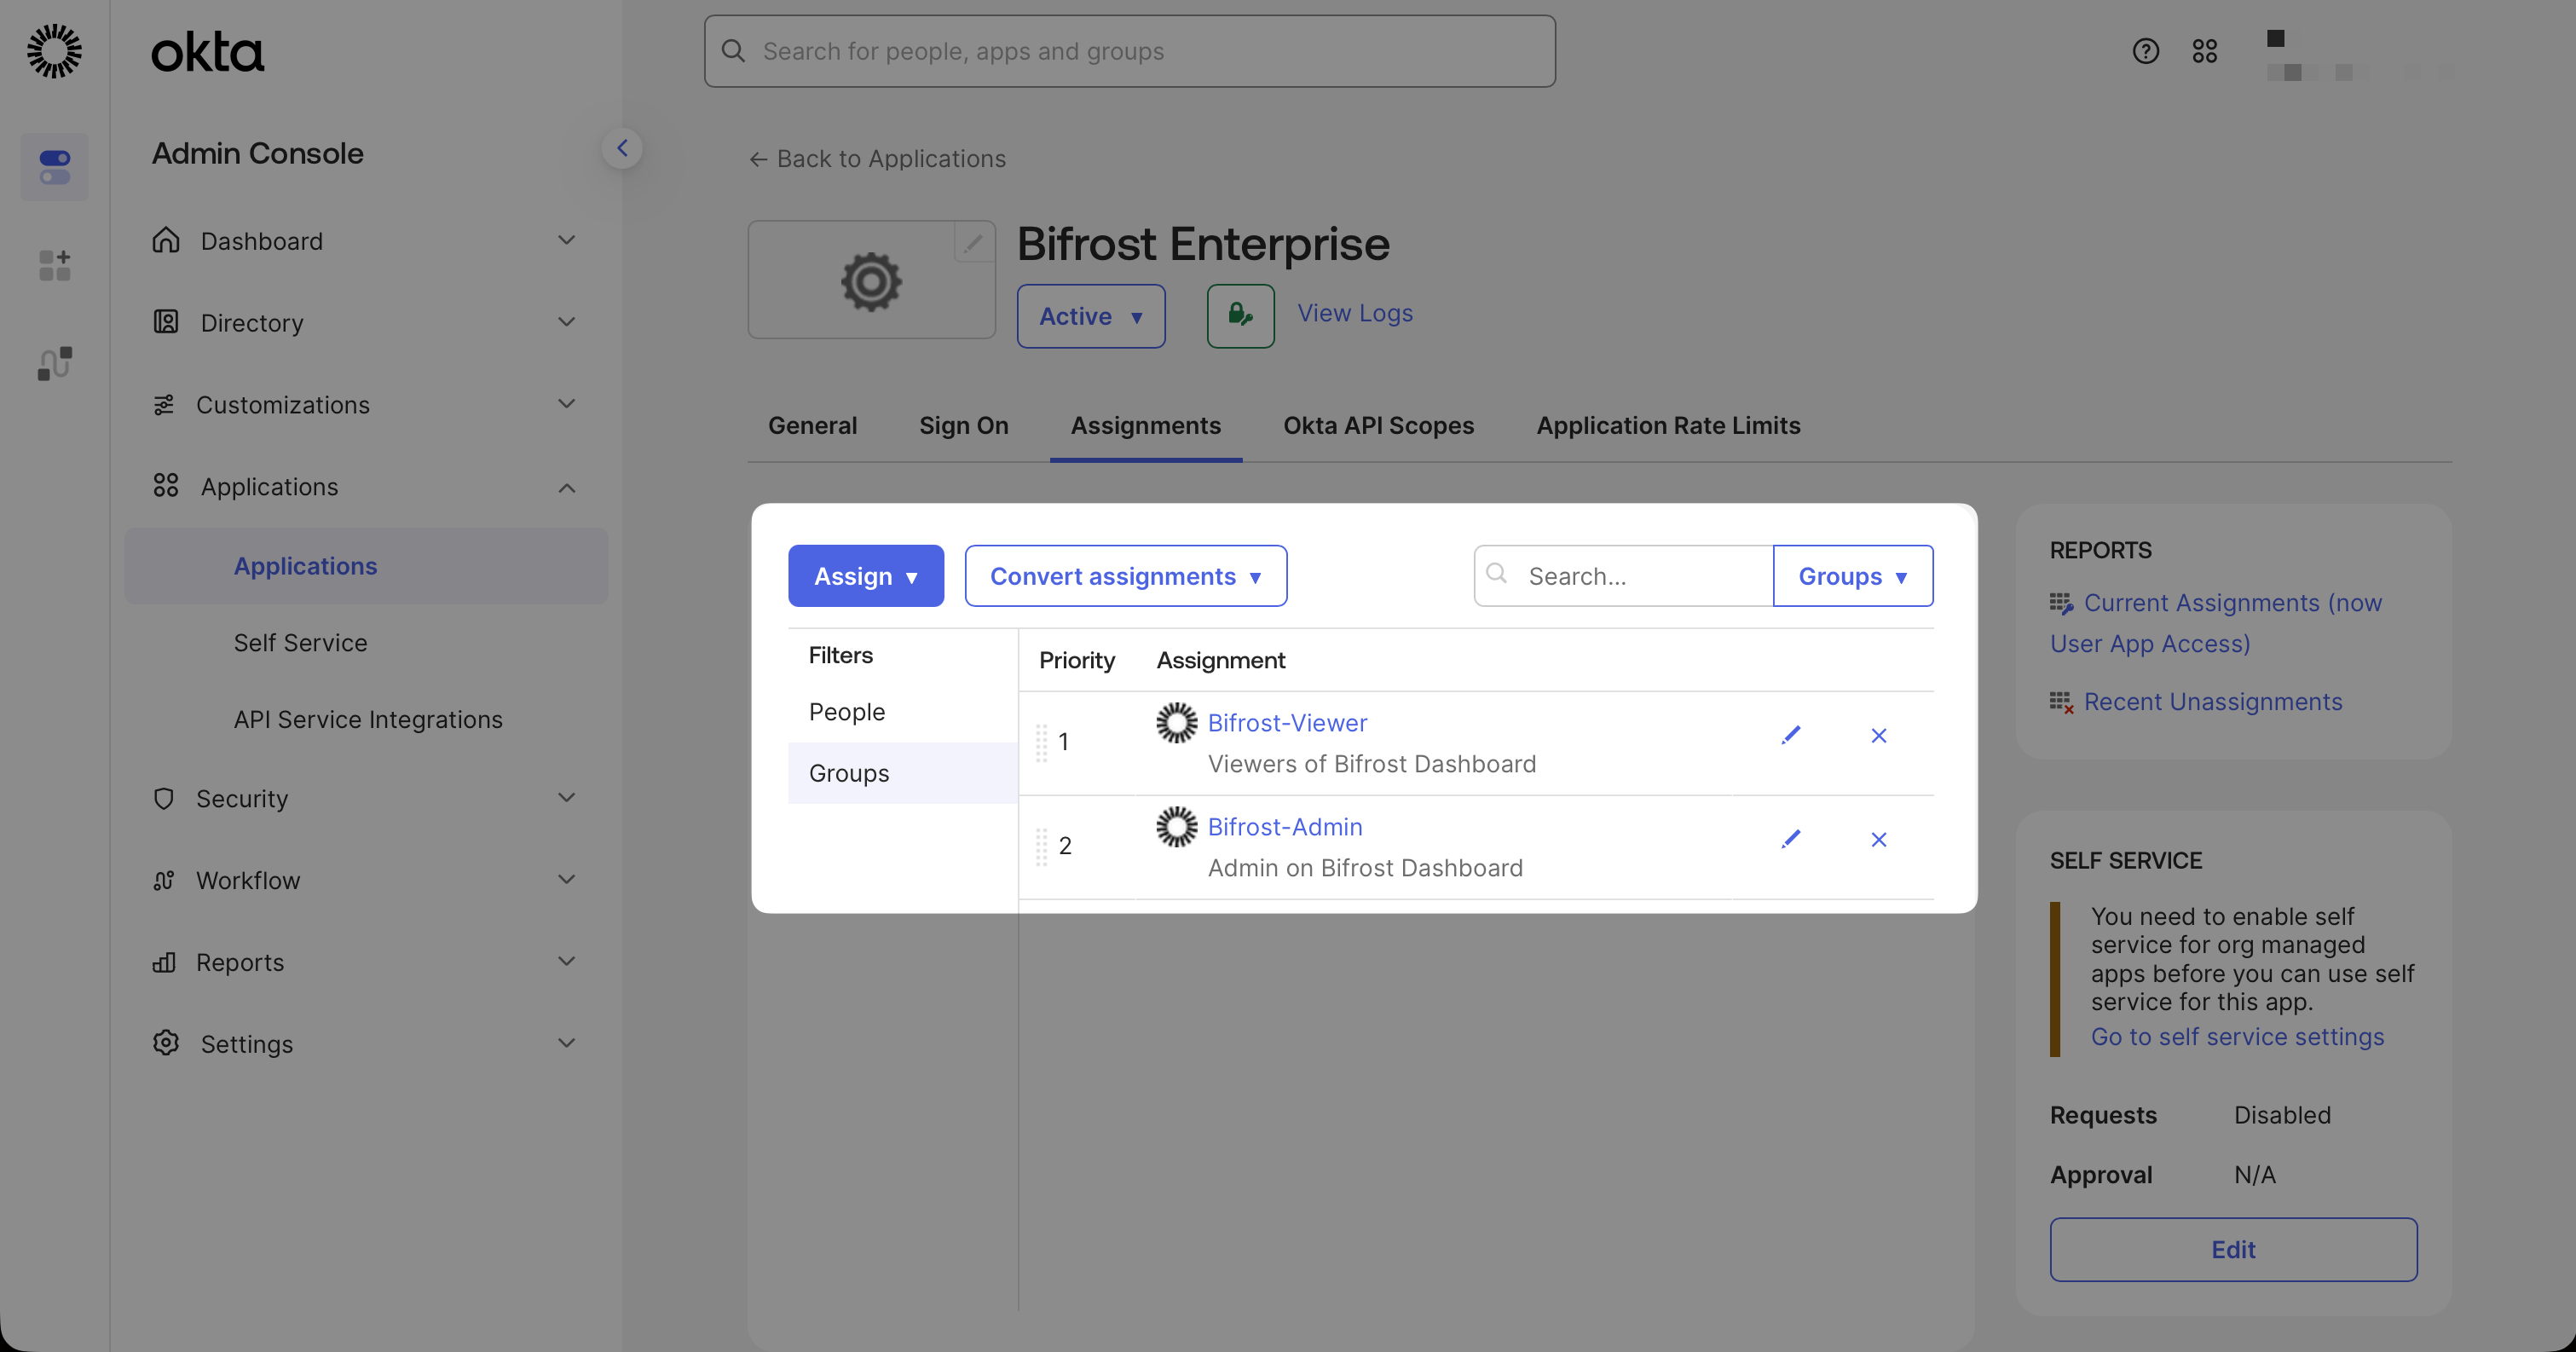
Selecting users or groups to assign to the Bifrost Enterprise application.
Step 4: Copy Your Credentials
Copy the Client ID and Secret
- Client ID
- Client Secret (click to reveal)
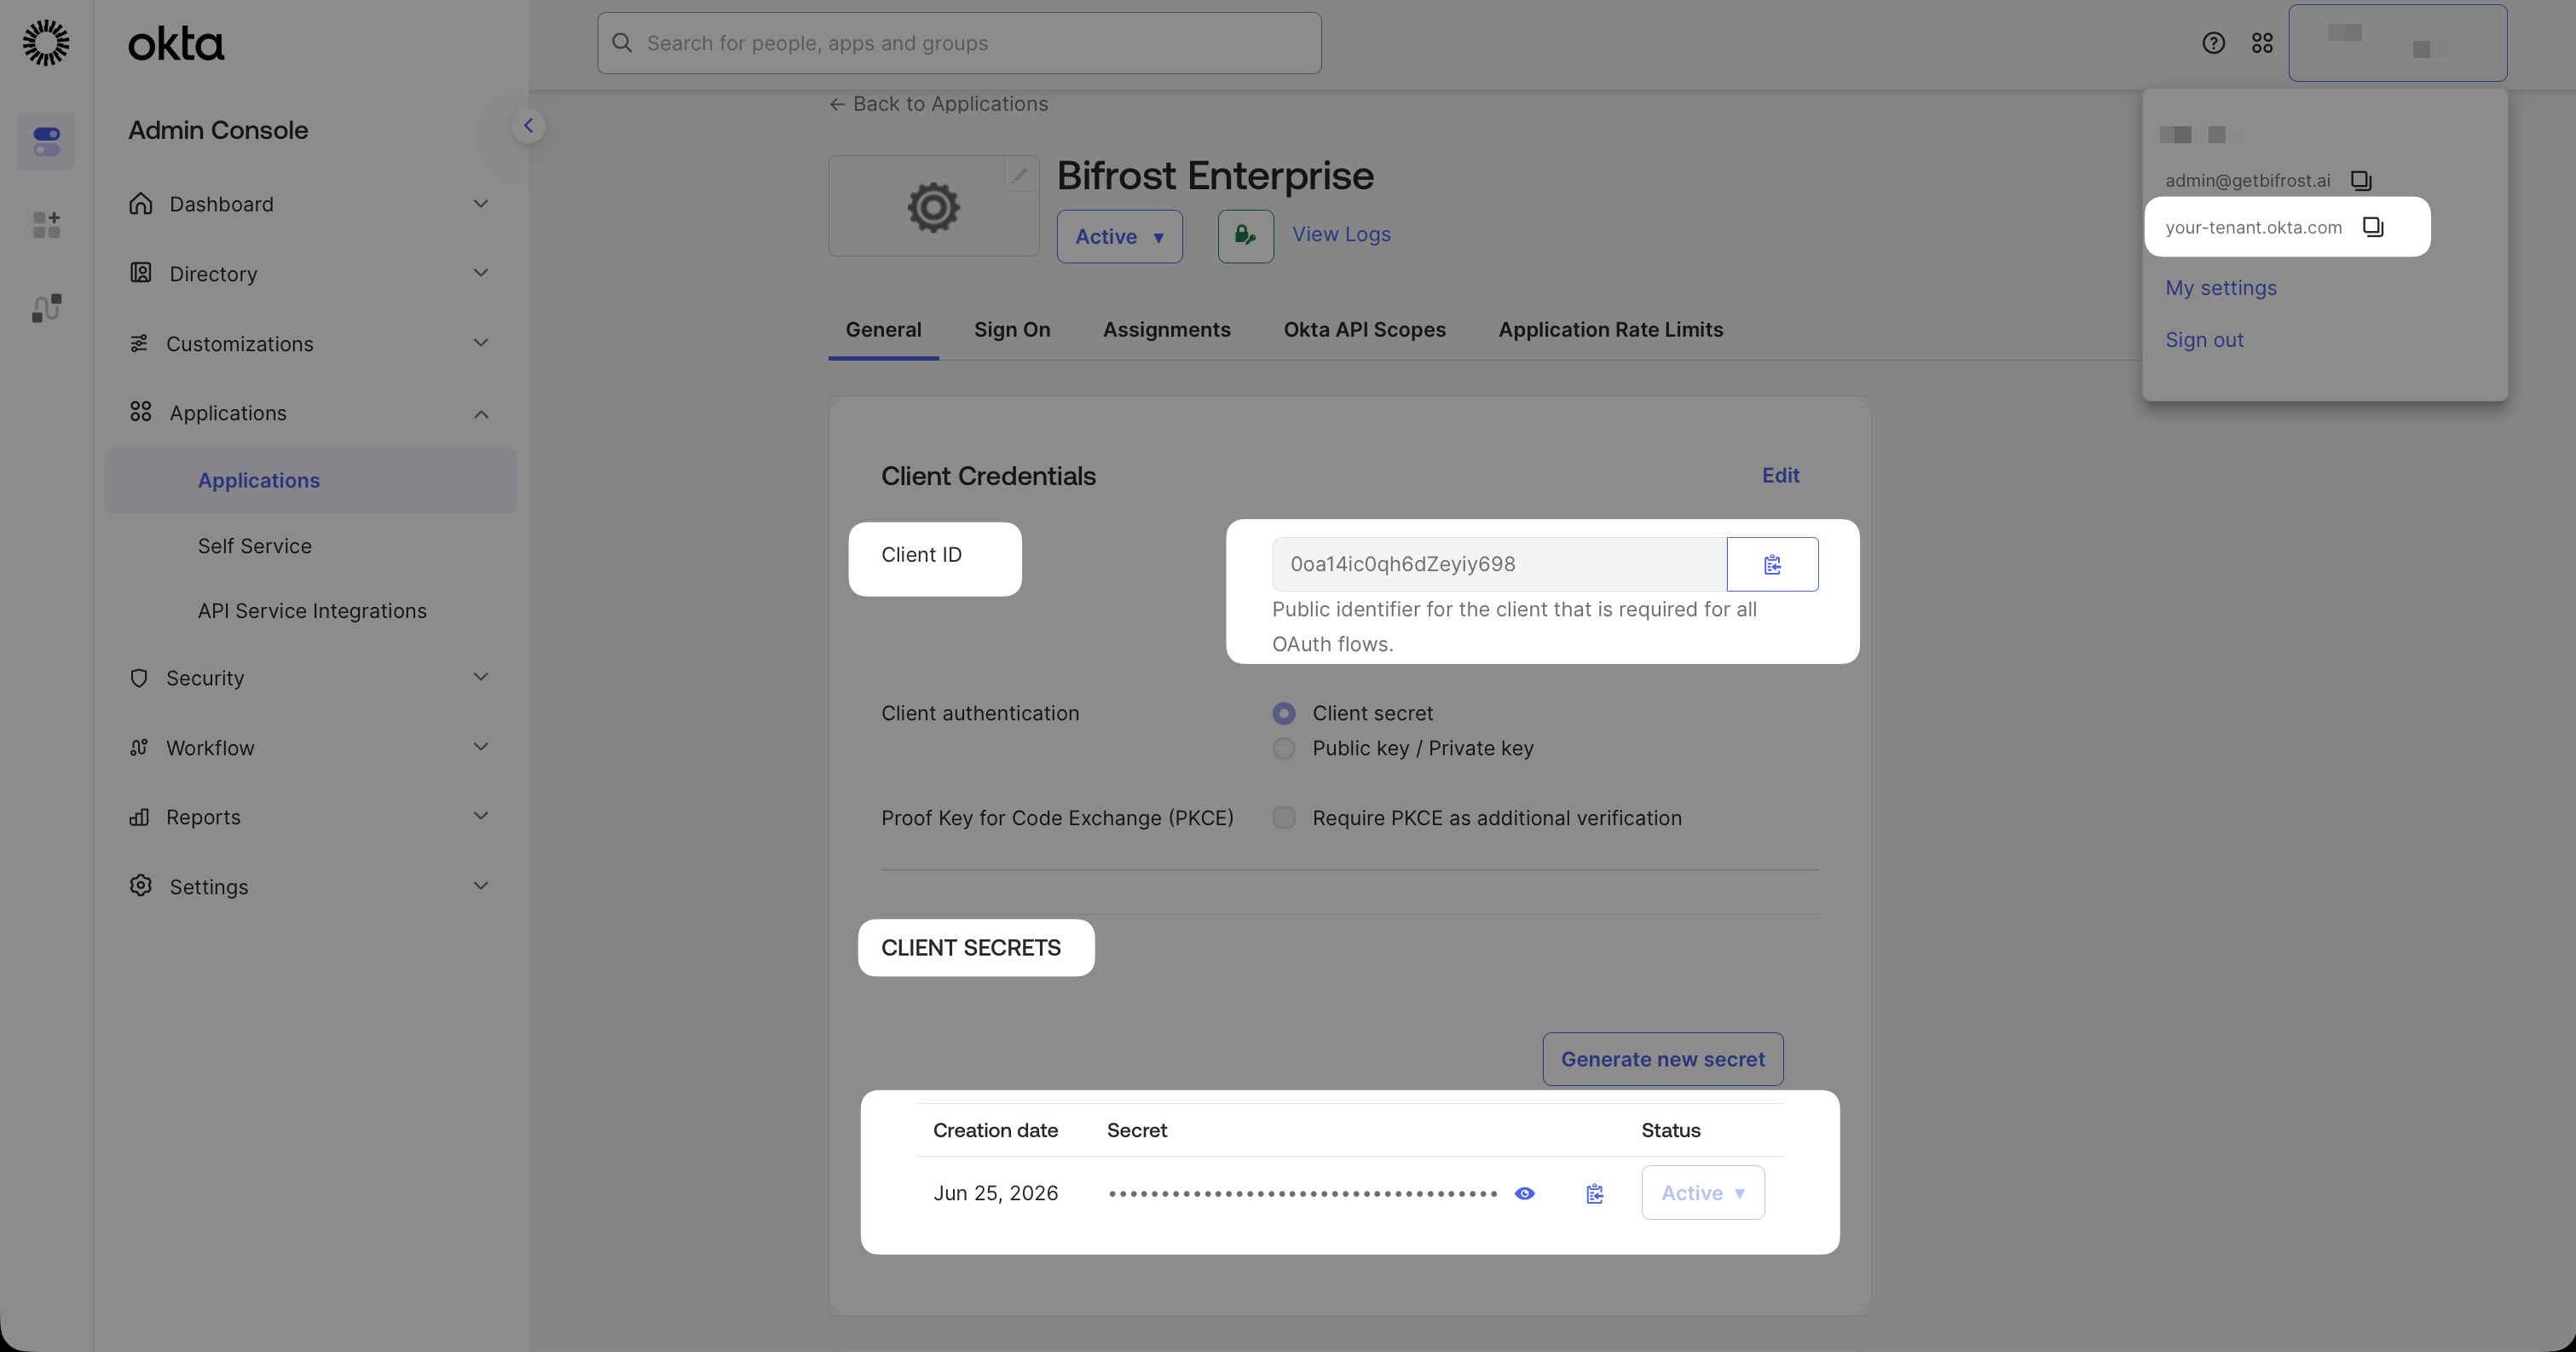
Client ID and Client Secret on the General tab.
Note your Issuer URL
Create an API token (optional)
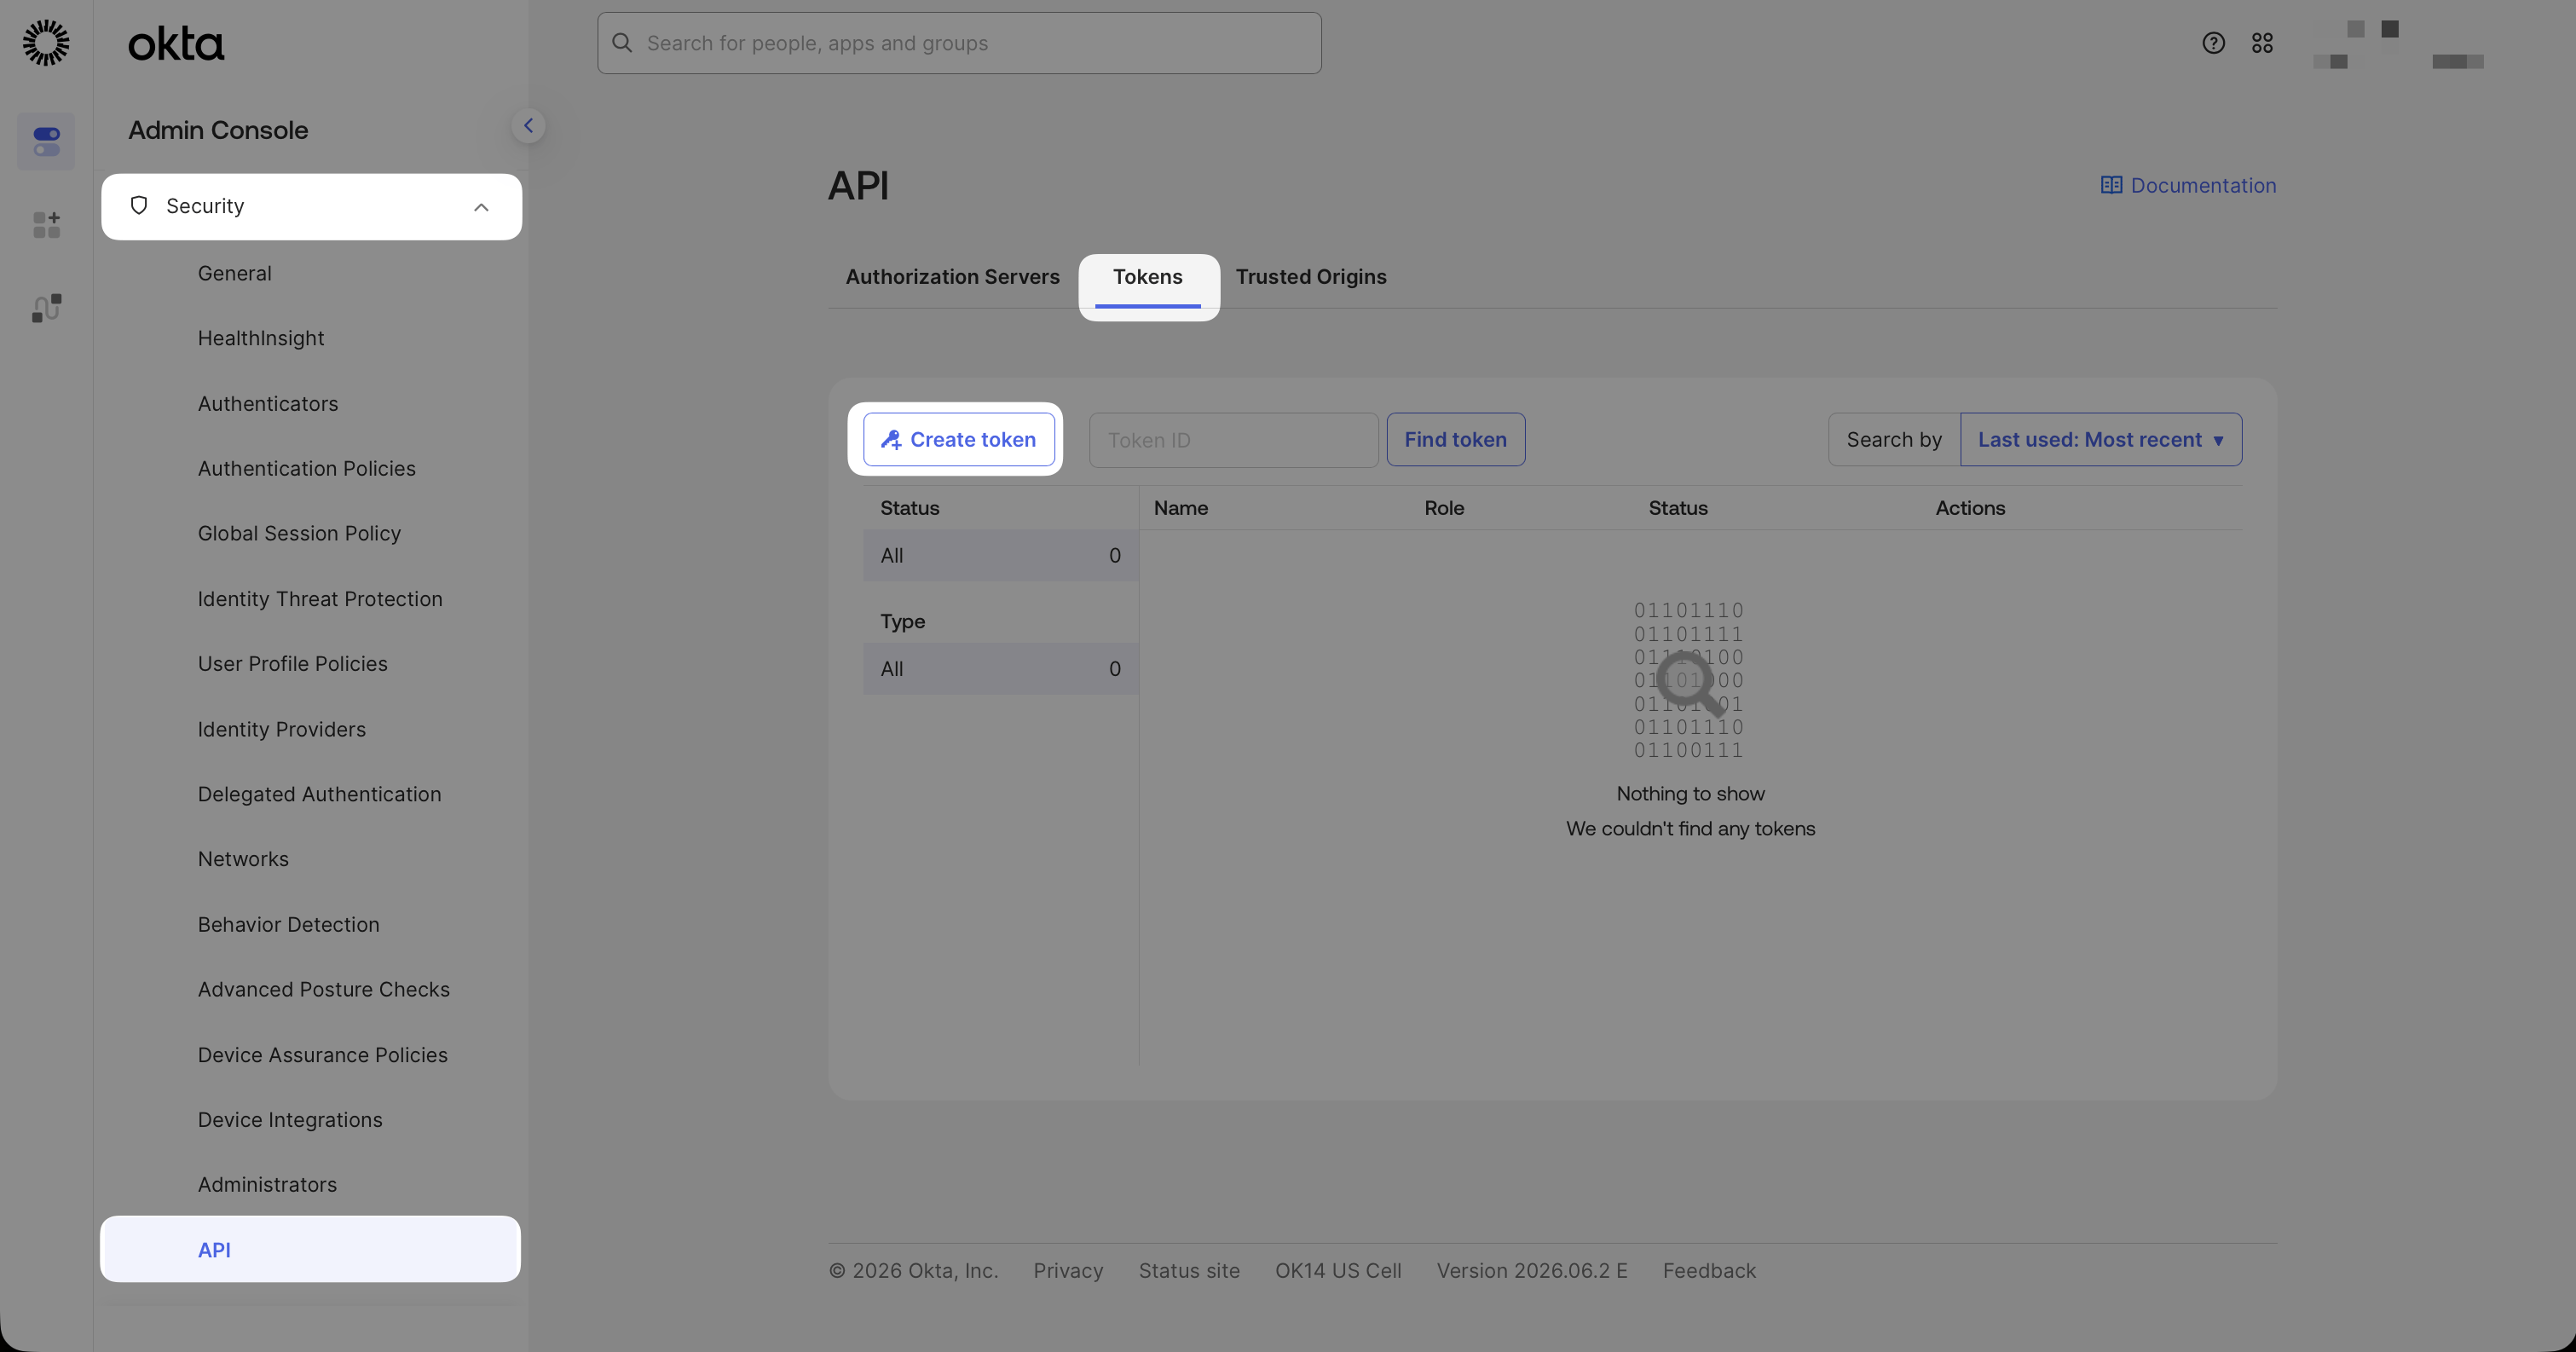
Create an API token under Security → API → Tokens.
Step 5: Configure Bifrost
Open User Provisioning and choose Okta
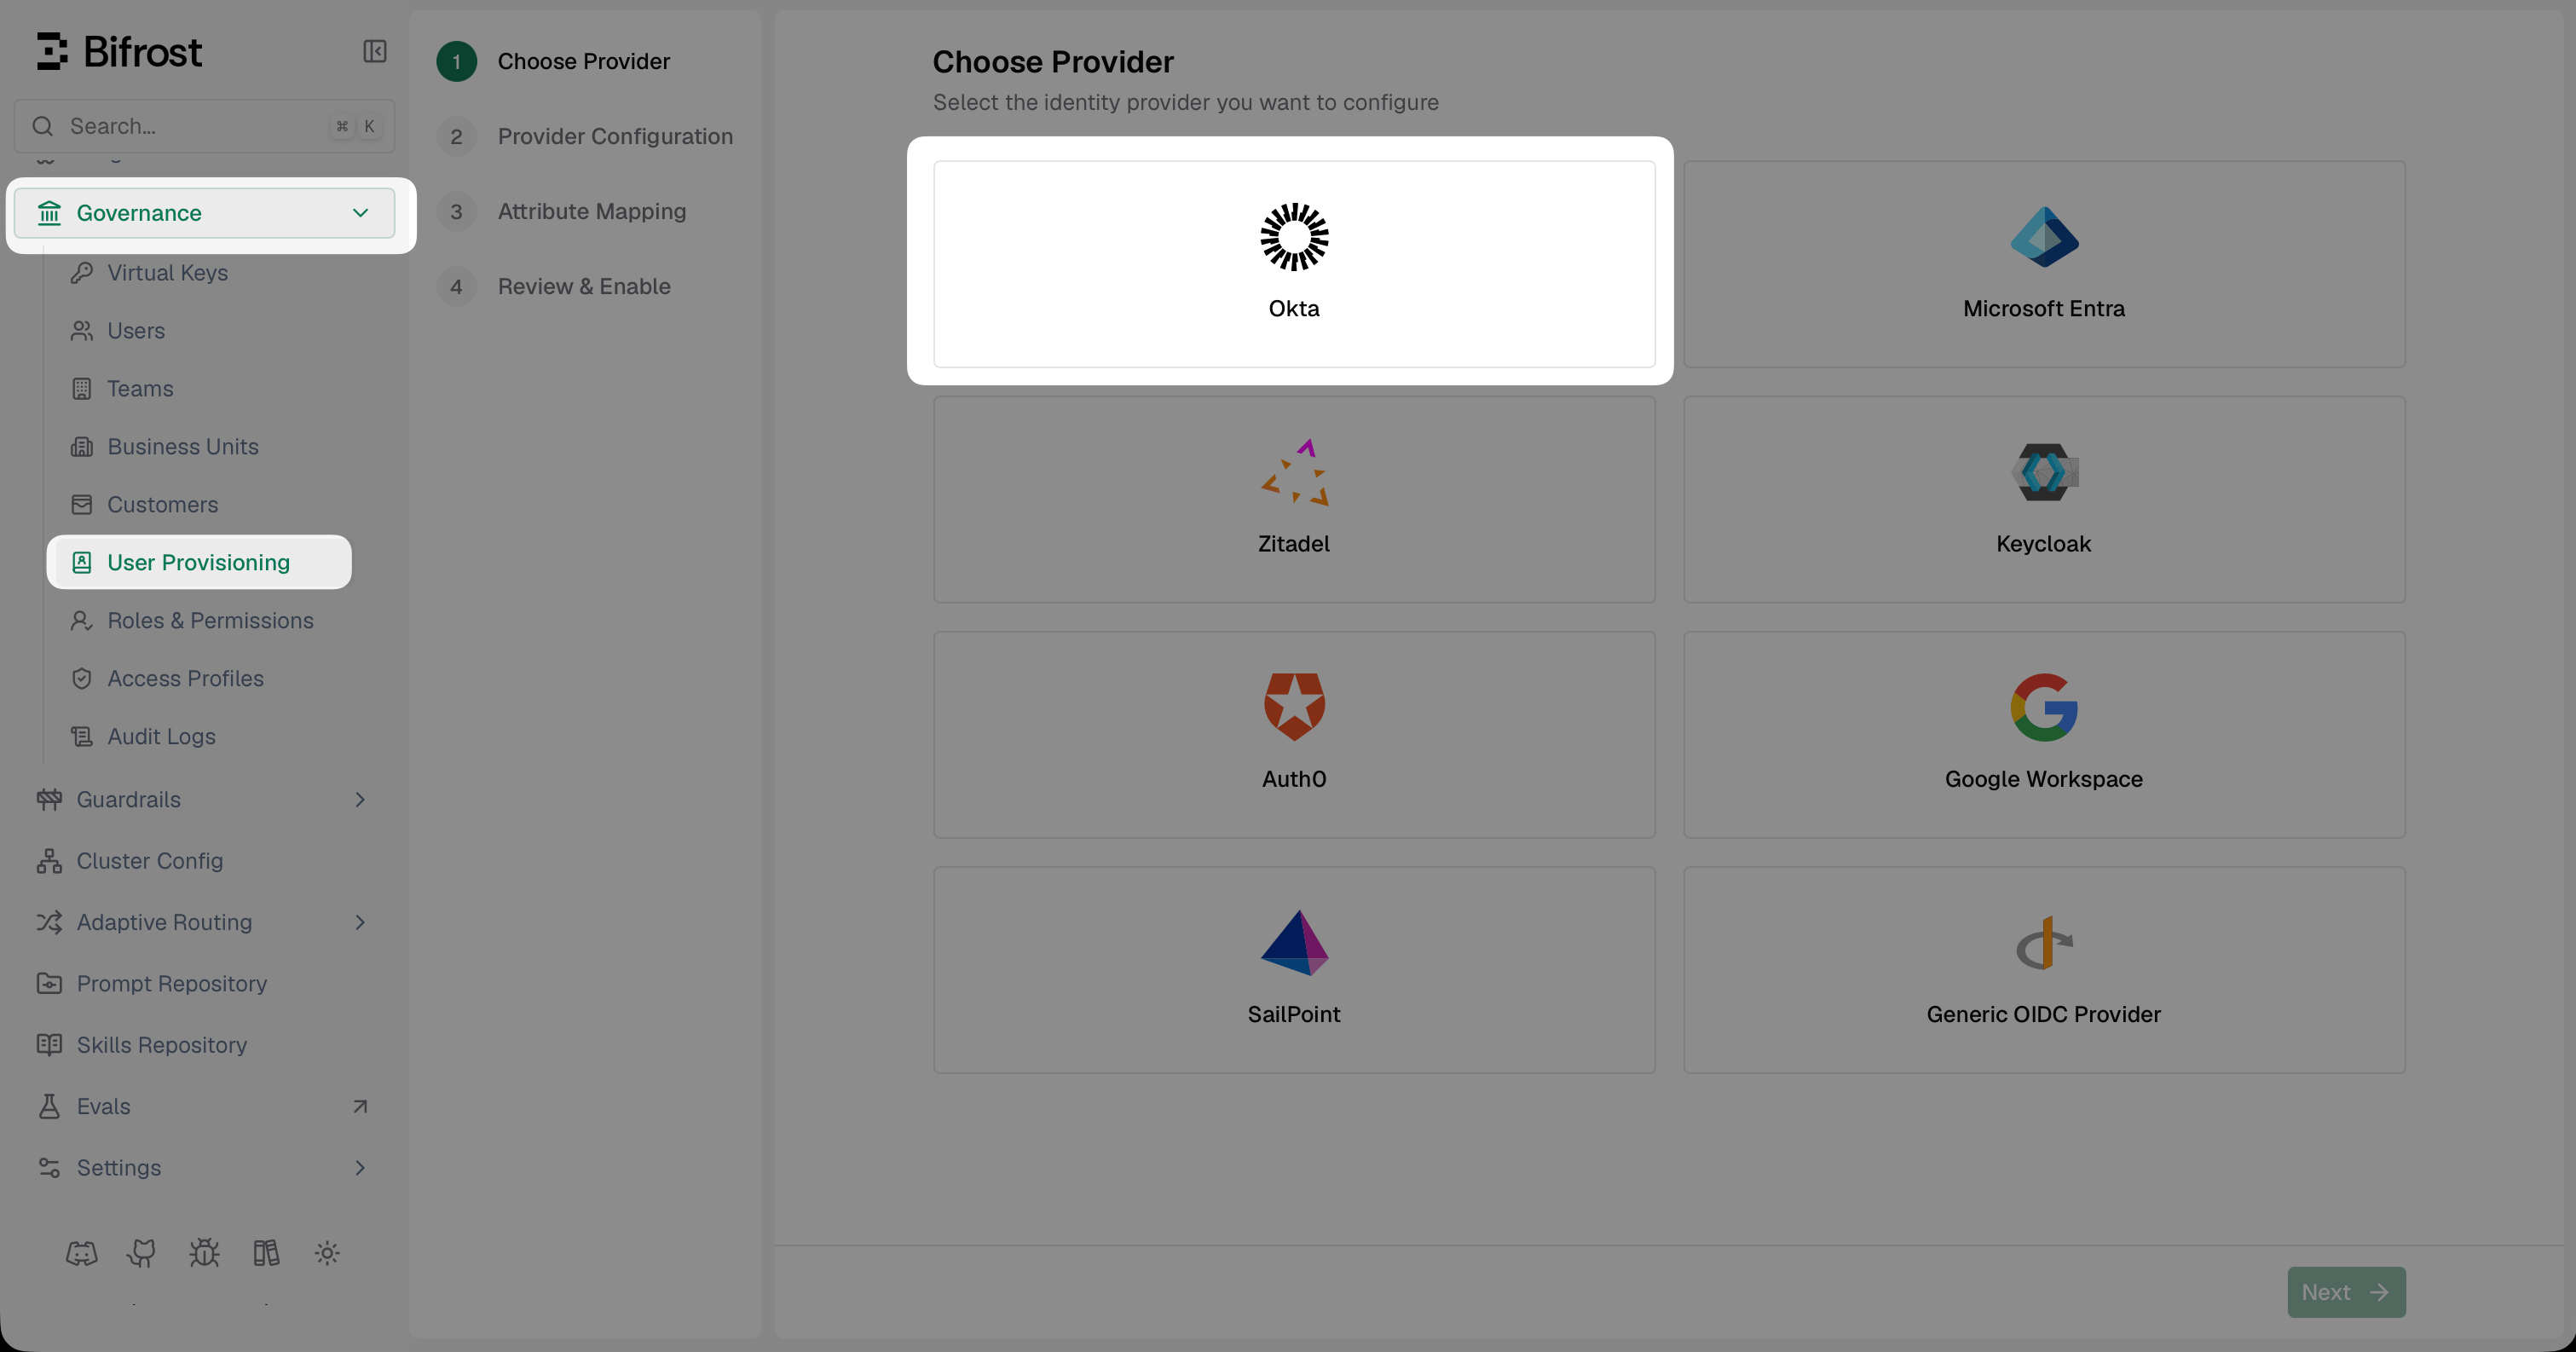
Select Okta from the list of identity providers.
Fill in the provider configuration
- Issuer URL: your Okta issuer URL
- Authorization Server: Org or Custom - match your Okta setup
- Client ID: from the Okta app General tab
- Client Secret: from the Okta app General tab
- Audience: required only for Custom Authorization Server
- API Token: optional - paste the token from Step 4 if you want background sync every Directory sync interval (default 24 hours)
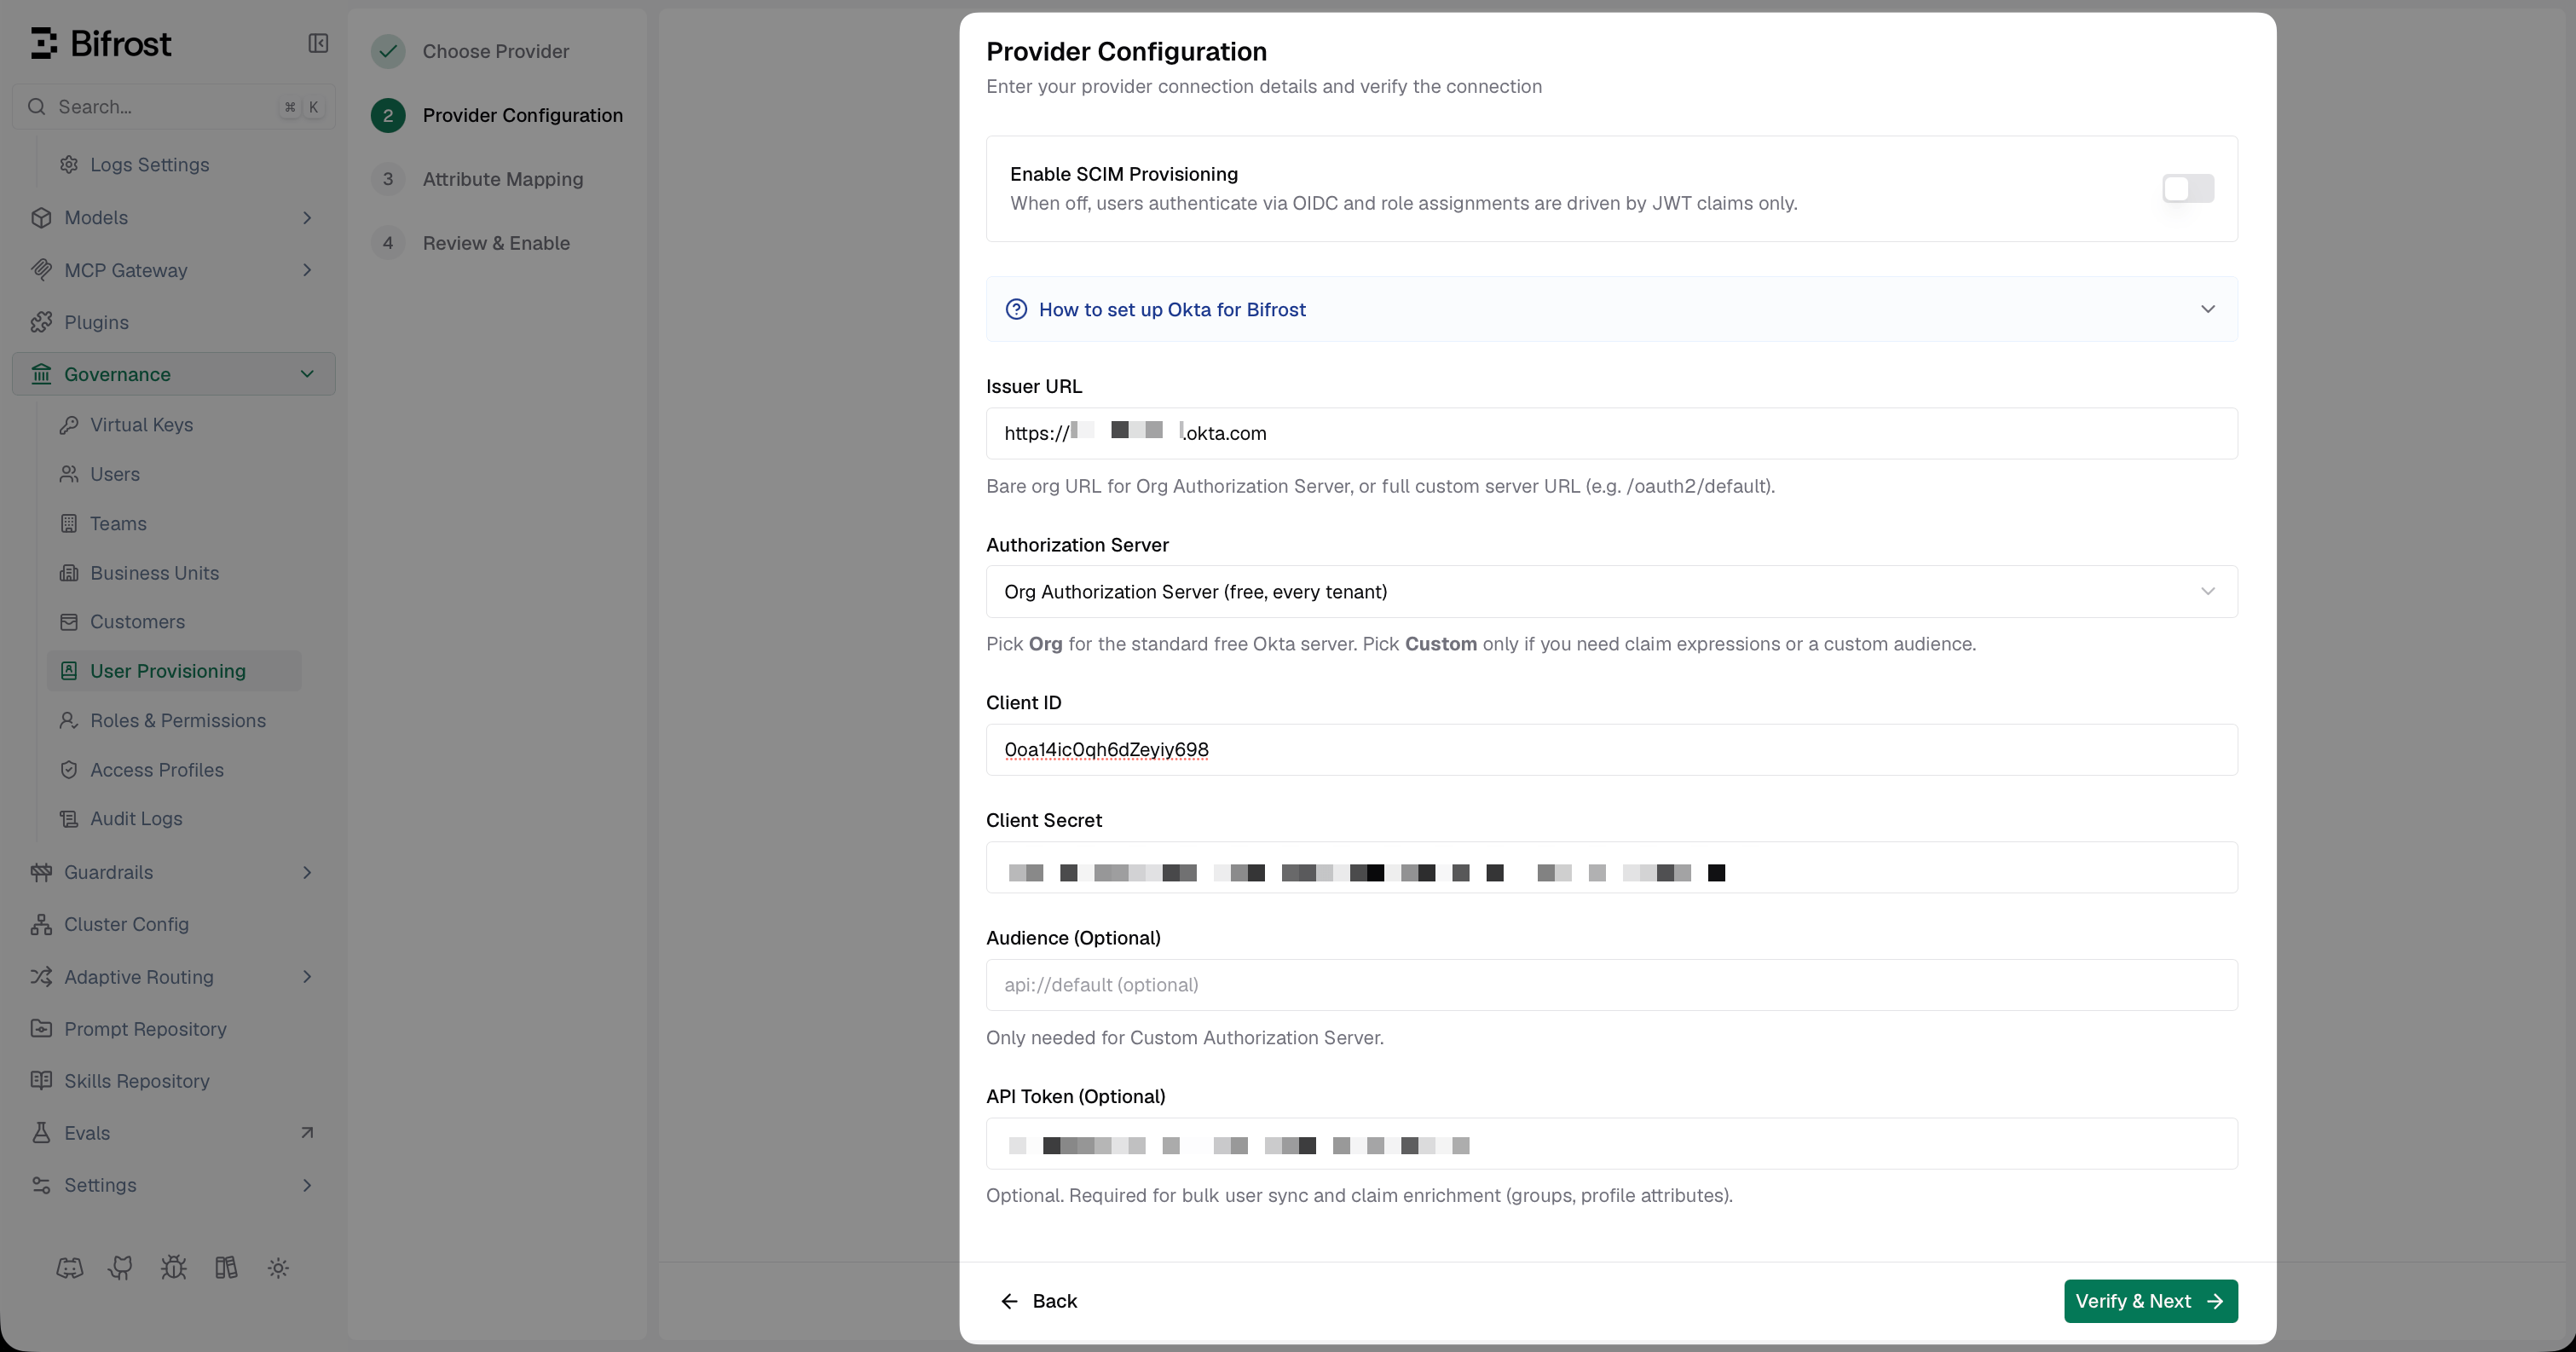
Provider Configuration - enter your Okta credentials and verify the connection.
Discover claims
groups, department, or division - are present before building your mappings.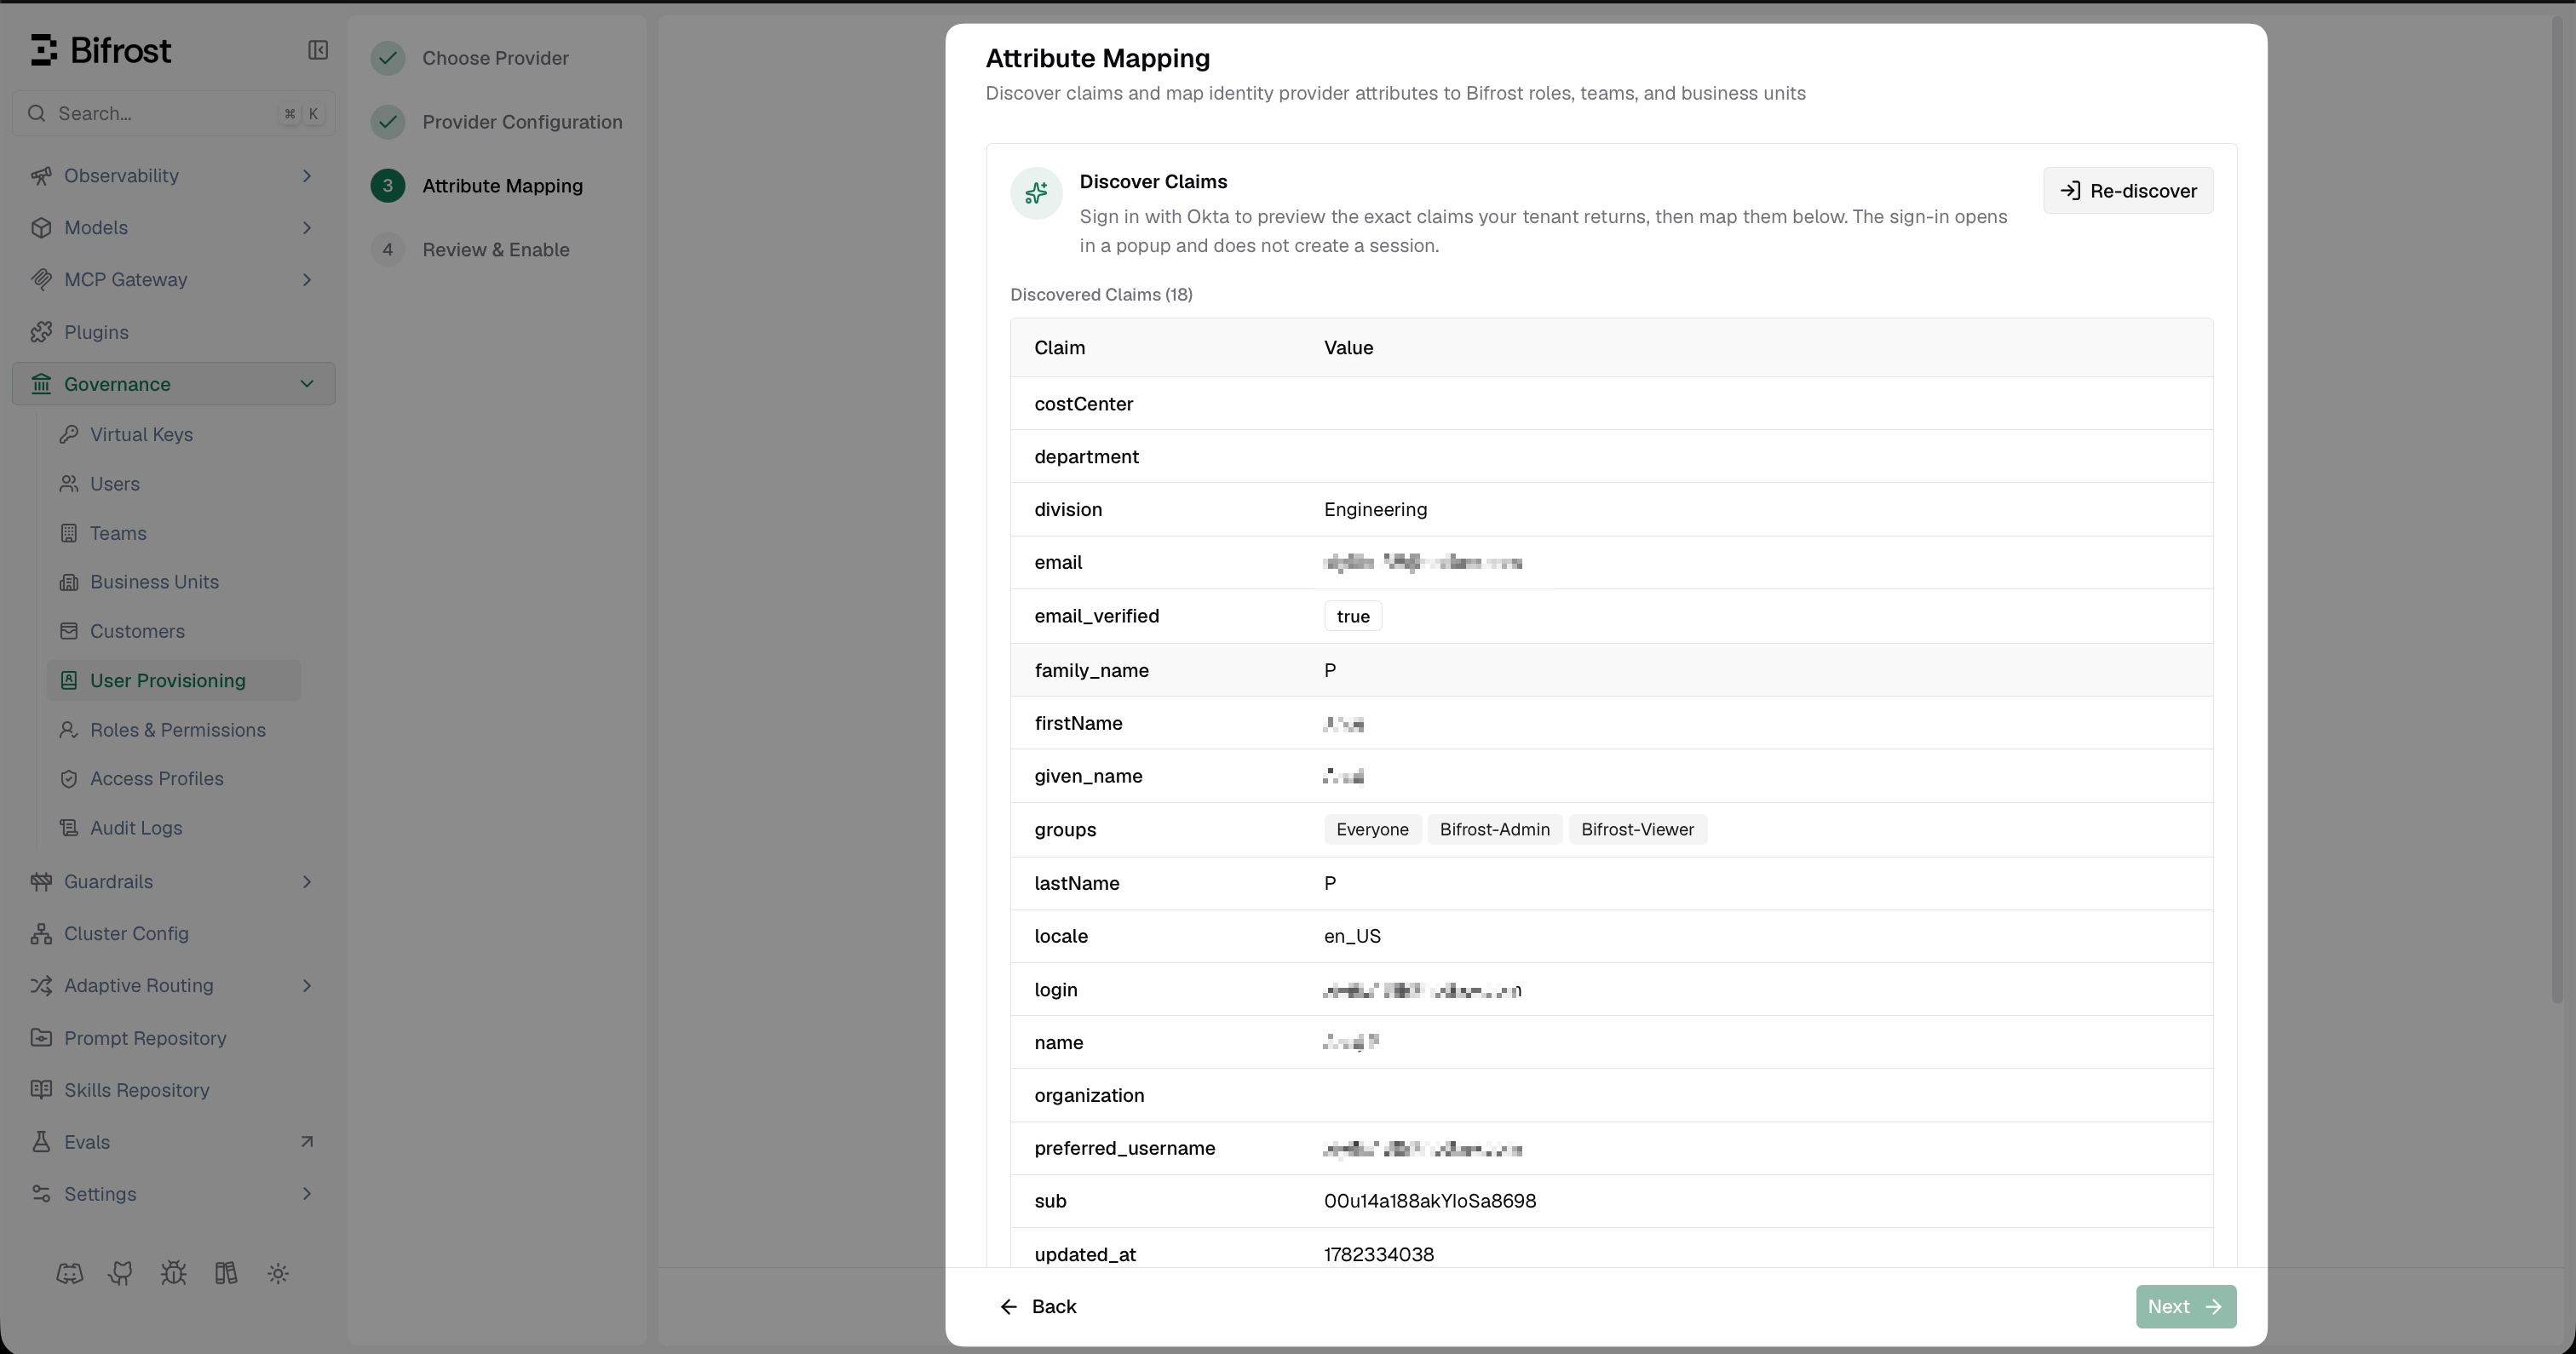
Discover Claims shows the exact claims Okta is returning for your user, including groups and any custom profile attributes.
Set up attribute mappings
- The role with the most permissions (default)
- The first matching role, by list order (drag rows to set priority)
- Use a specific value (e.g.
engineering) to map that exact claim value to a named Bifrost team - Use
*as the value to sync the claim value directly as the team name - Use
${*}to extract part of the string - e.g.Bifrost Playground: ${*} TeammatchesBifrost Playground: Alpha Teamand creates team Alpha
- Use a specific value (e.g.
platform) to map that exact claim value to a named Bifrost business unit - Use
${*}to extract a substring as the business unit name - e.g.Bifrost Playground: ${*} BUmatchesBifrost Playground: Alpha BUand creates business unit Alpha - When a rule matches, the resolved business unit is assigned to the user. All matching rules apply, so a user can belong to several business units at once
- A business unit you assign by hand stays until you remove it, unless a mapping later grants the same one, in which case it follows your IdP. One granted from a claim is removed at a later sign-in where the attribute is present and no longer matches; a refreshed token that leaves the attribute out entirely doesn’t remove it
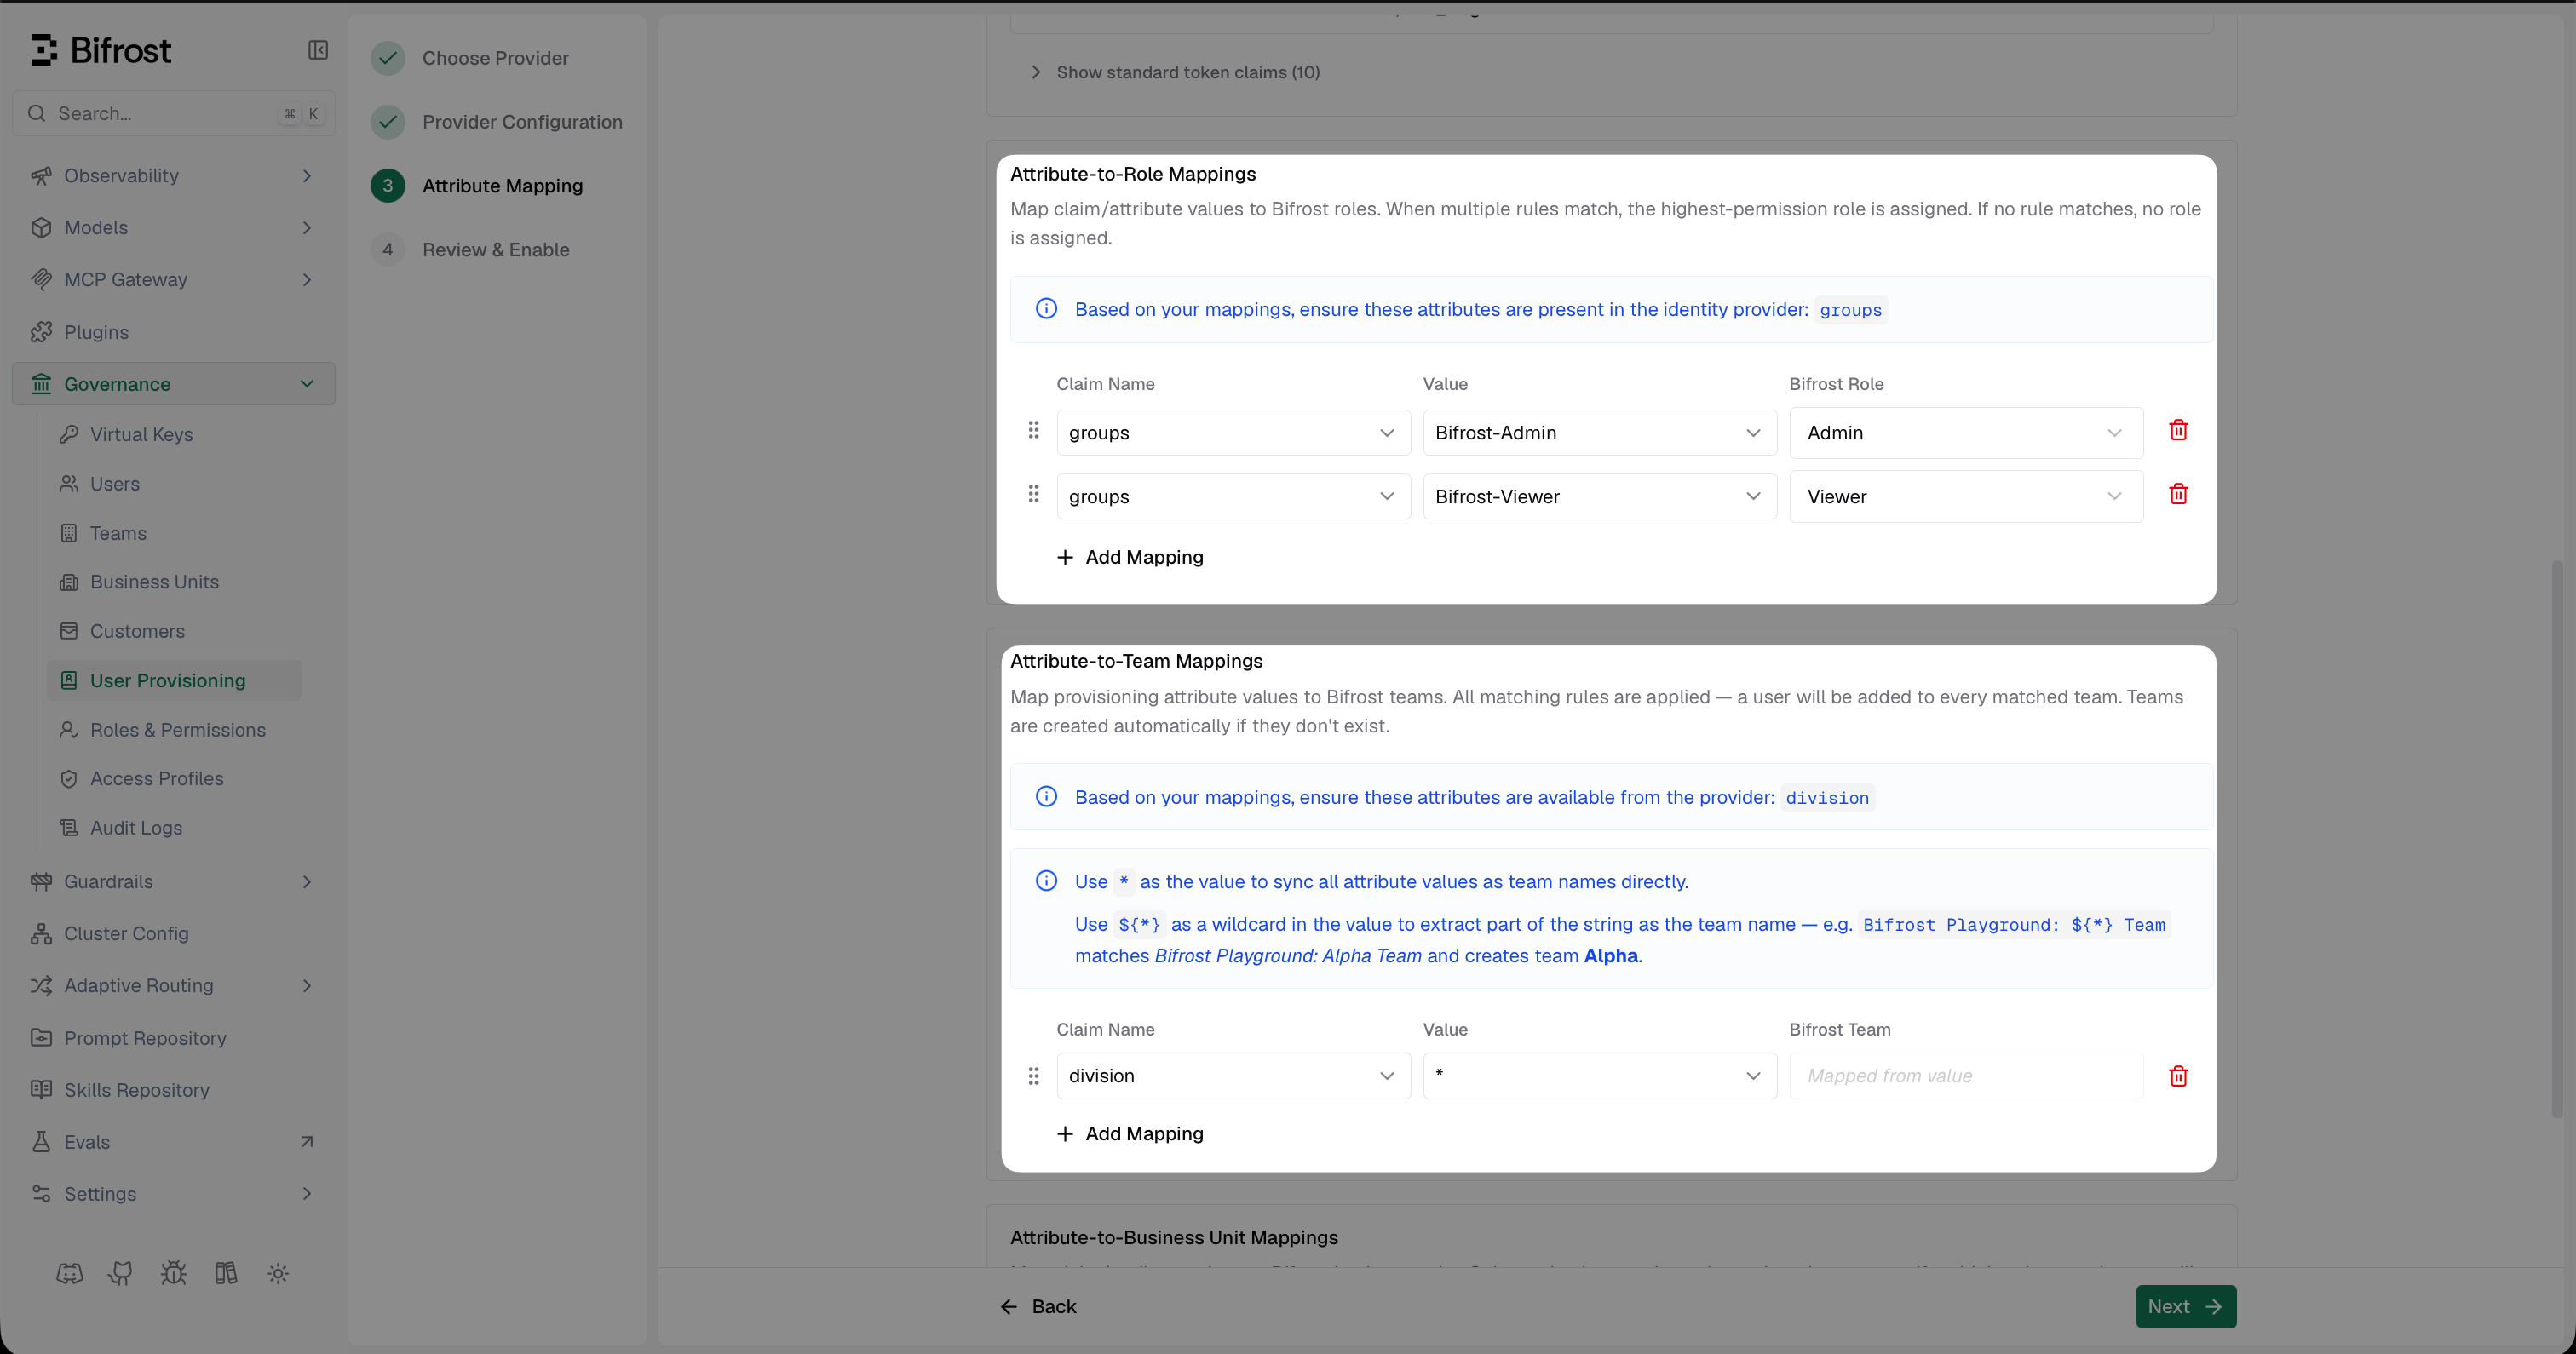
Attribute Mapping - configure role, team, and business unit rules based on the claims Okta sends.
Review and enable
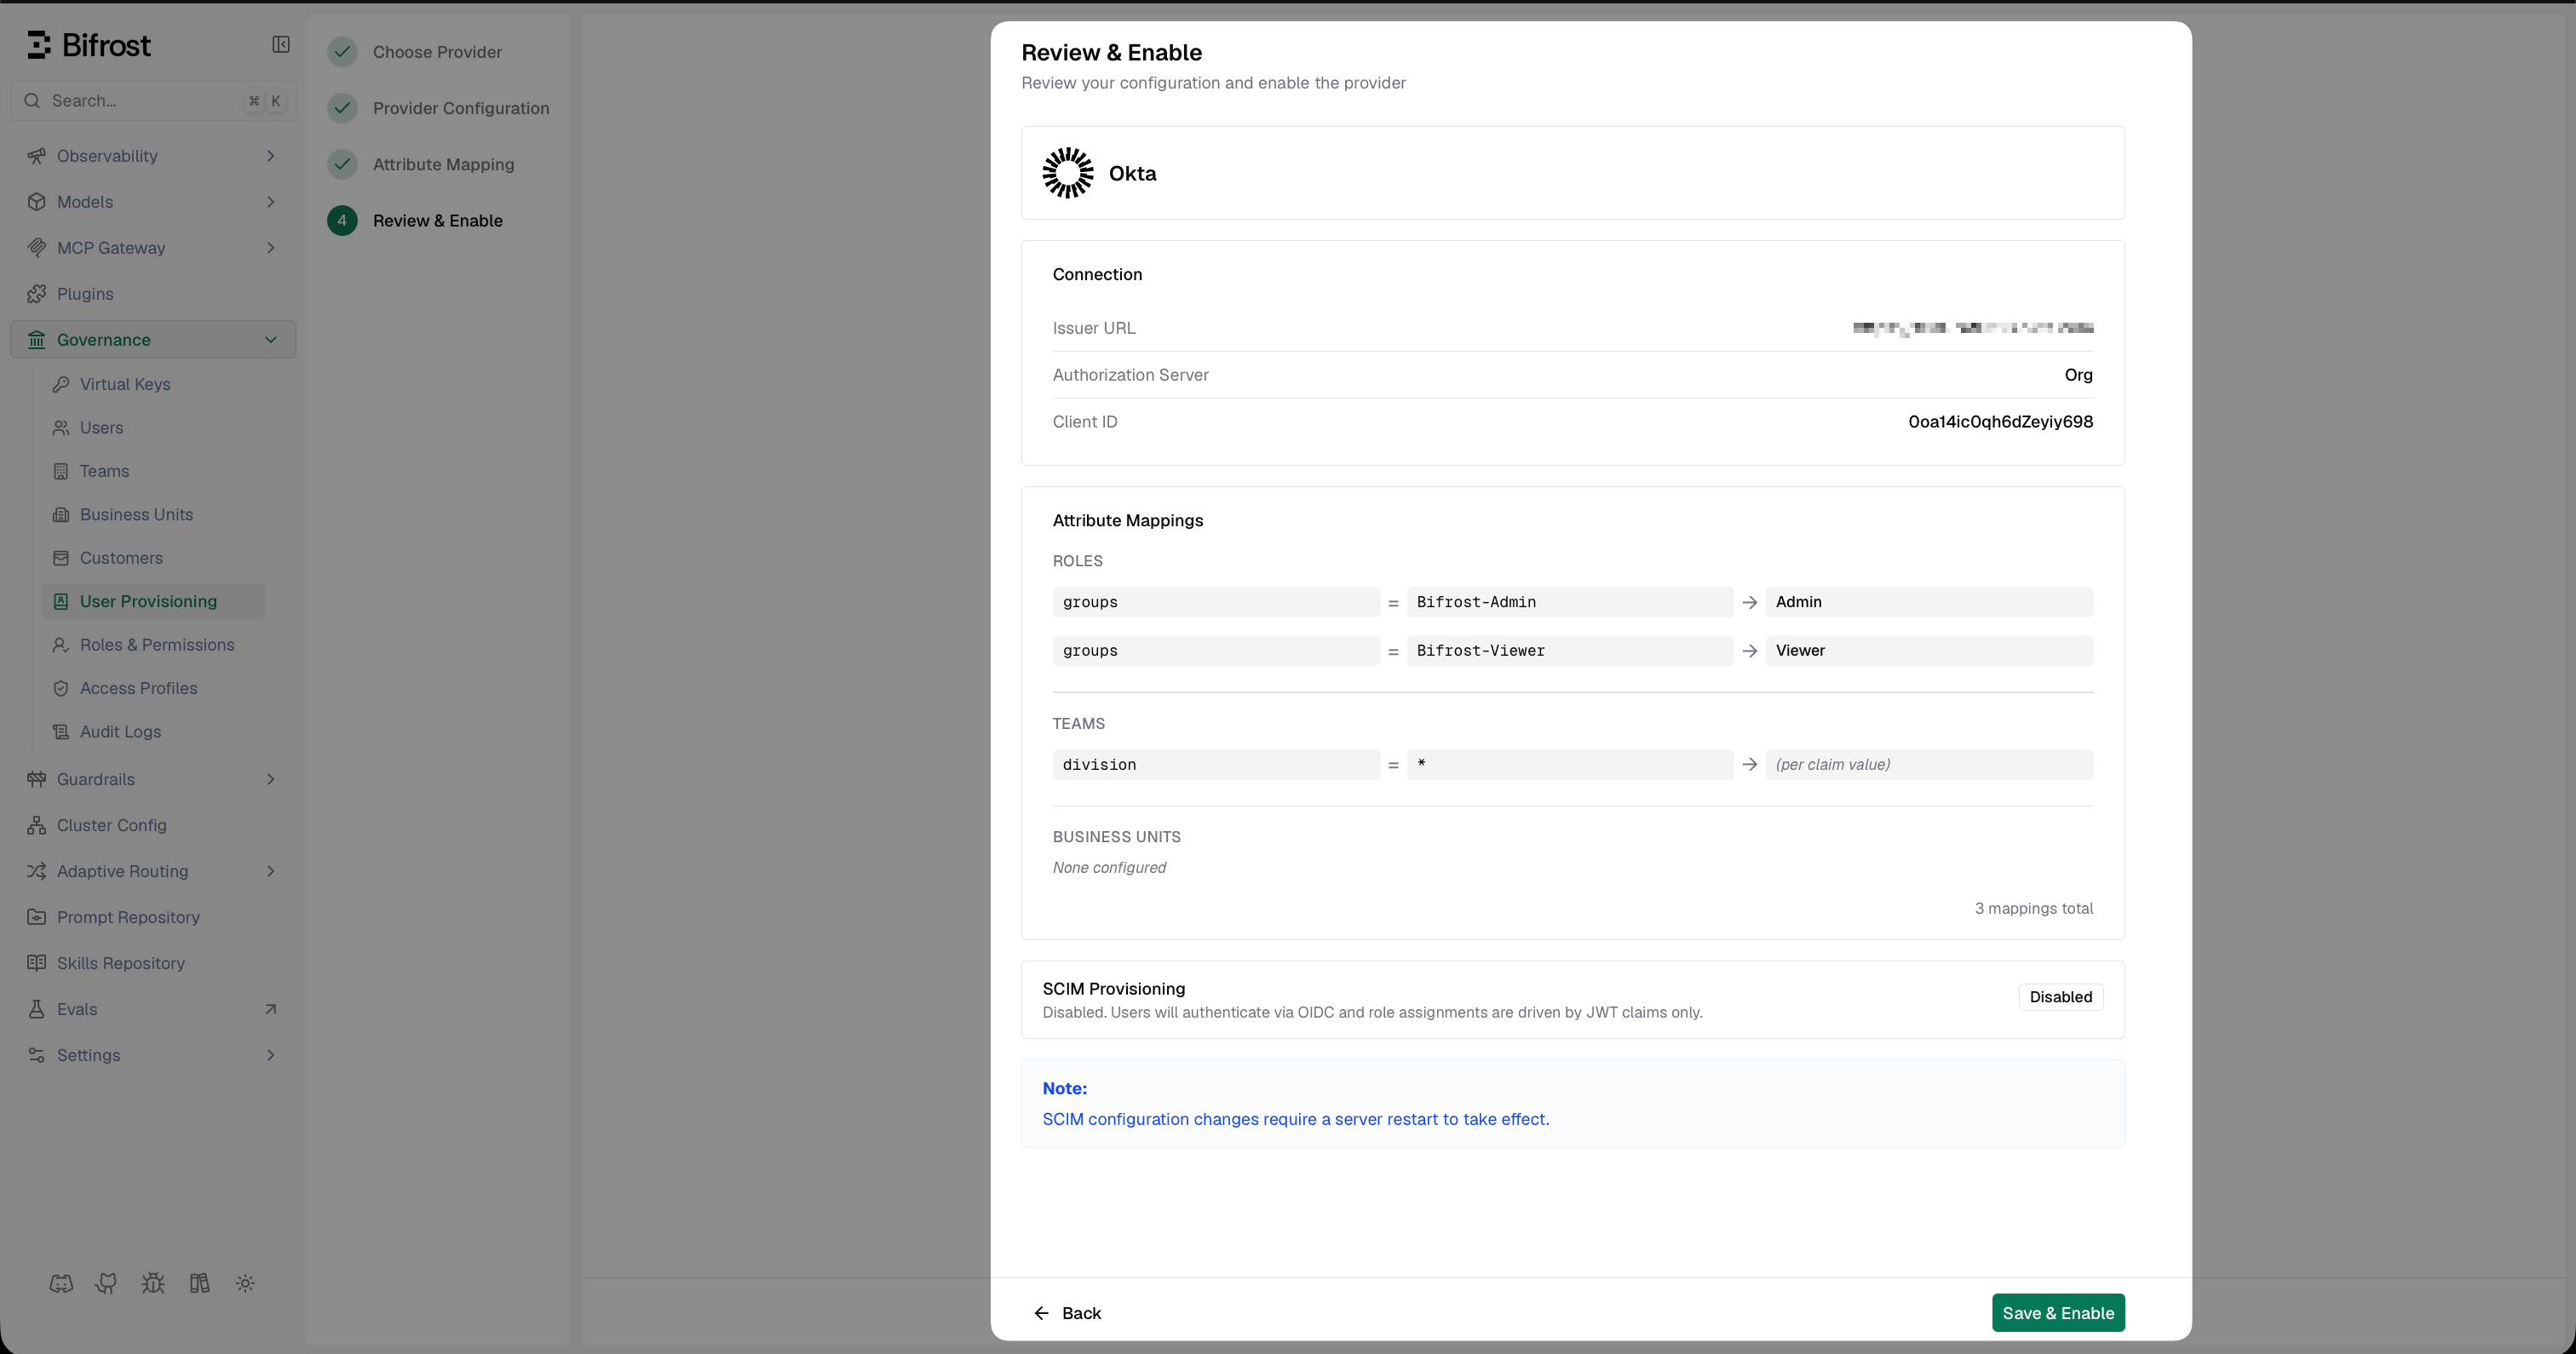
Review your Okta SSO configuration before enabling.
Optional Next Steps
Sync users and groups automatically - SSO alone provisions users on first login. To keep Bifrost in sync with Okta in real time (deactivations, group changes, new users before they log in), set up SCIM with Okta.Troubleshooting
User is not redirected to Okta - verify the provider is enabled in Bifrost and the server was restarted after saving. Check that the Issuer URL has no trailing slash and is reachable from your server. Login fails with an invalid client error - the Client ID or Client Secret is incorrect. Regenerate the secret in the Okta app General tab and update Bifrost. Roles or teams are not assigned after login - confirm the claim (e.g.groups) is included in the token. Verify the attribute mapping values in Bifrost match exactly what Okta sends.
Empty email after login - the email scope is not included. Ensure openid and email are requested, and that the Okta user has a primary email set.