

Prerequisites
- A Zitadel instance (cloud at
*.zitadel.cloudor self-hosted) with admin access - An existing Zitadel Project in the organization you want to connect
- Bifrost Enterprise deployed and accessible
- Your Bifrost callback URL:
https://<your-bifrost-domain>/login - Bifrost roles created for the roles you plan to map
Step 1: Create a web application
Add a new application to your project
Bifrost OIDC - and select Web as the application type.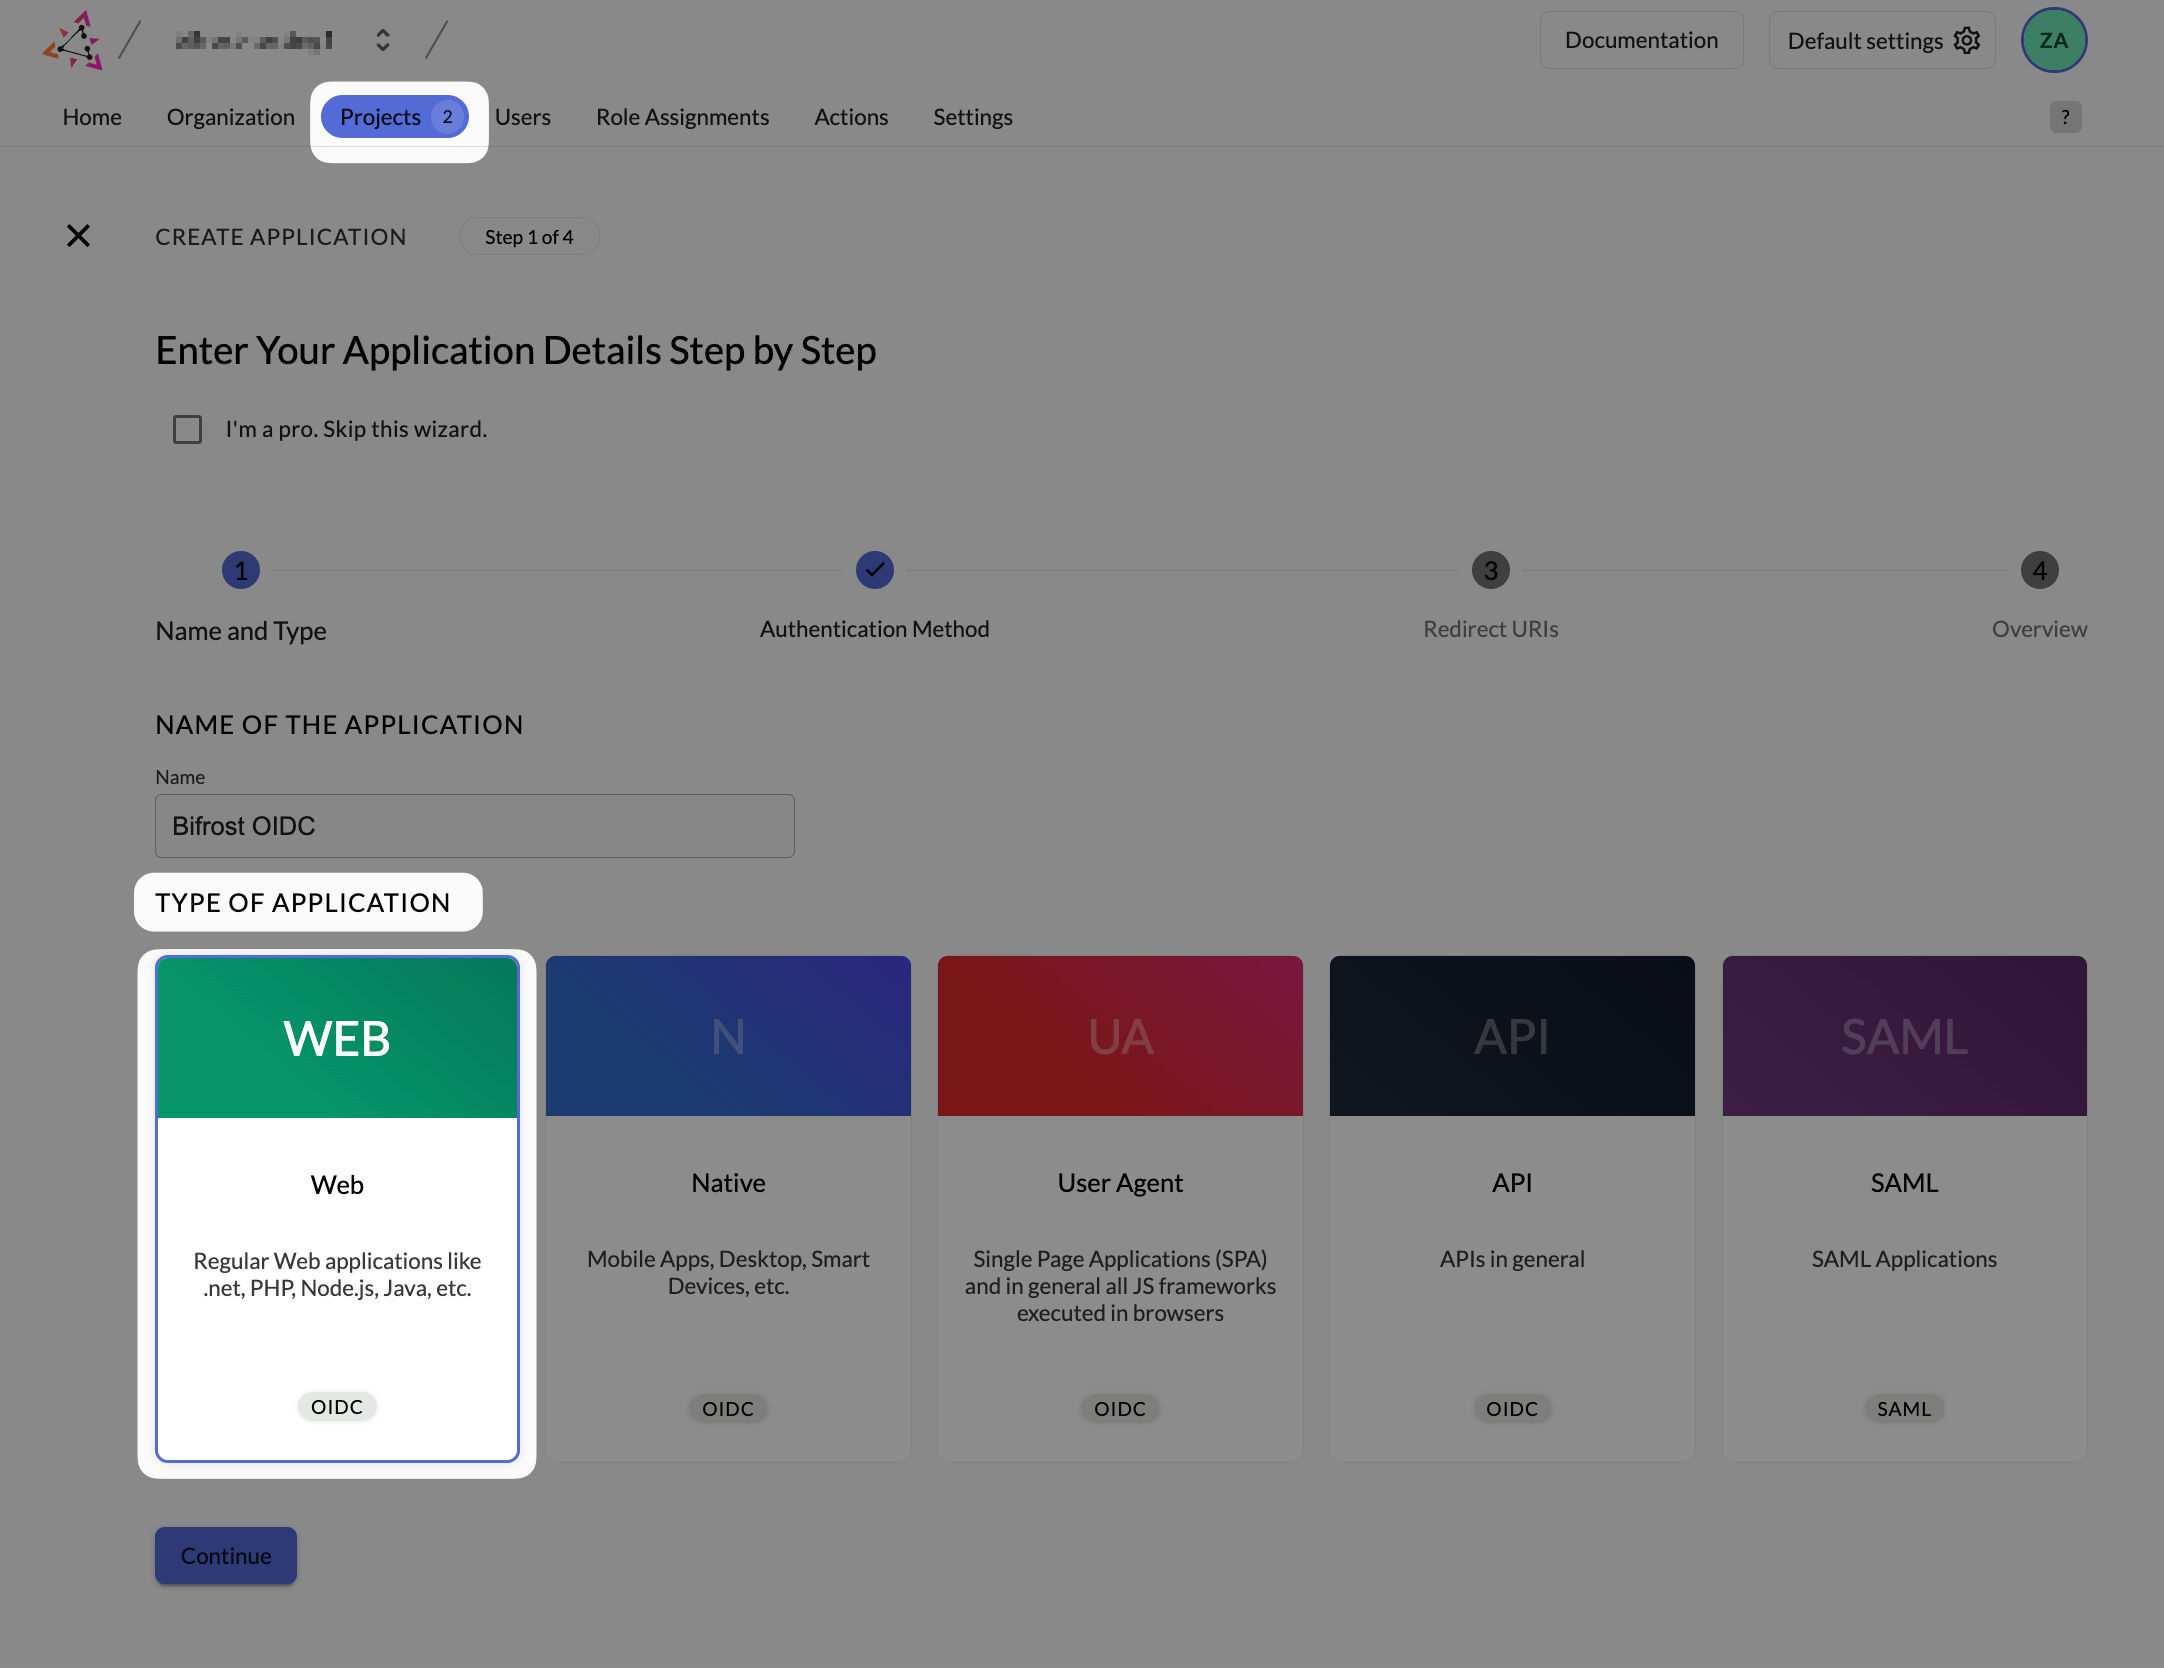
Create application - name it and select Web as the type.
Configure redirect URIs
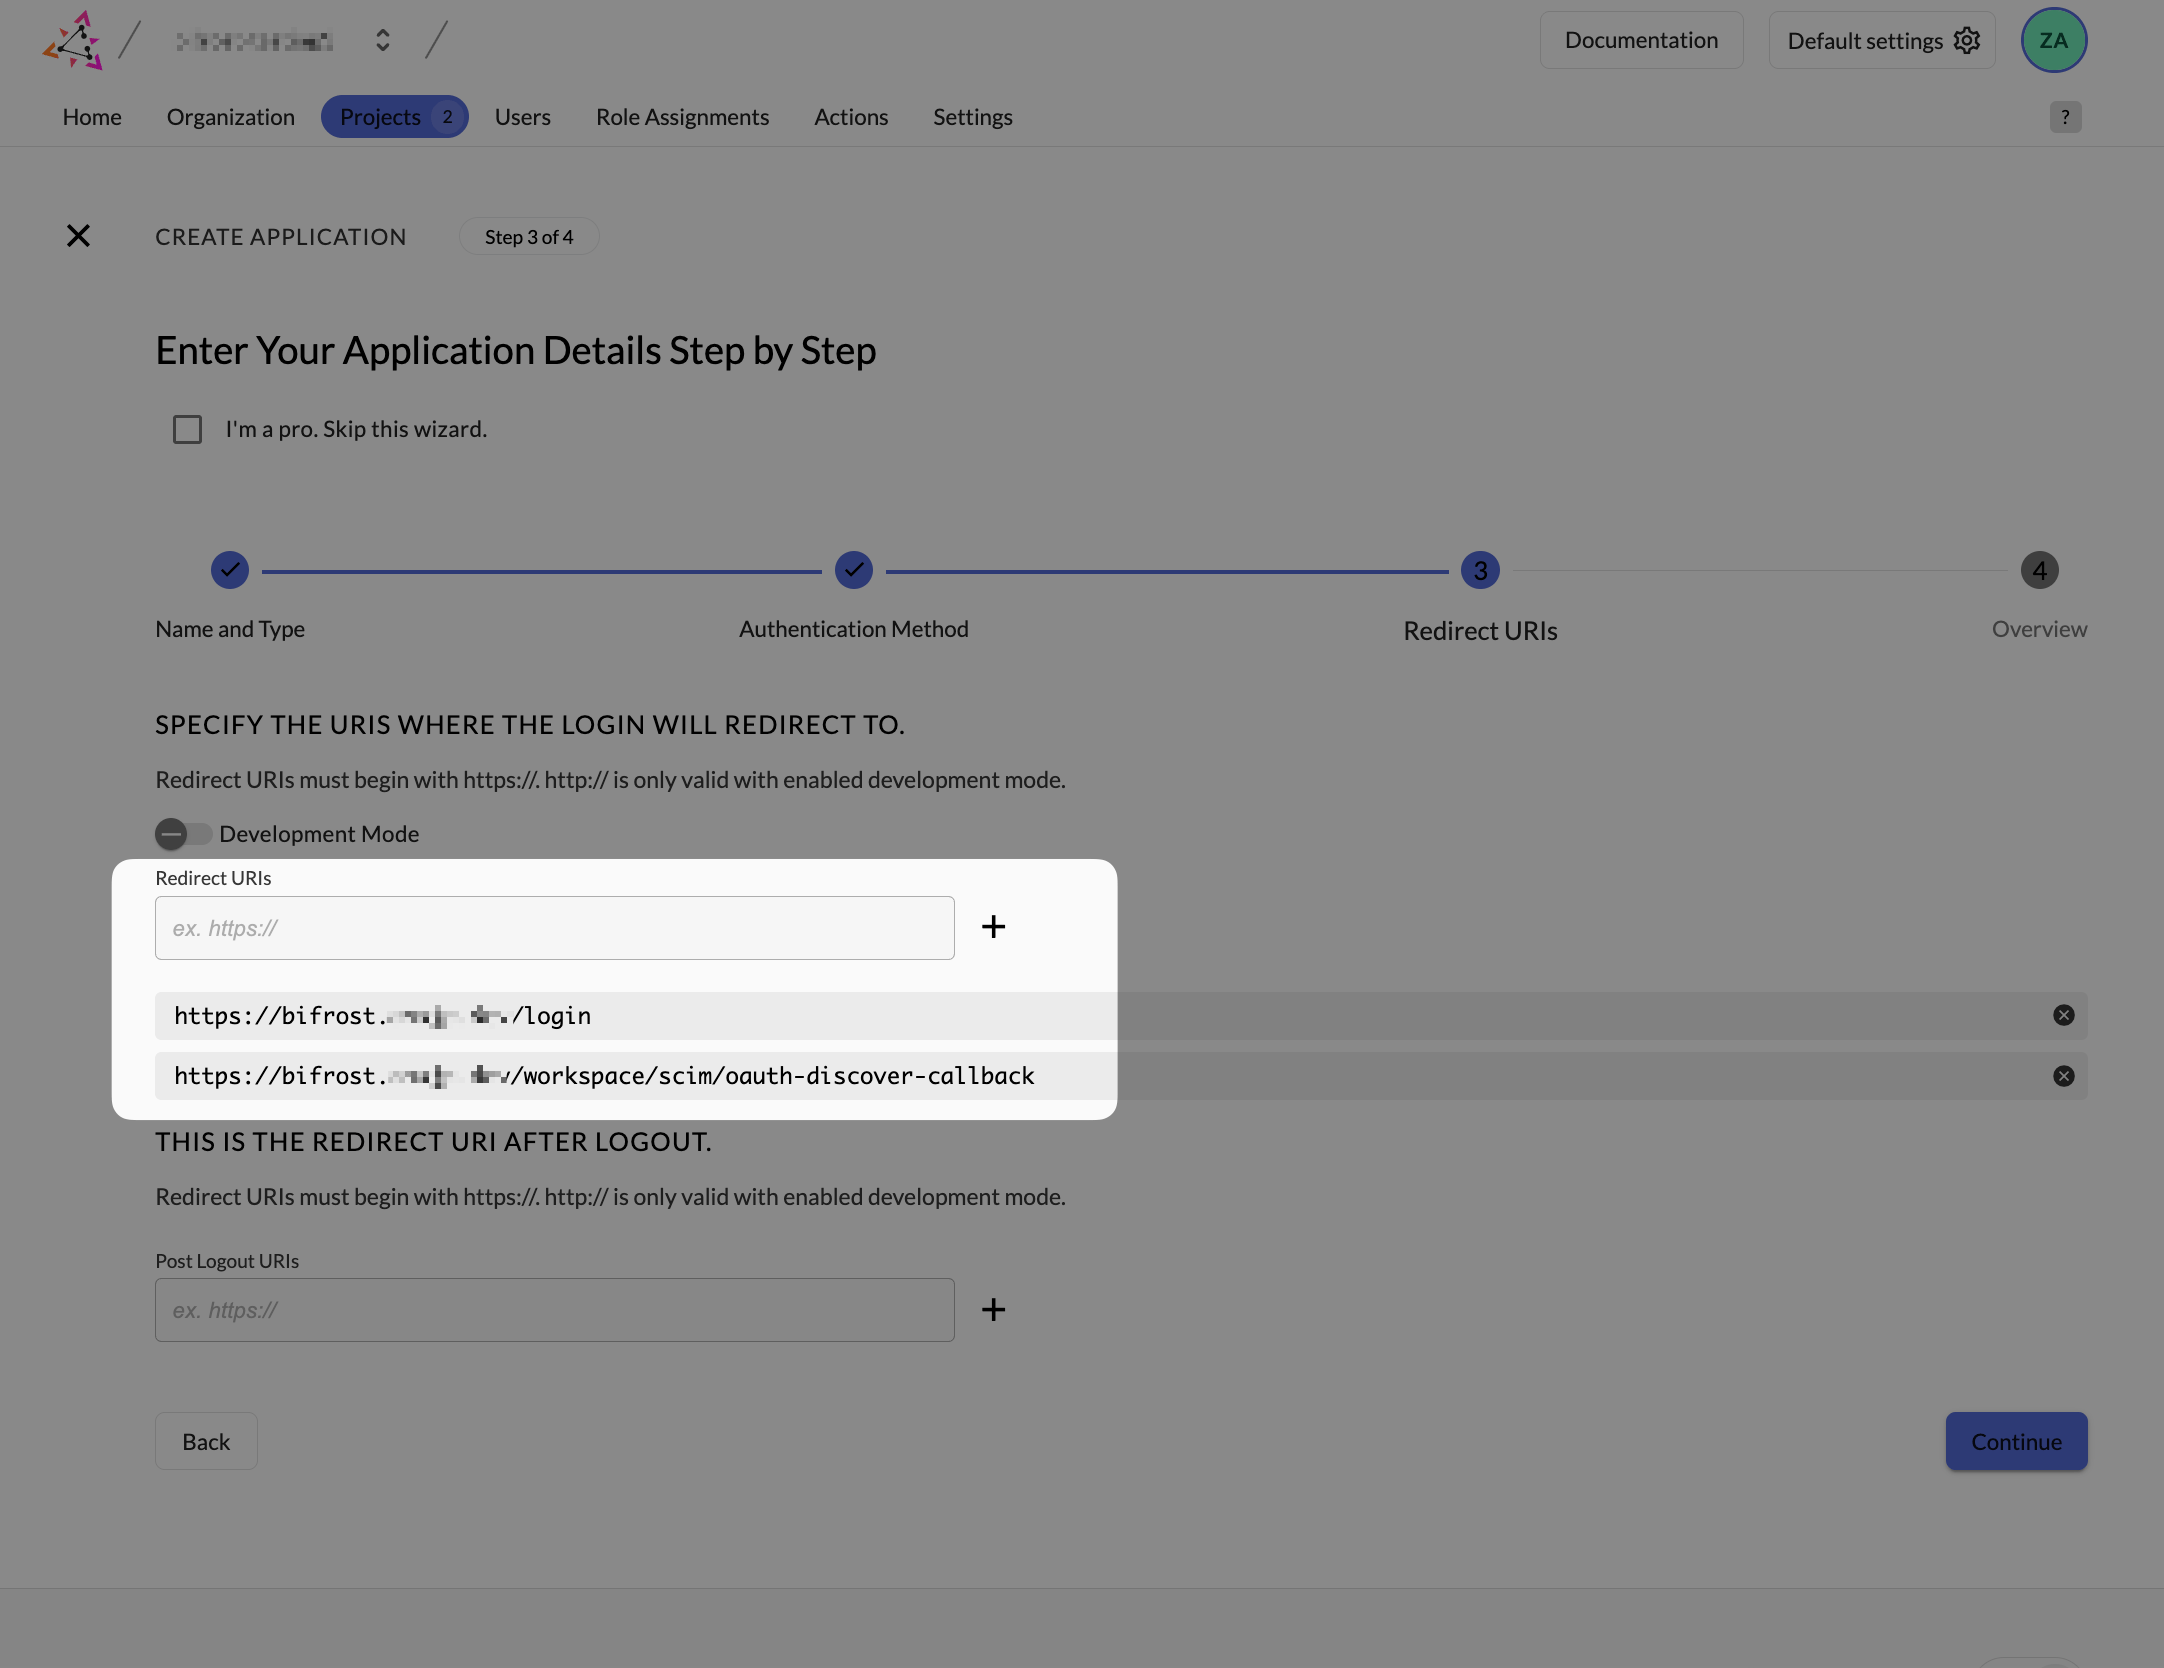
Redirect URIs - the login callback is required; the discovery callback is optional and only used during initial setup.
Copy the Client ID
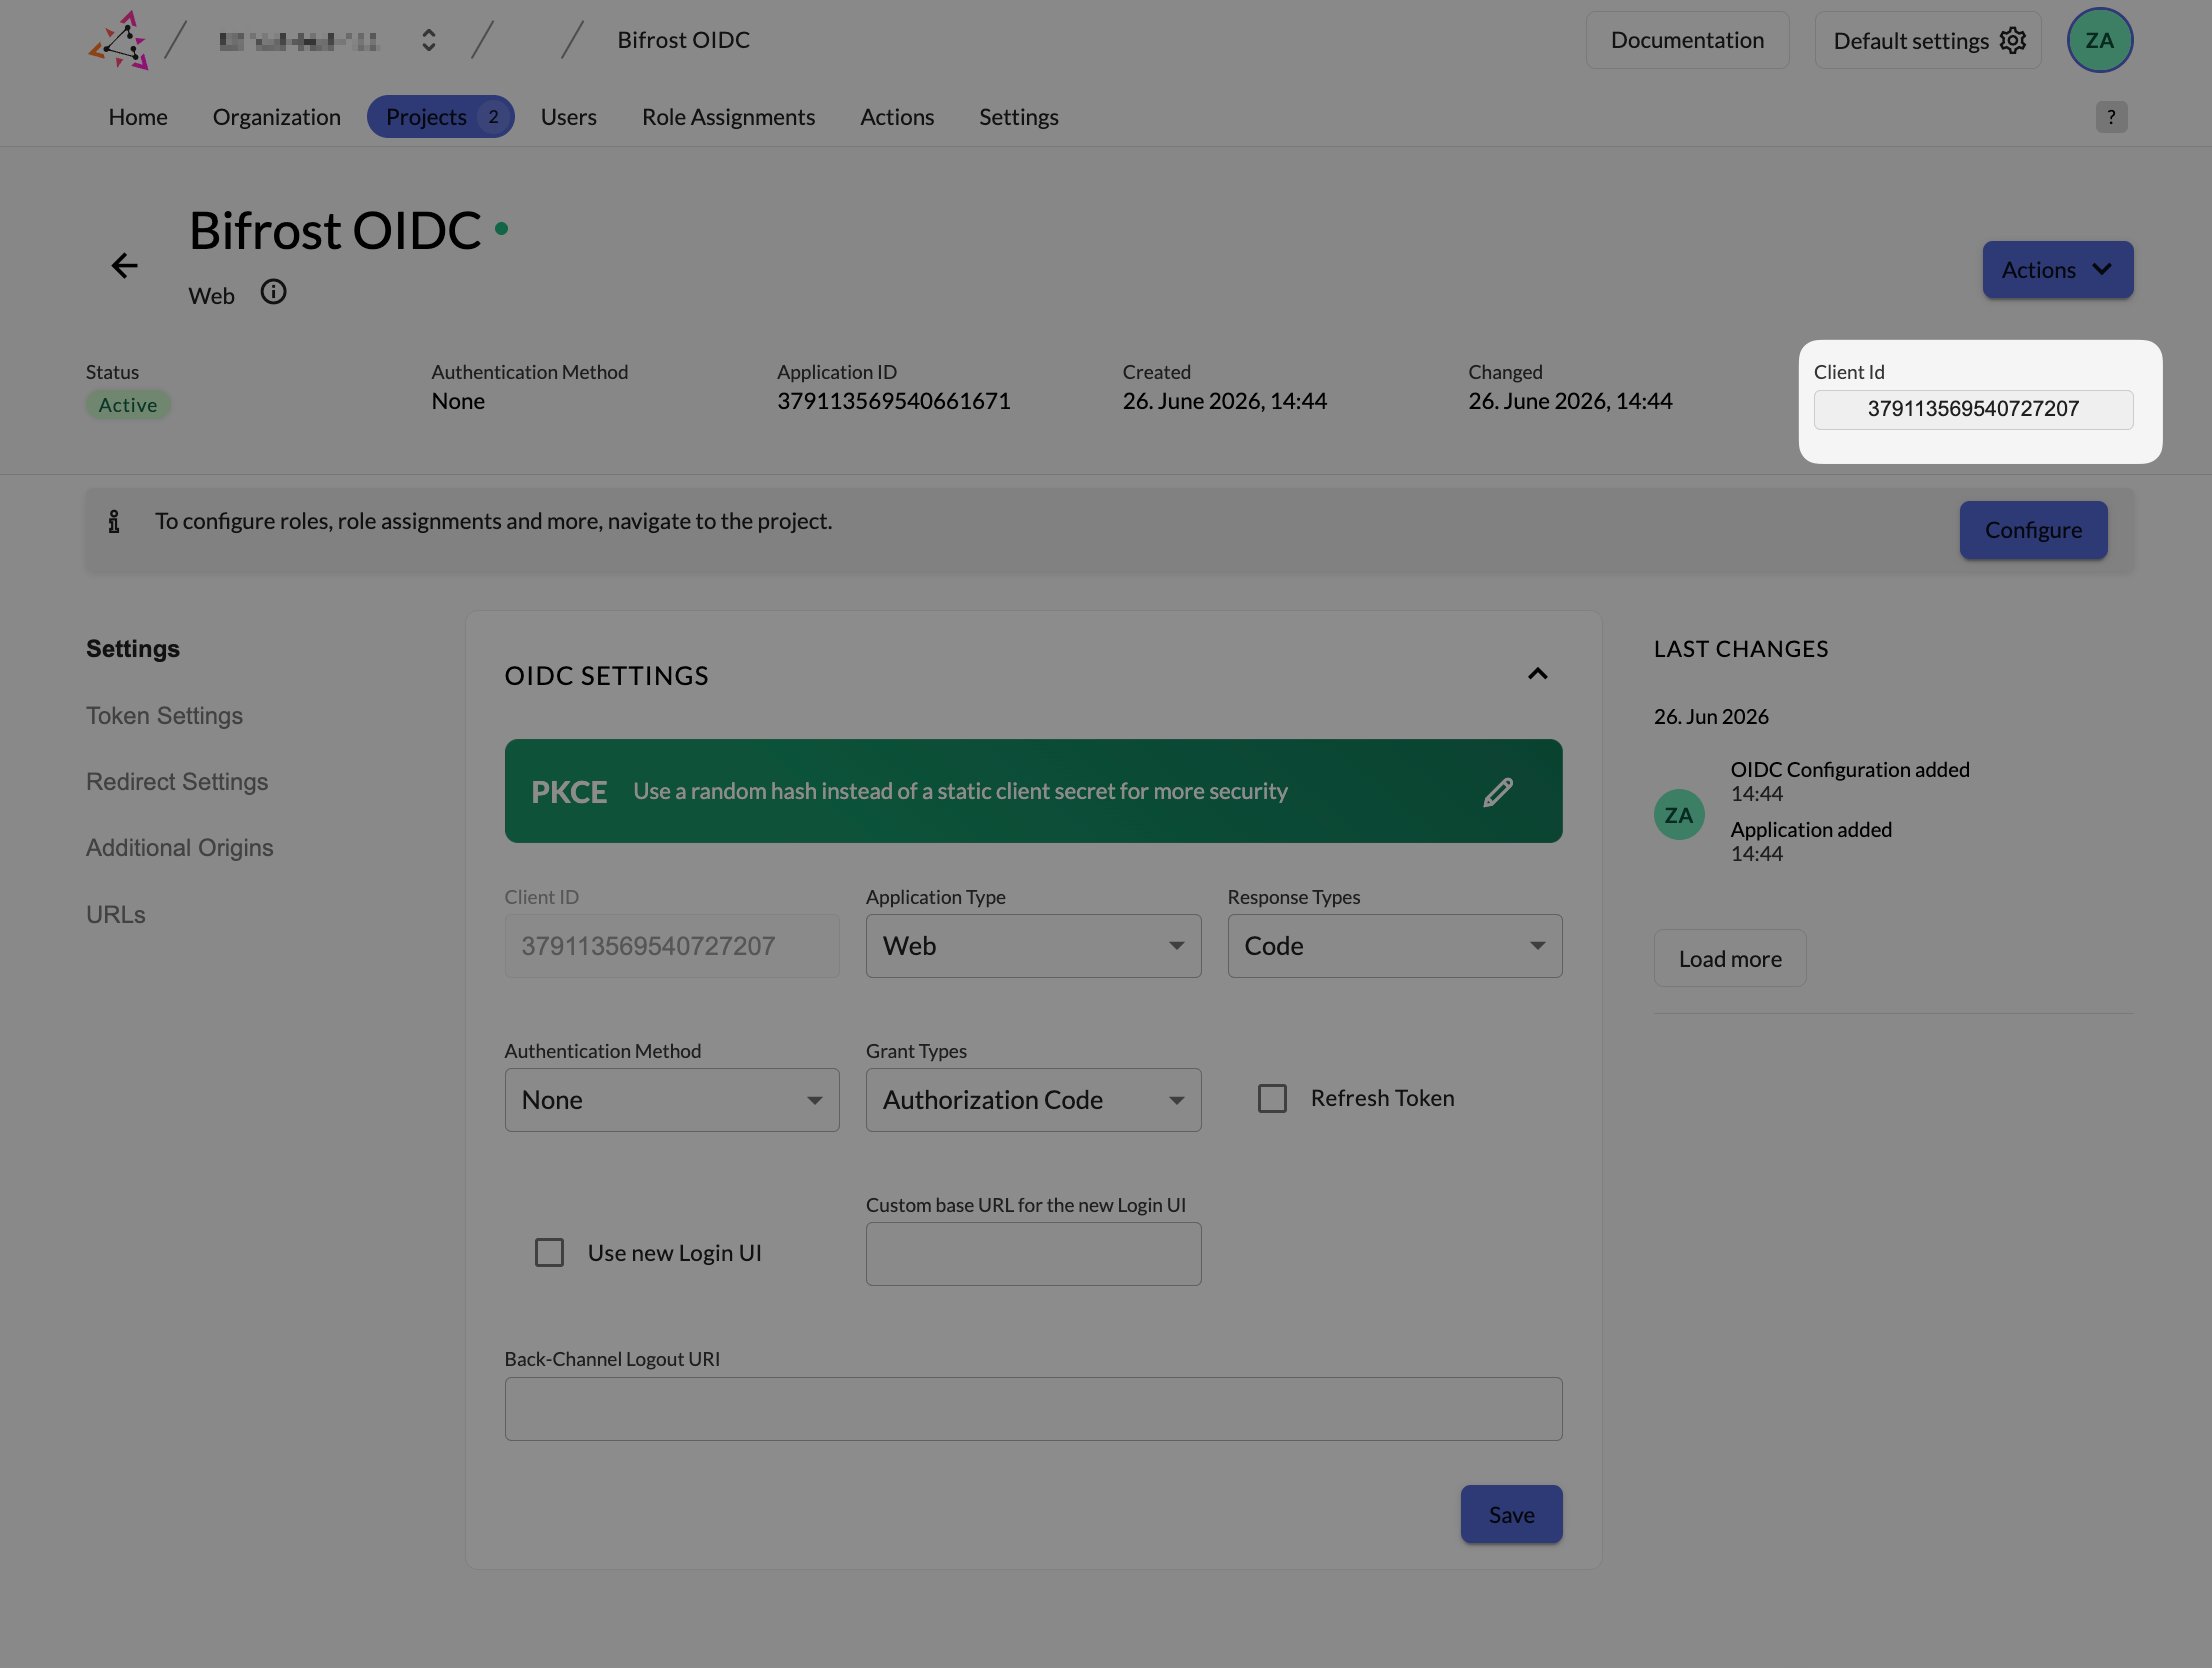
Application OIDC settings - copy the Client ID. You will need it when configuring Bifrost.
Step 2: Enable role claims on the project (optional)
Enable Return user roles during authentication
- Return user roles during authentication - required for role claims to appear in the token
- Only authorized users can authenticate - enforces that every user has at least one project role
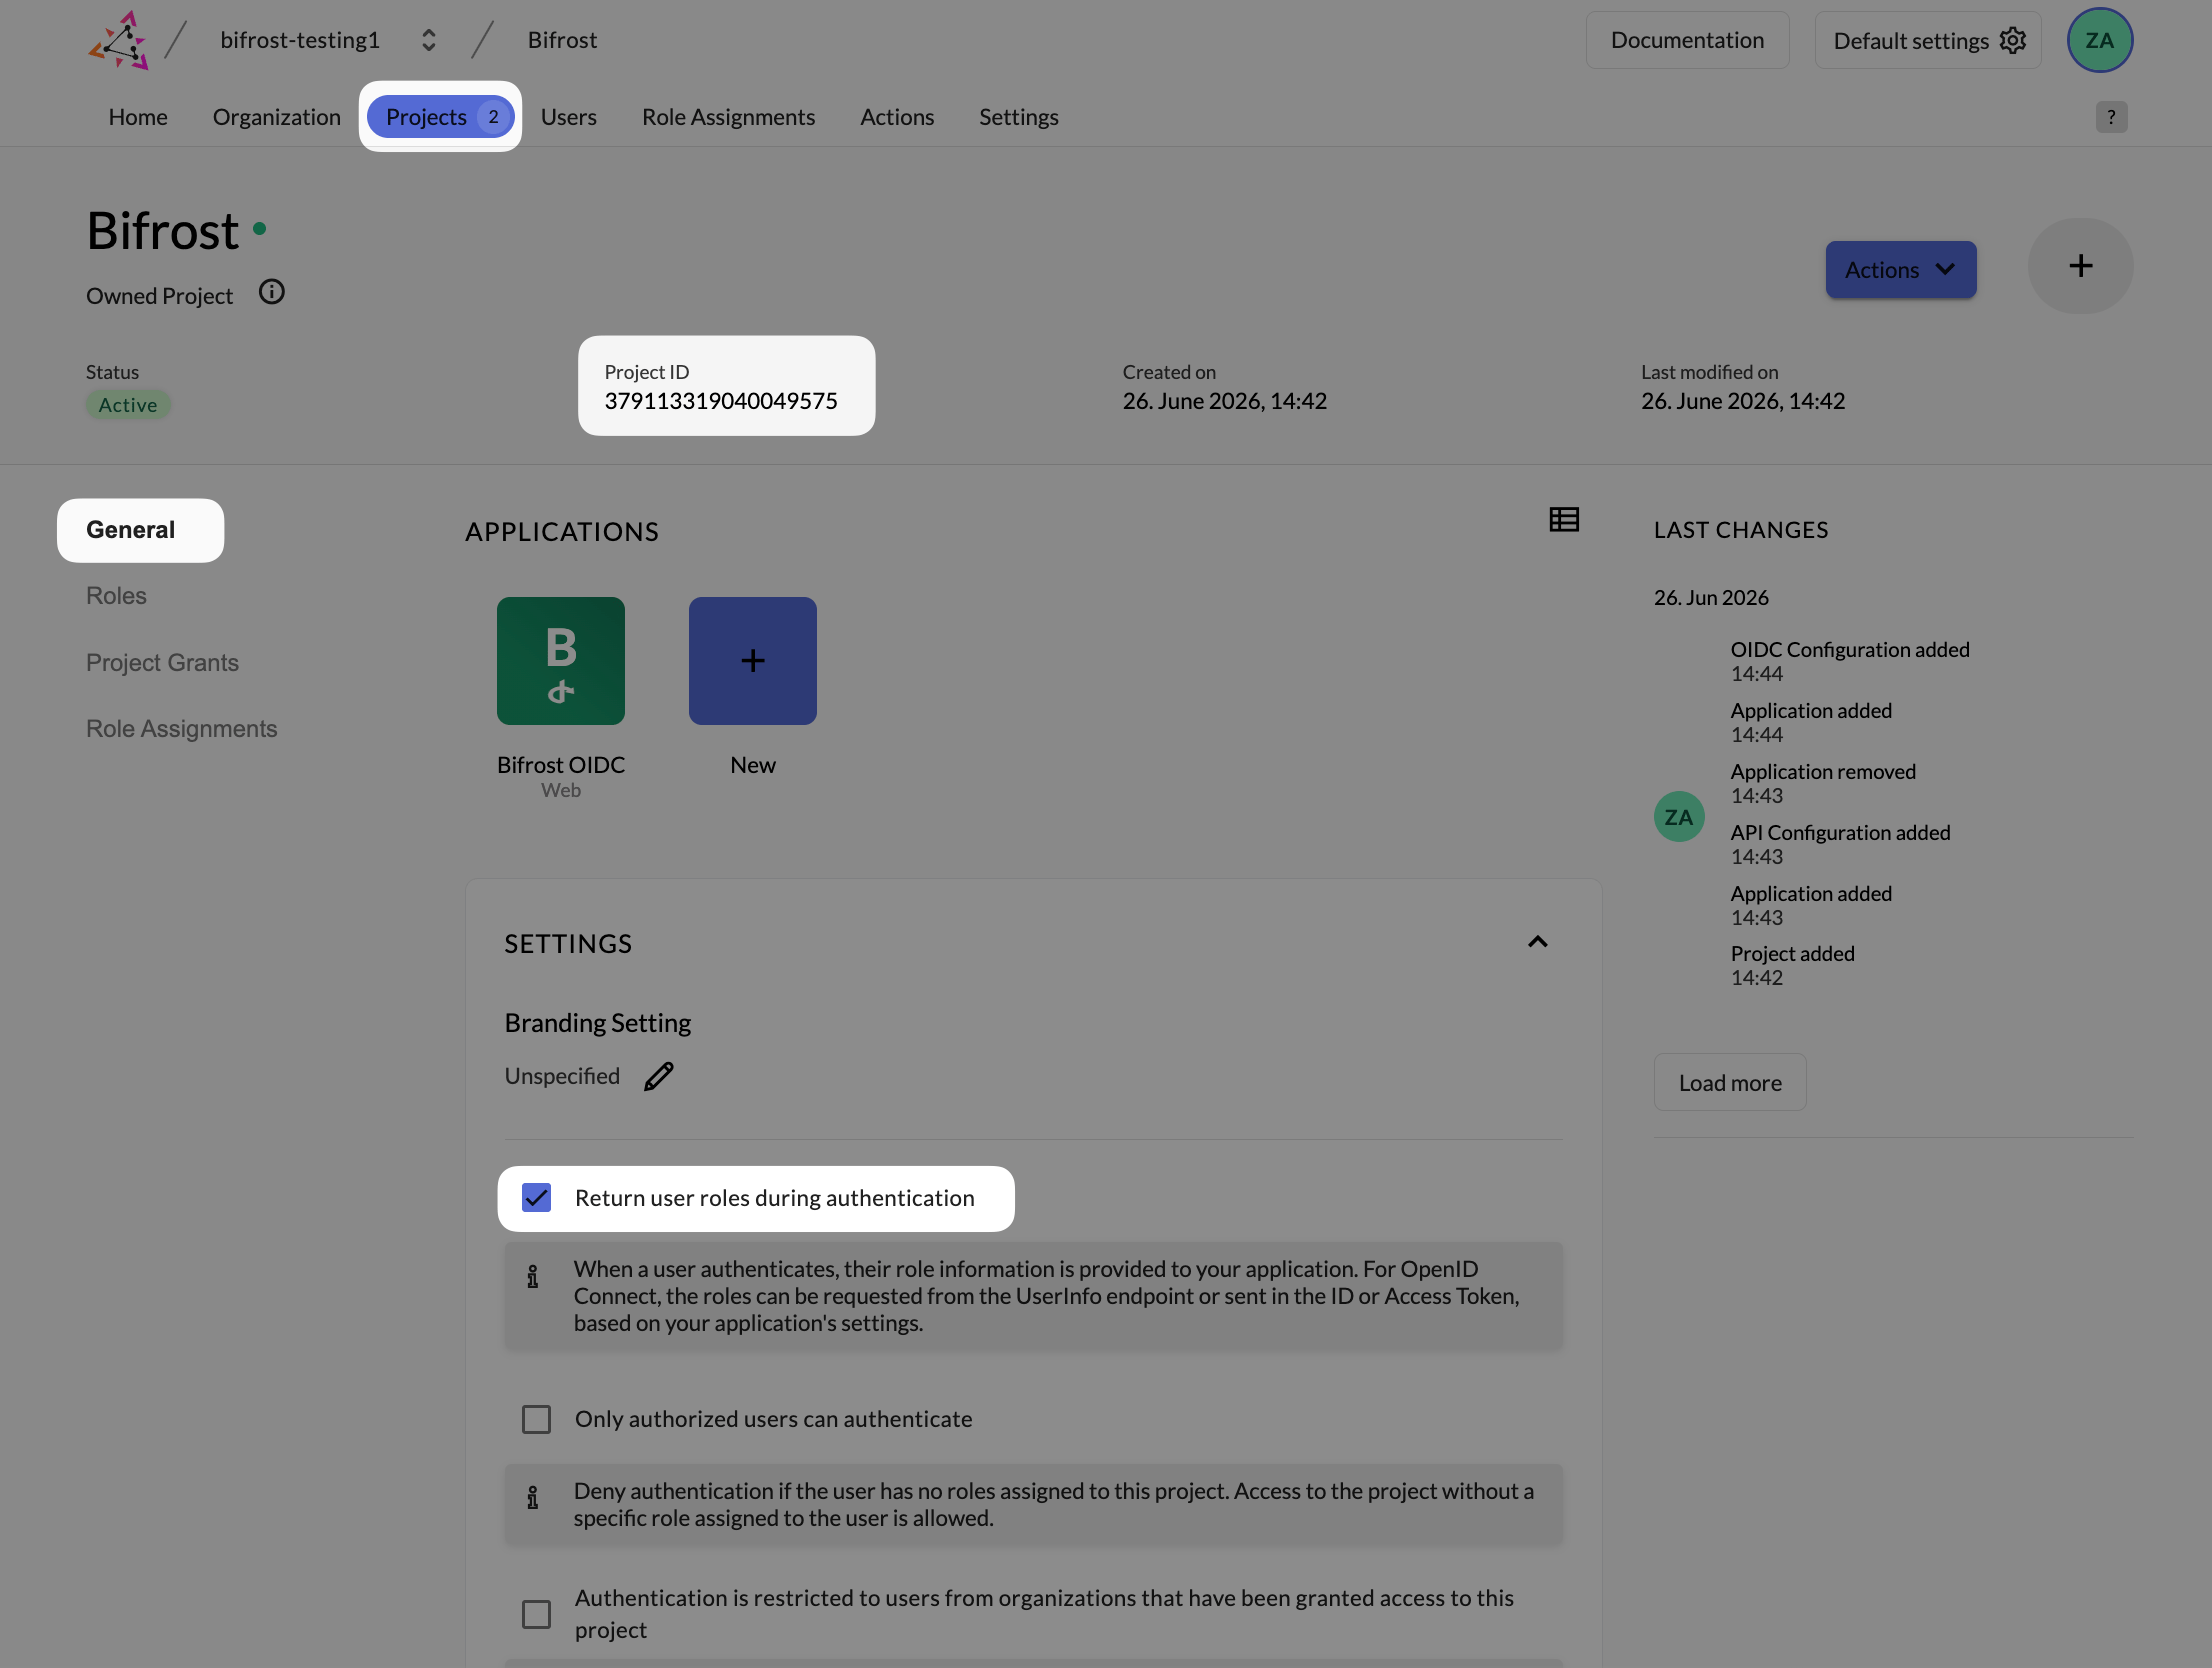
Project General settings - enable Return user roles during authentication to include role claims in the token.
Step 3: Create project roles (optional)
Add roles to the project
Bifrost-Admin, Bifrost-Viewer).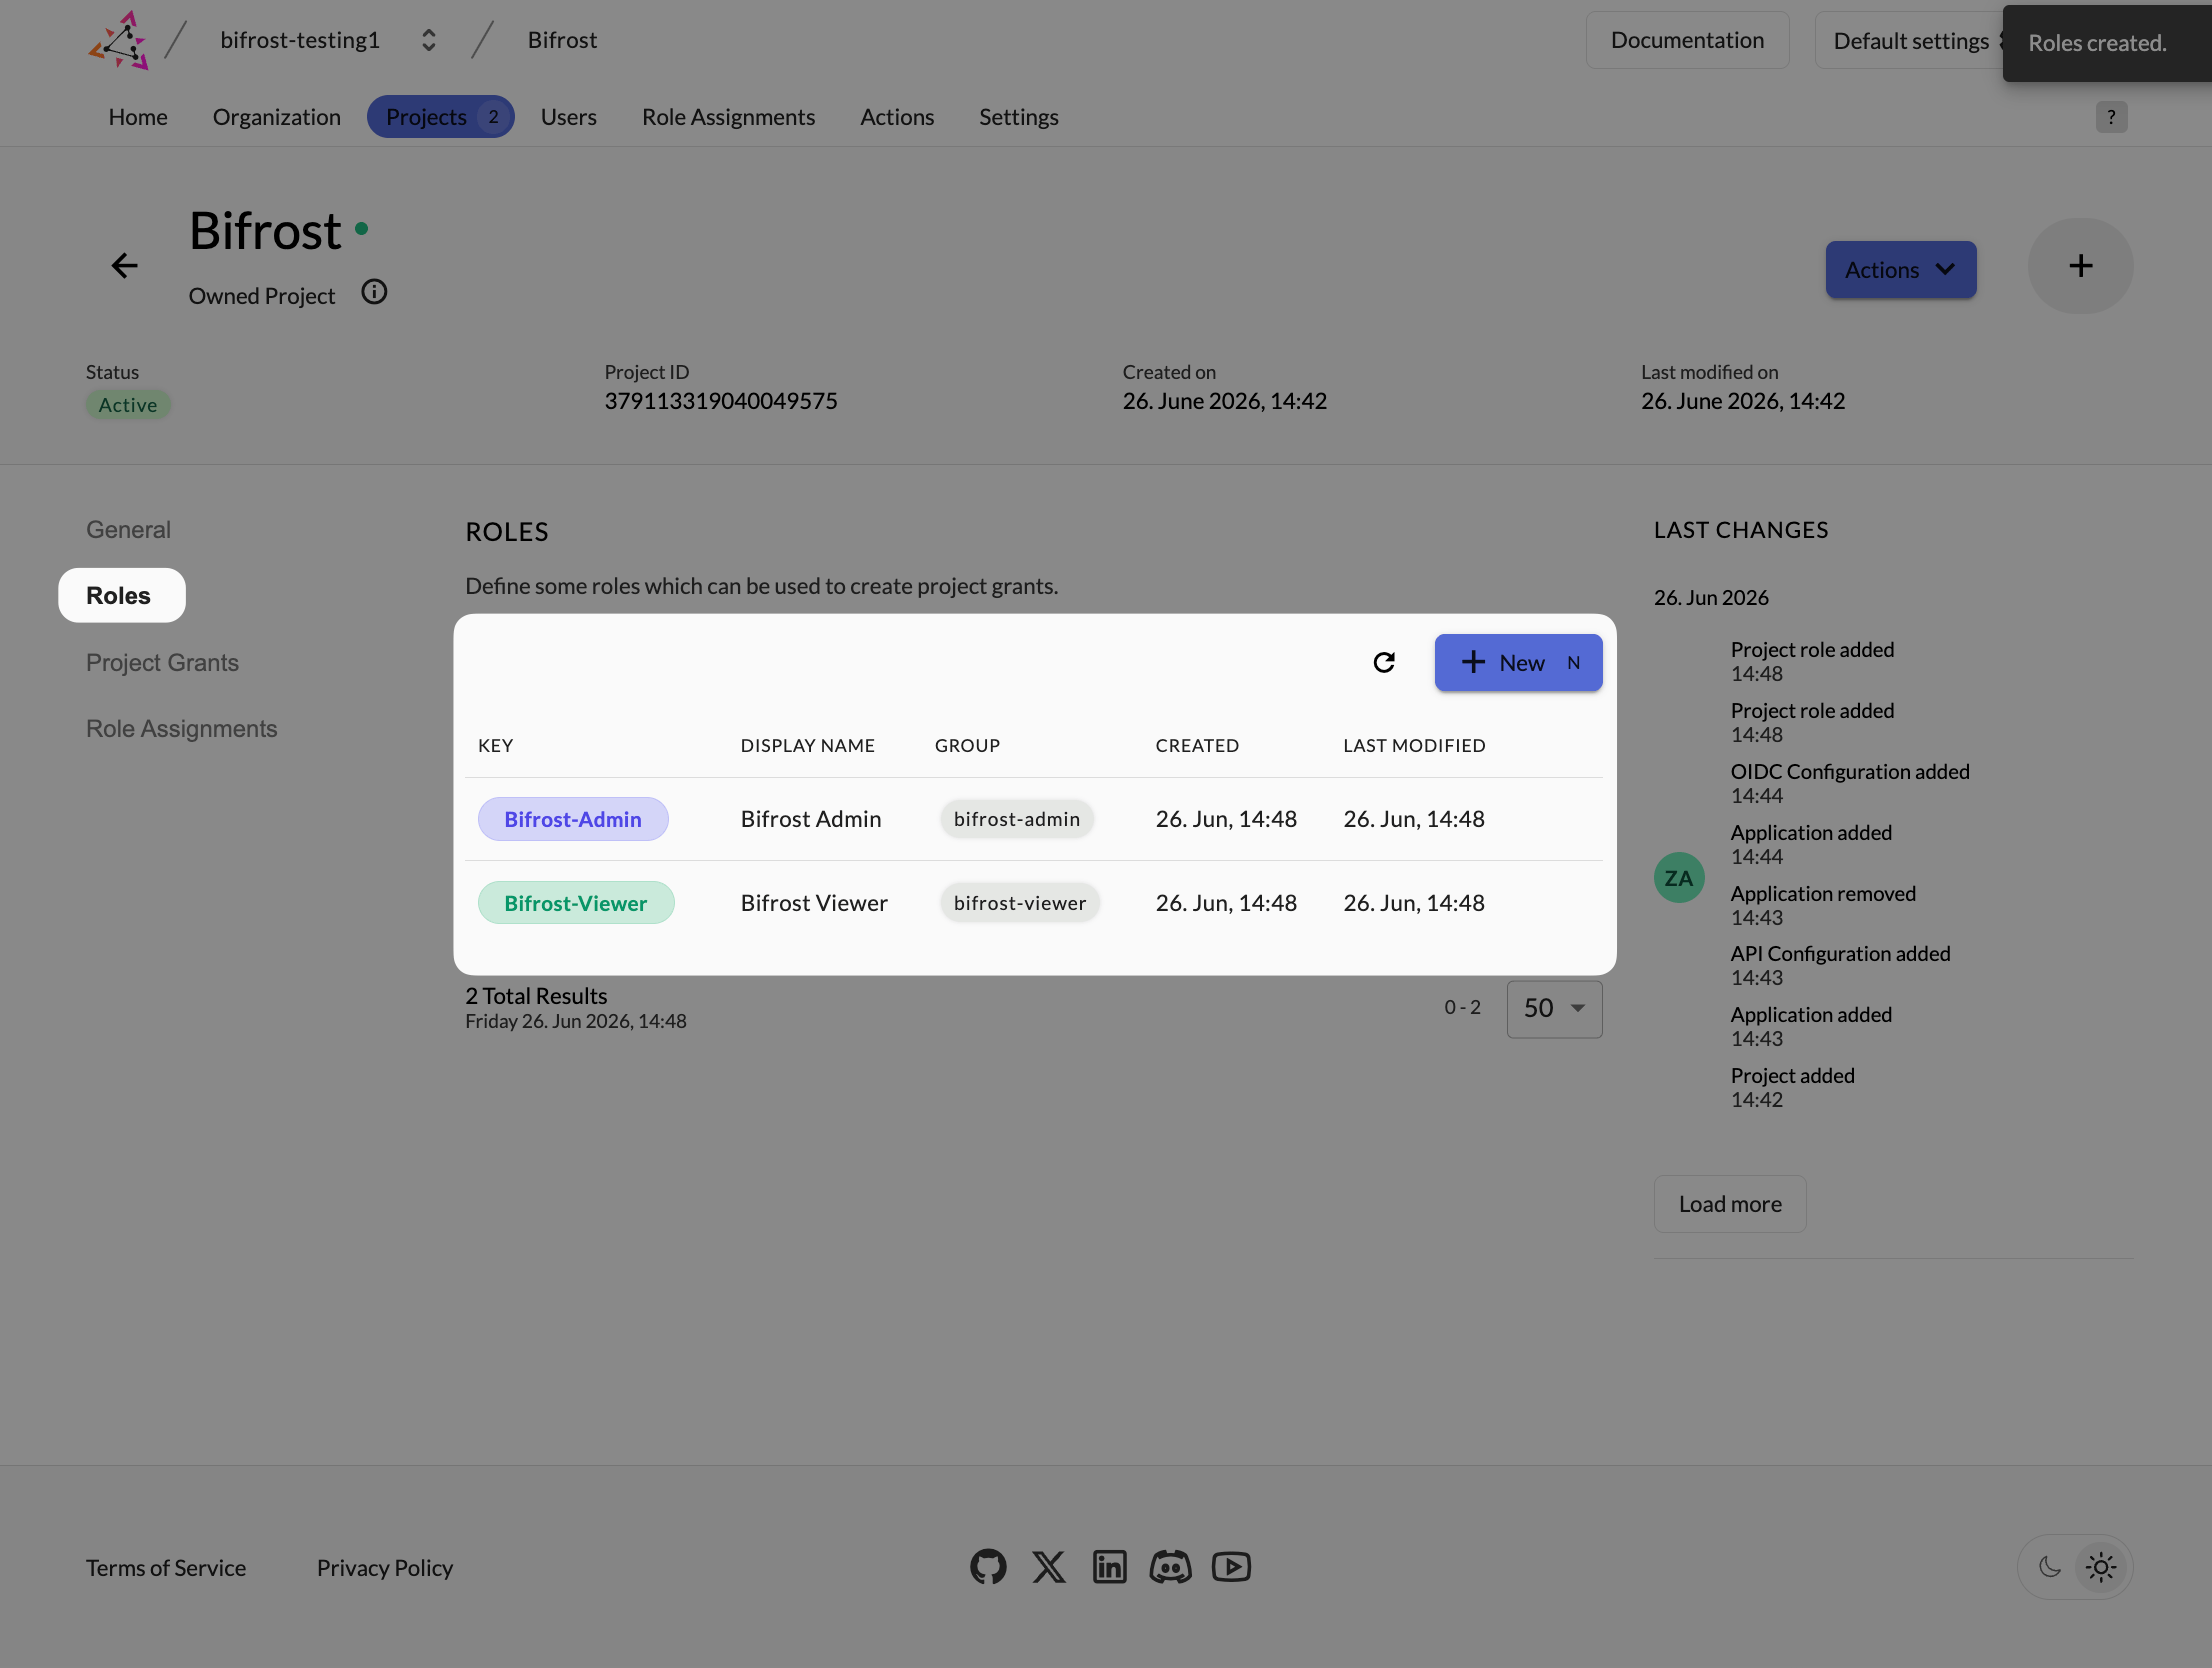
Project Roles - create roles that match the values you will use in Bifrost attribute mappings.
Assign roles to users
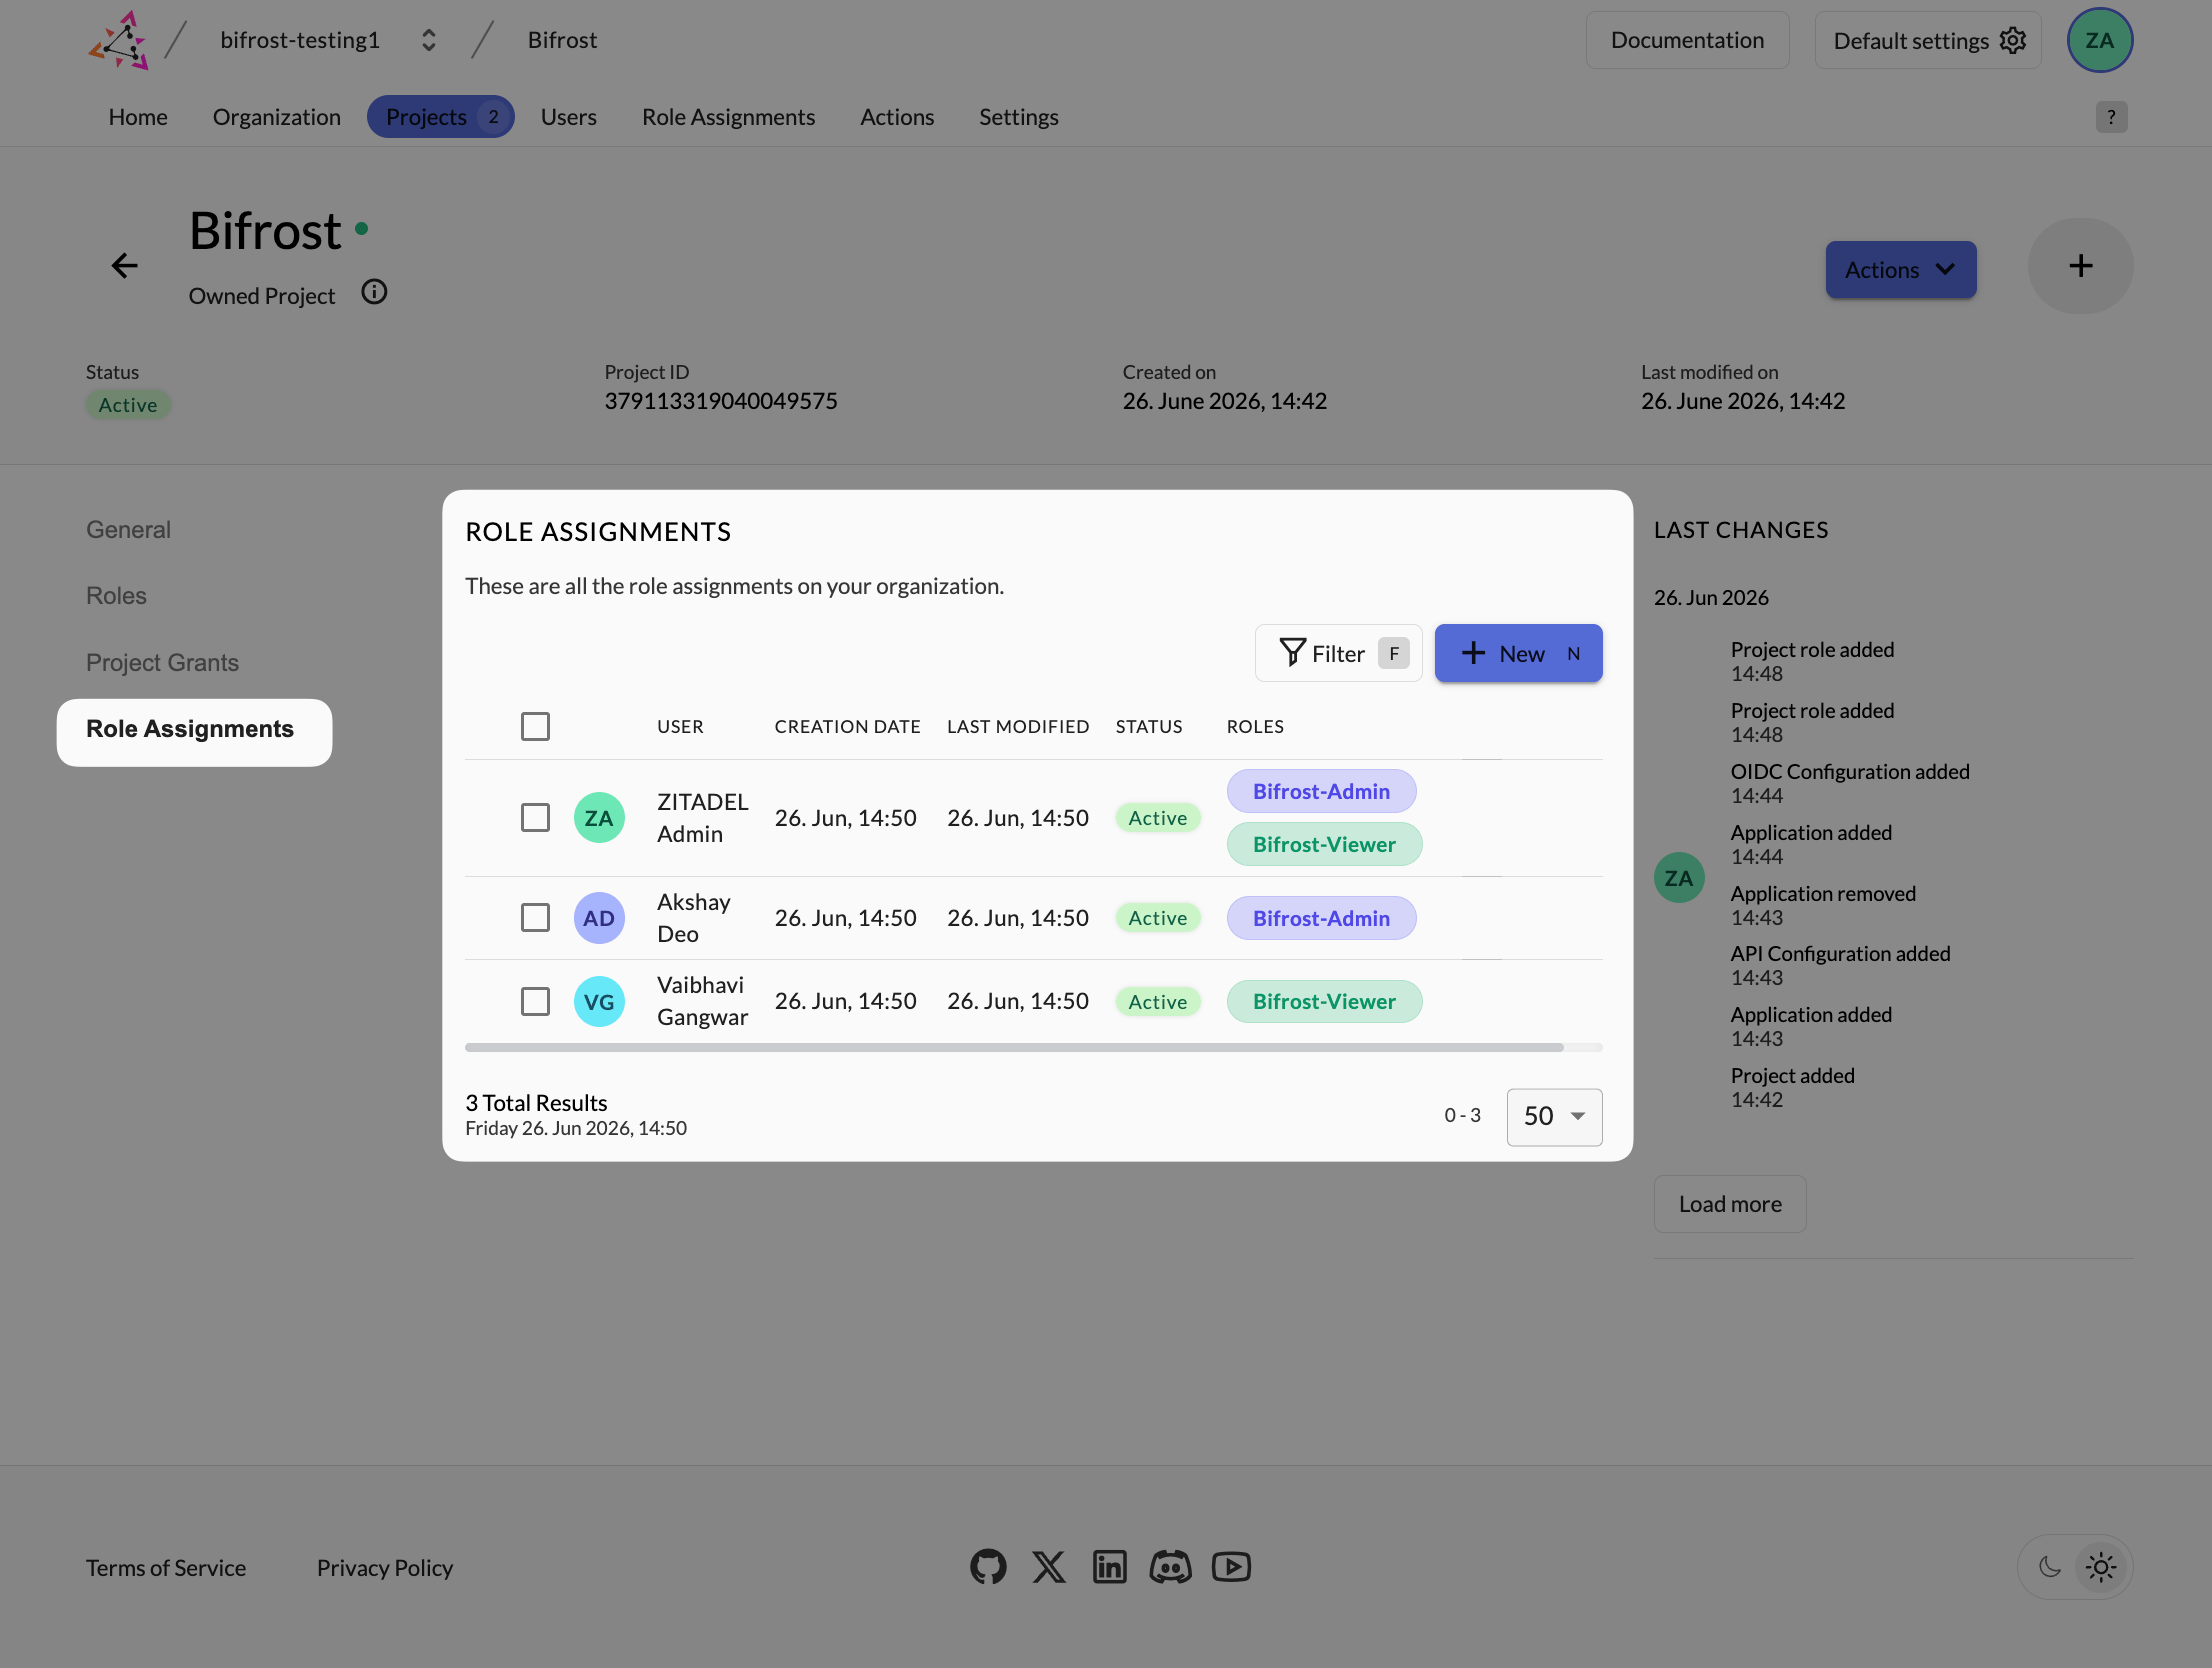
Role Assignments - each user needs at least one project role authorization for the role claim to appear in their token.
Step 4: Configure token settings
Set auth token type and enable claims
- Set Auth Token Type to JWT
- Enable Add user roles to the access token
- Enable User Info inside ID Token
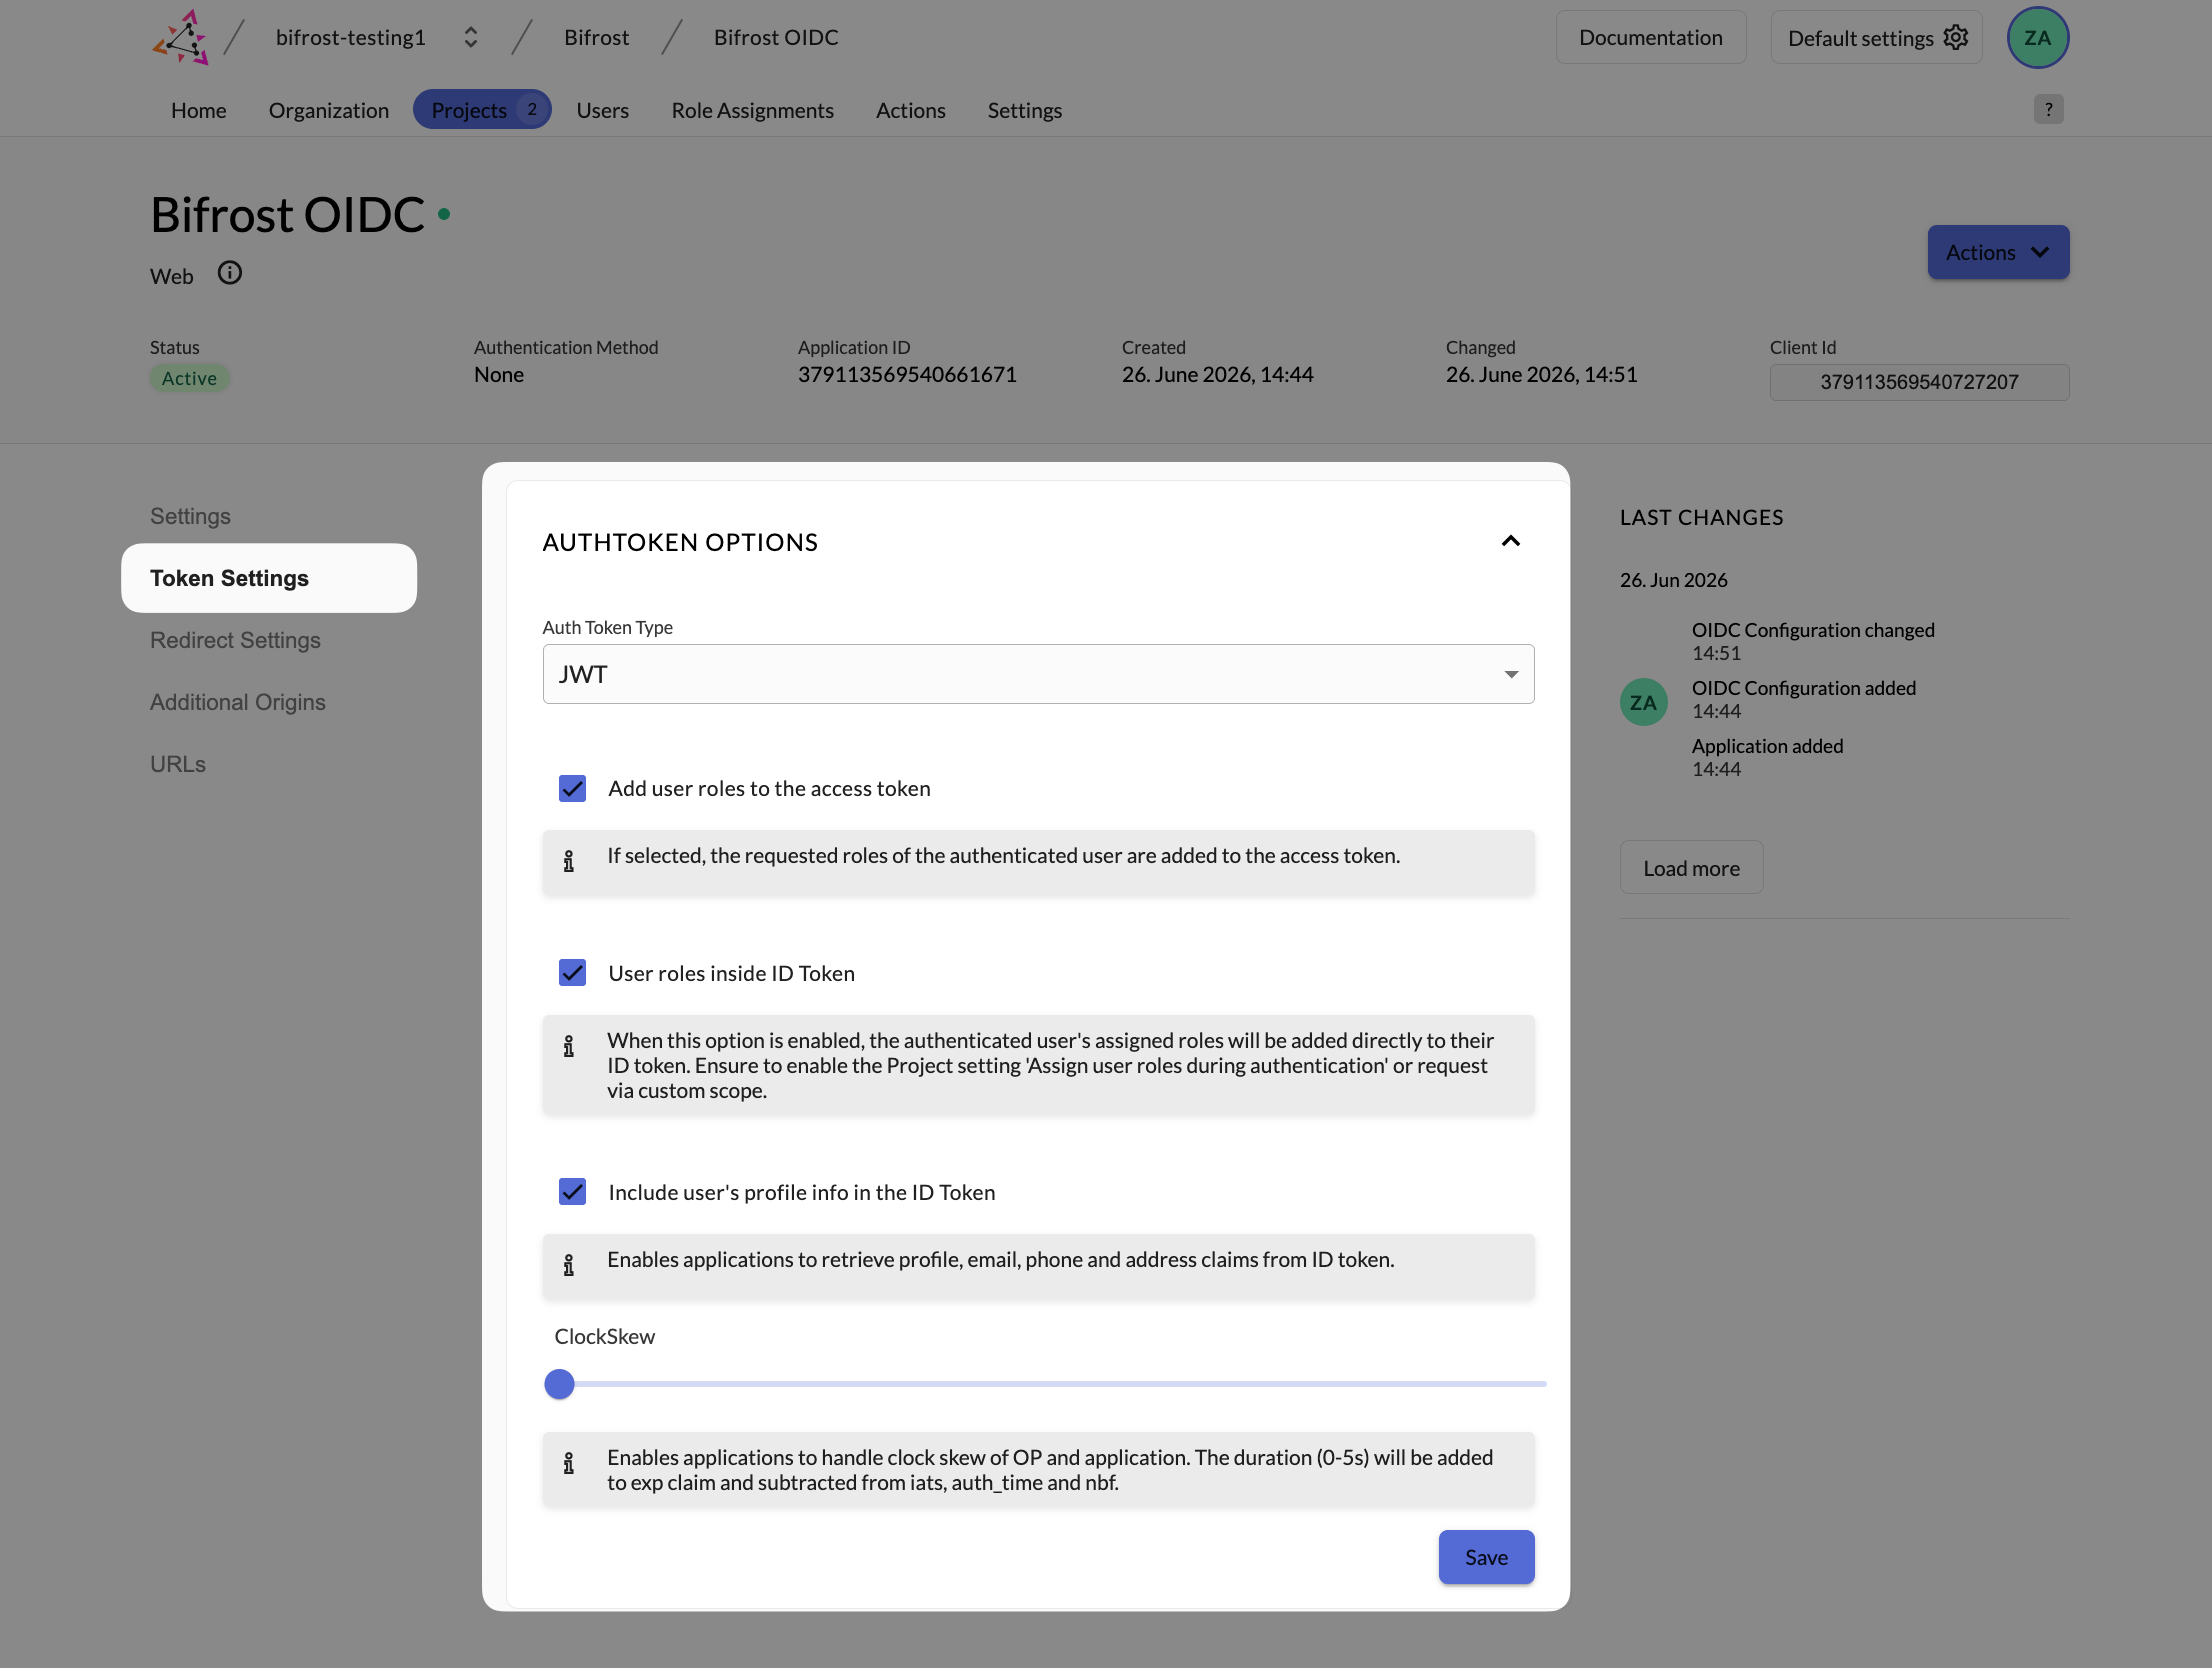
Token settings - set JWT token type and enable roles and profile info in the ID token.
Step 5: Create a service account for bulk sync (optional)
Create the service account
Bifrost Service Account) and create it.Generate a client secret
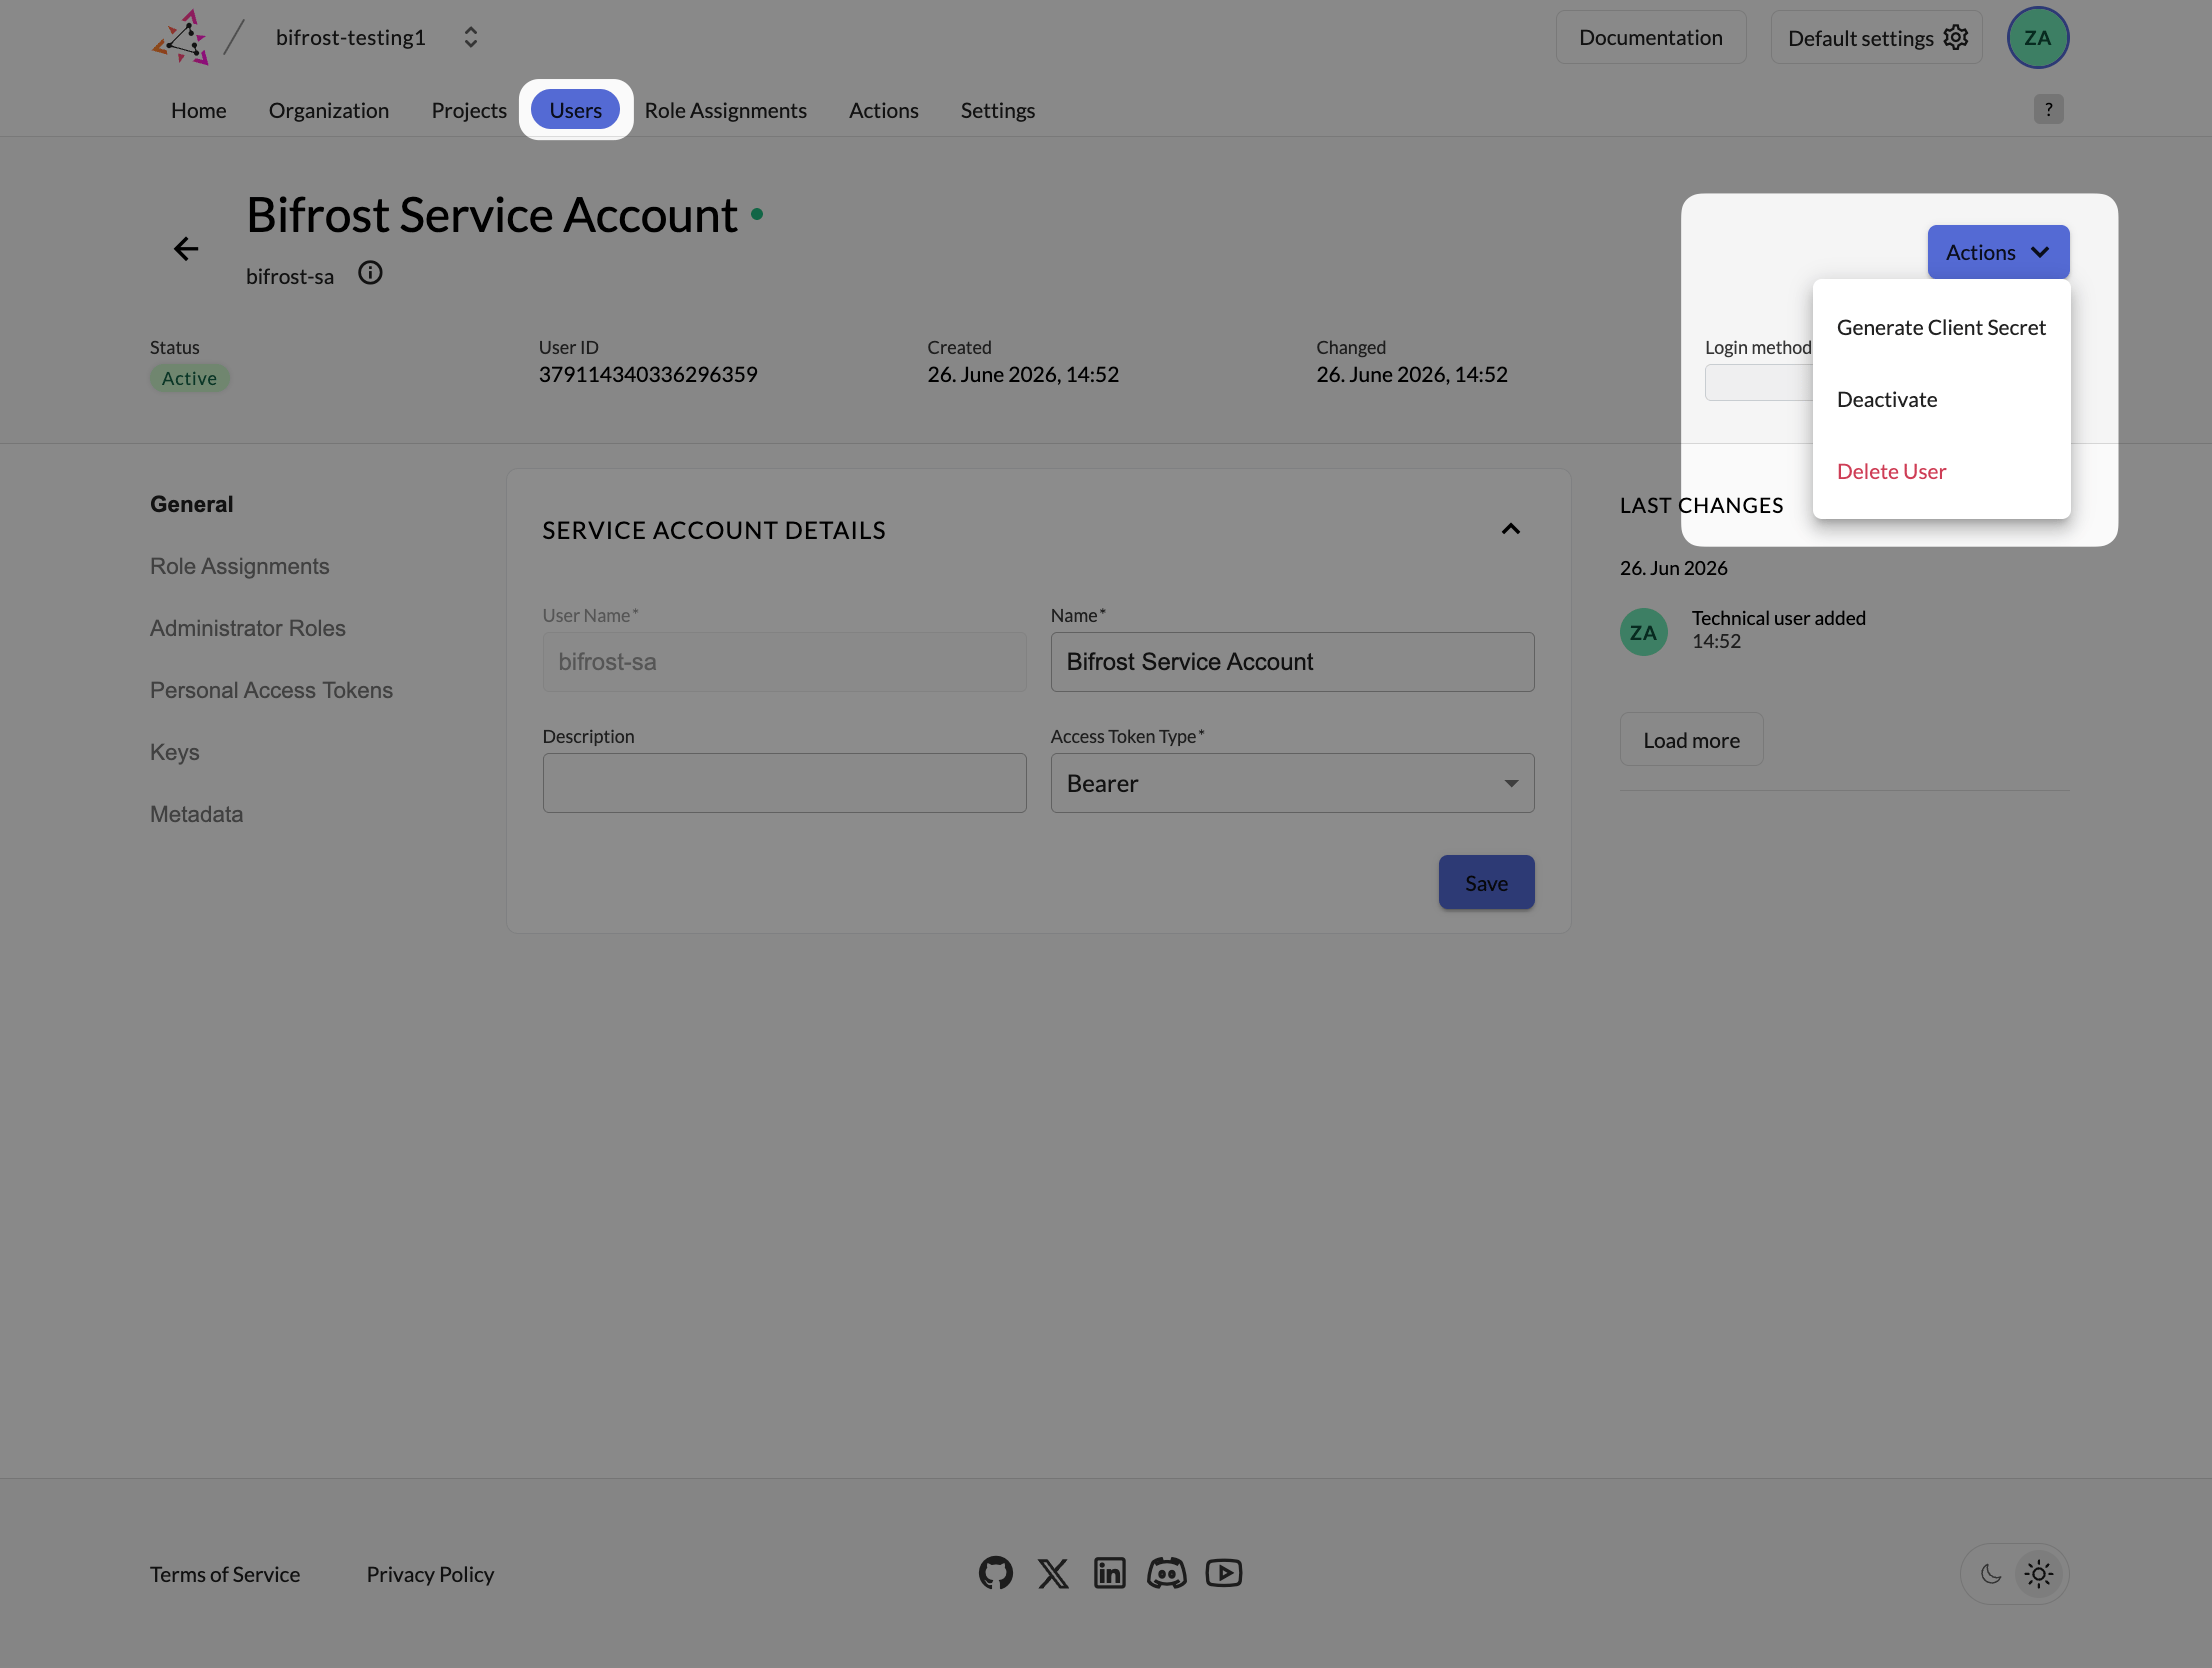
Generate a client secret for the service account - copy both the Client ID and Client Secret immediately.
Grant the service account org access
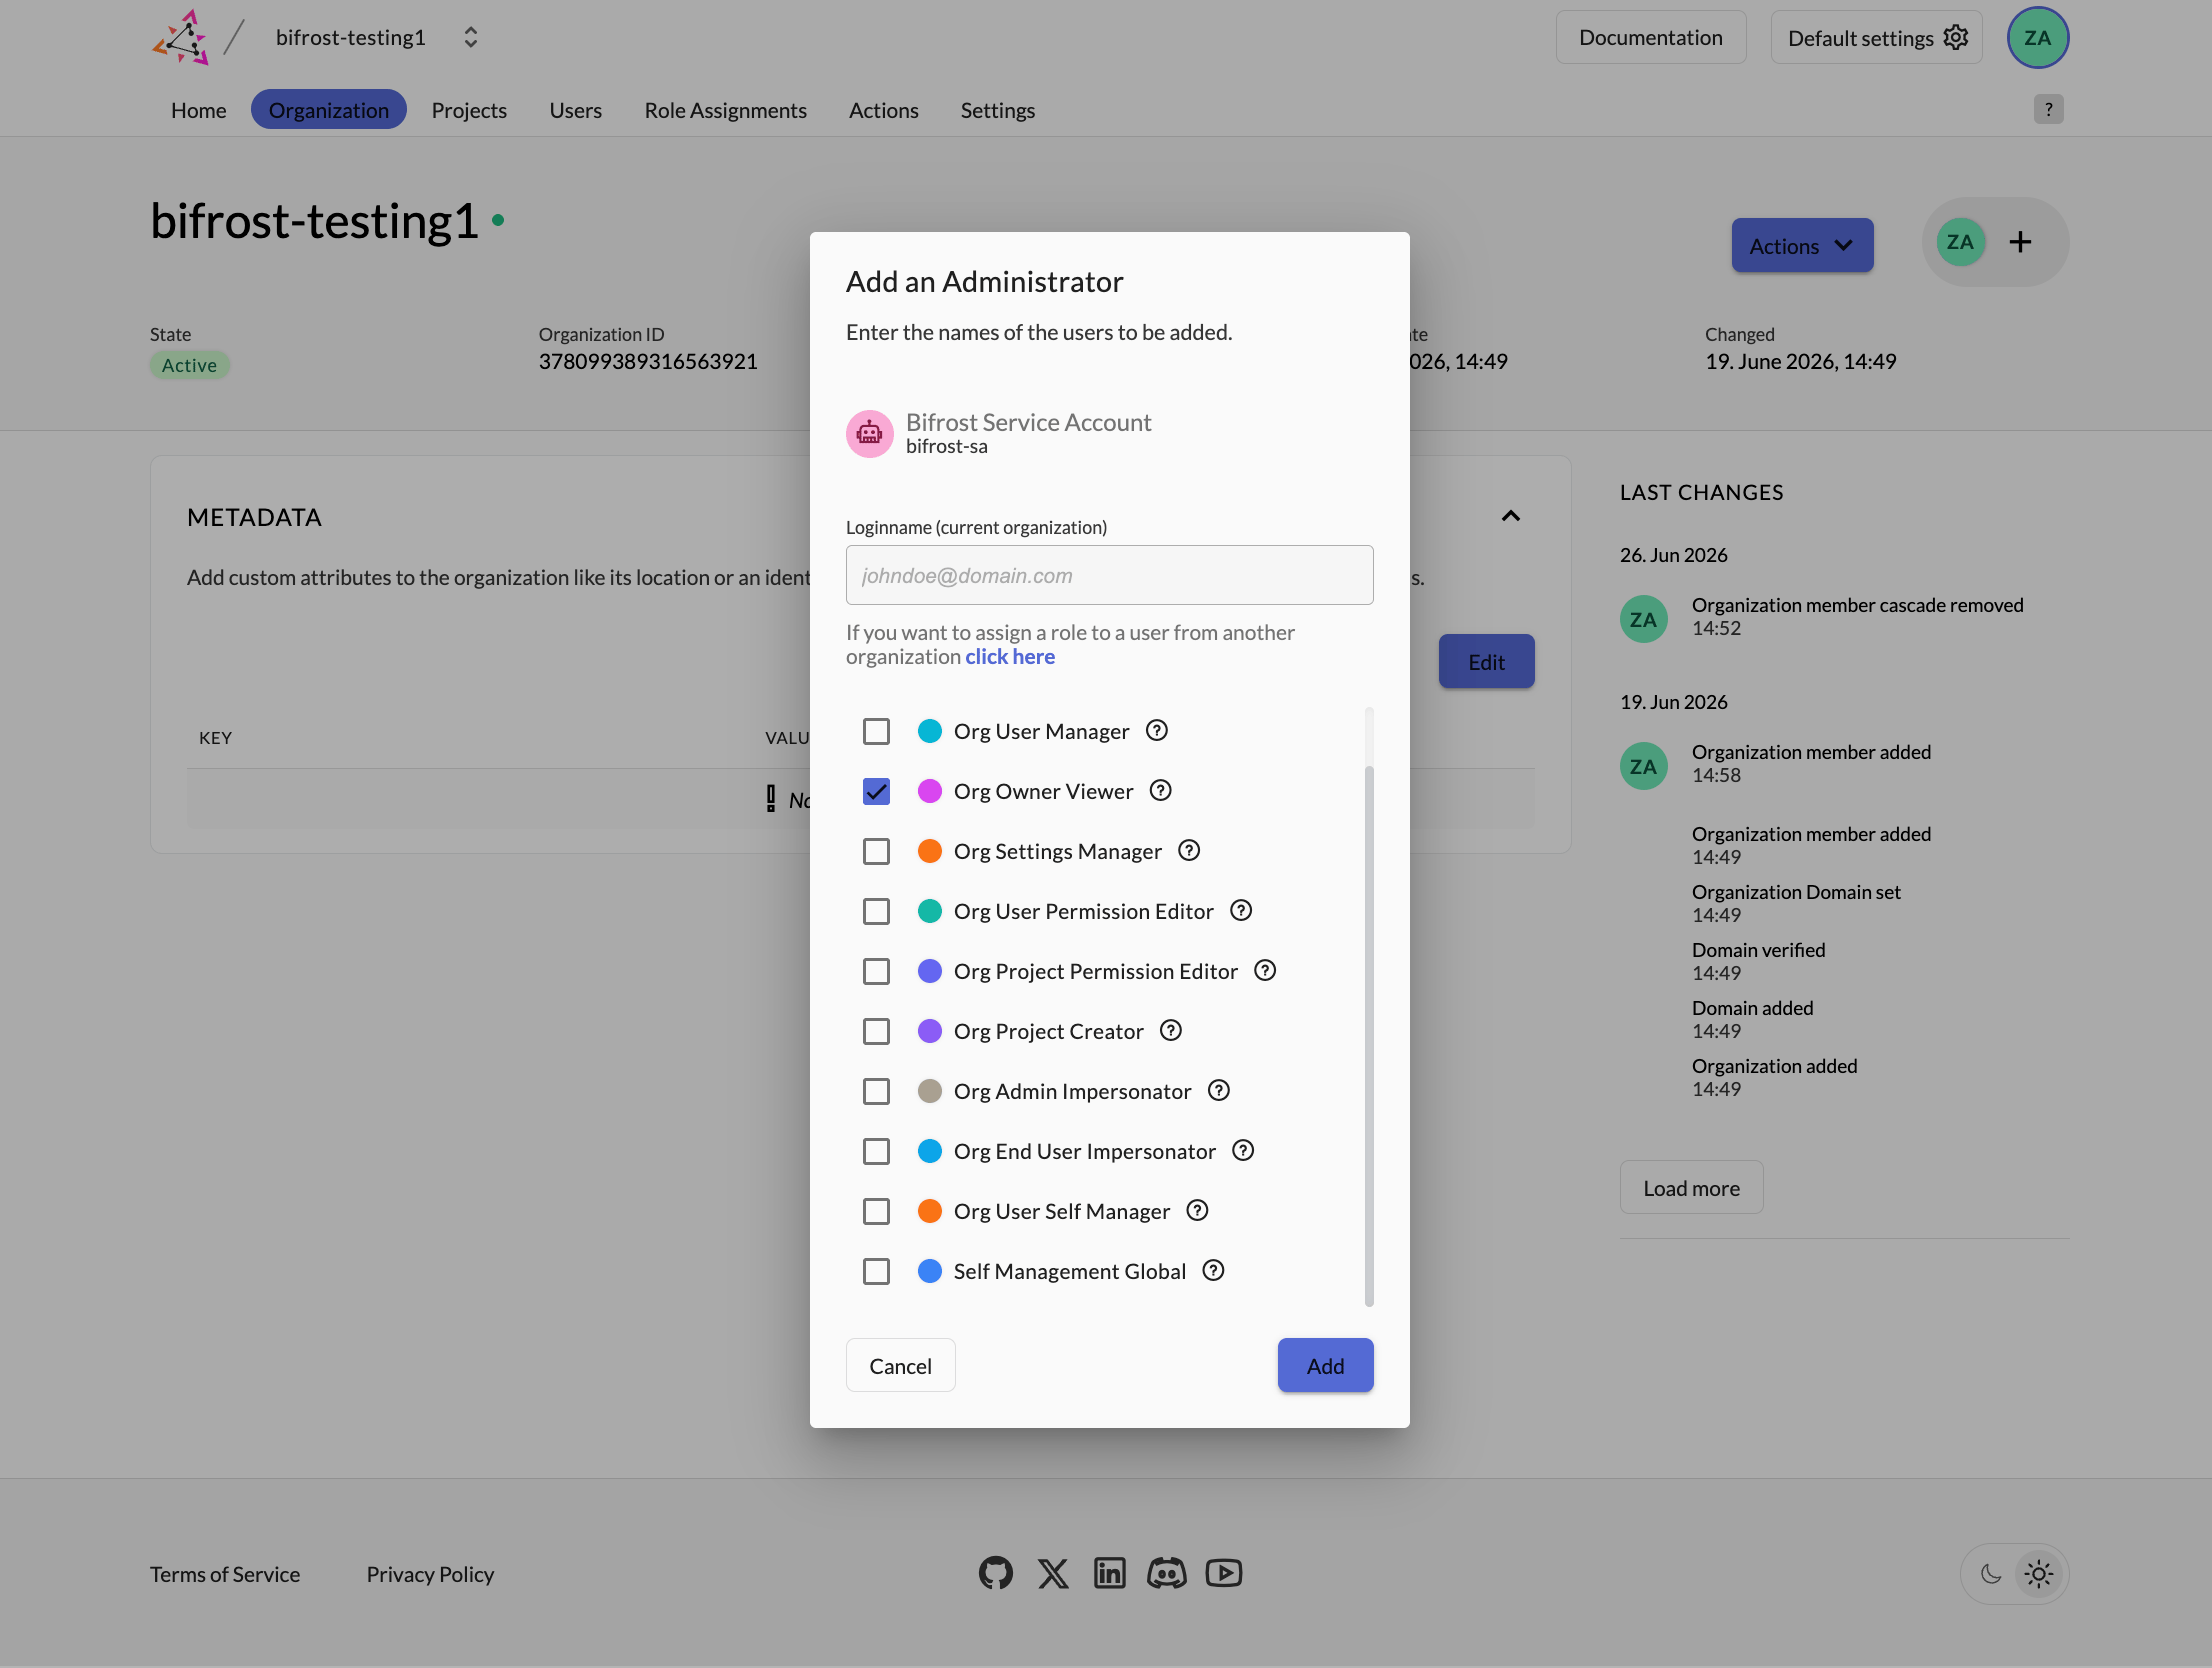
Organization Managers - add the service account as an admin so Bifrost can list users for directory sync.
Step 6: Configure Bifrost
Open User Provisioning and choose Zitadel
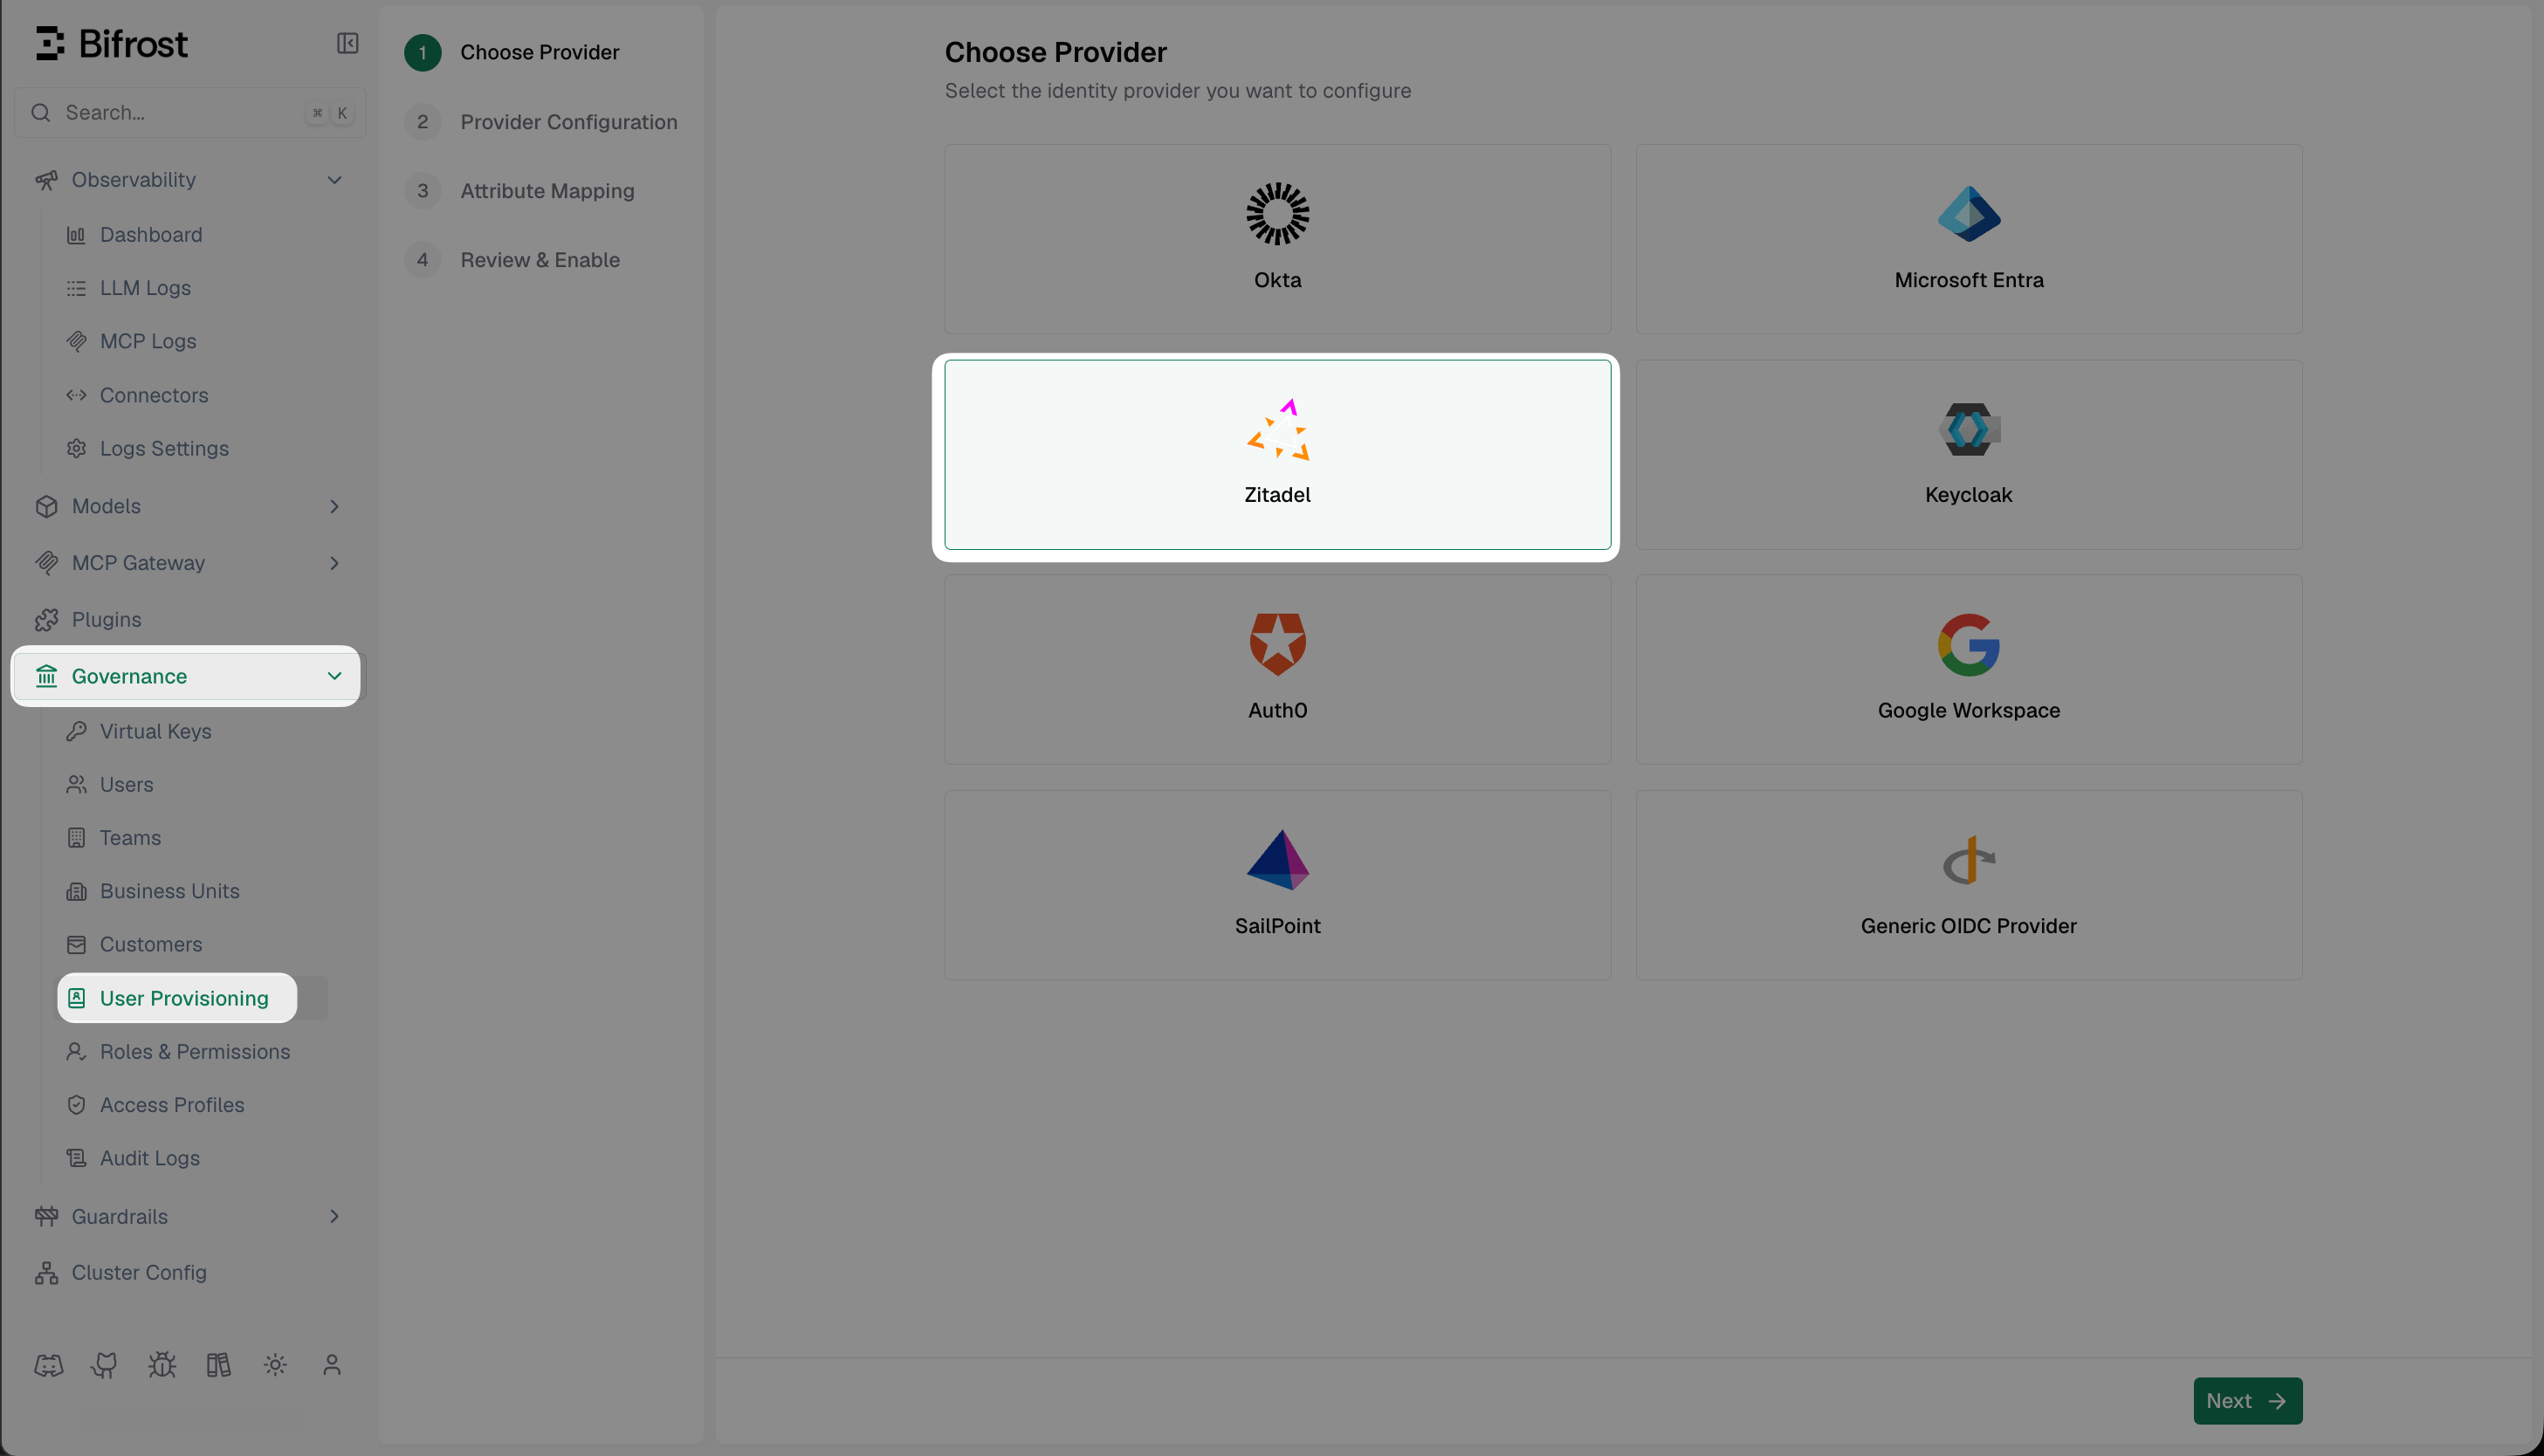
Choose Provider - select Zitadel from the list of supported identity providers.
Fill in the provider configuration
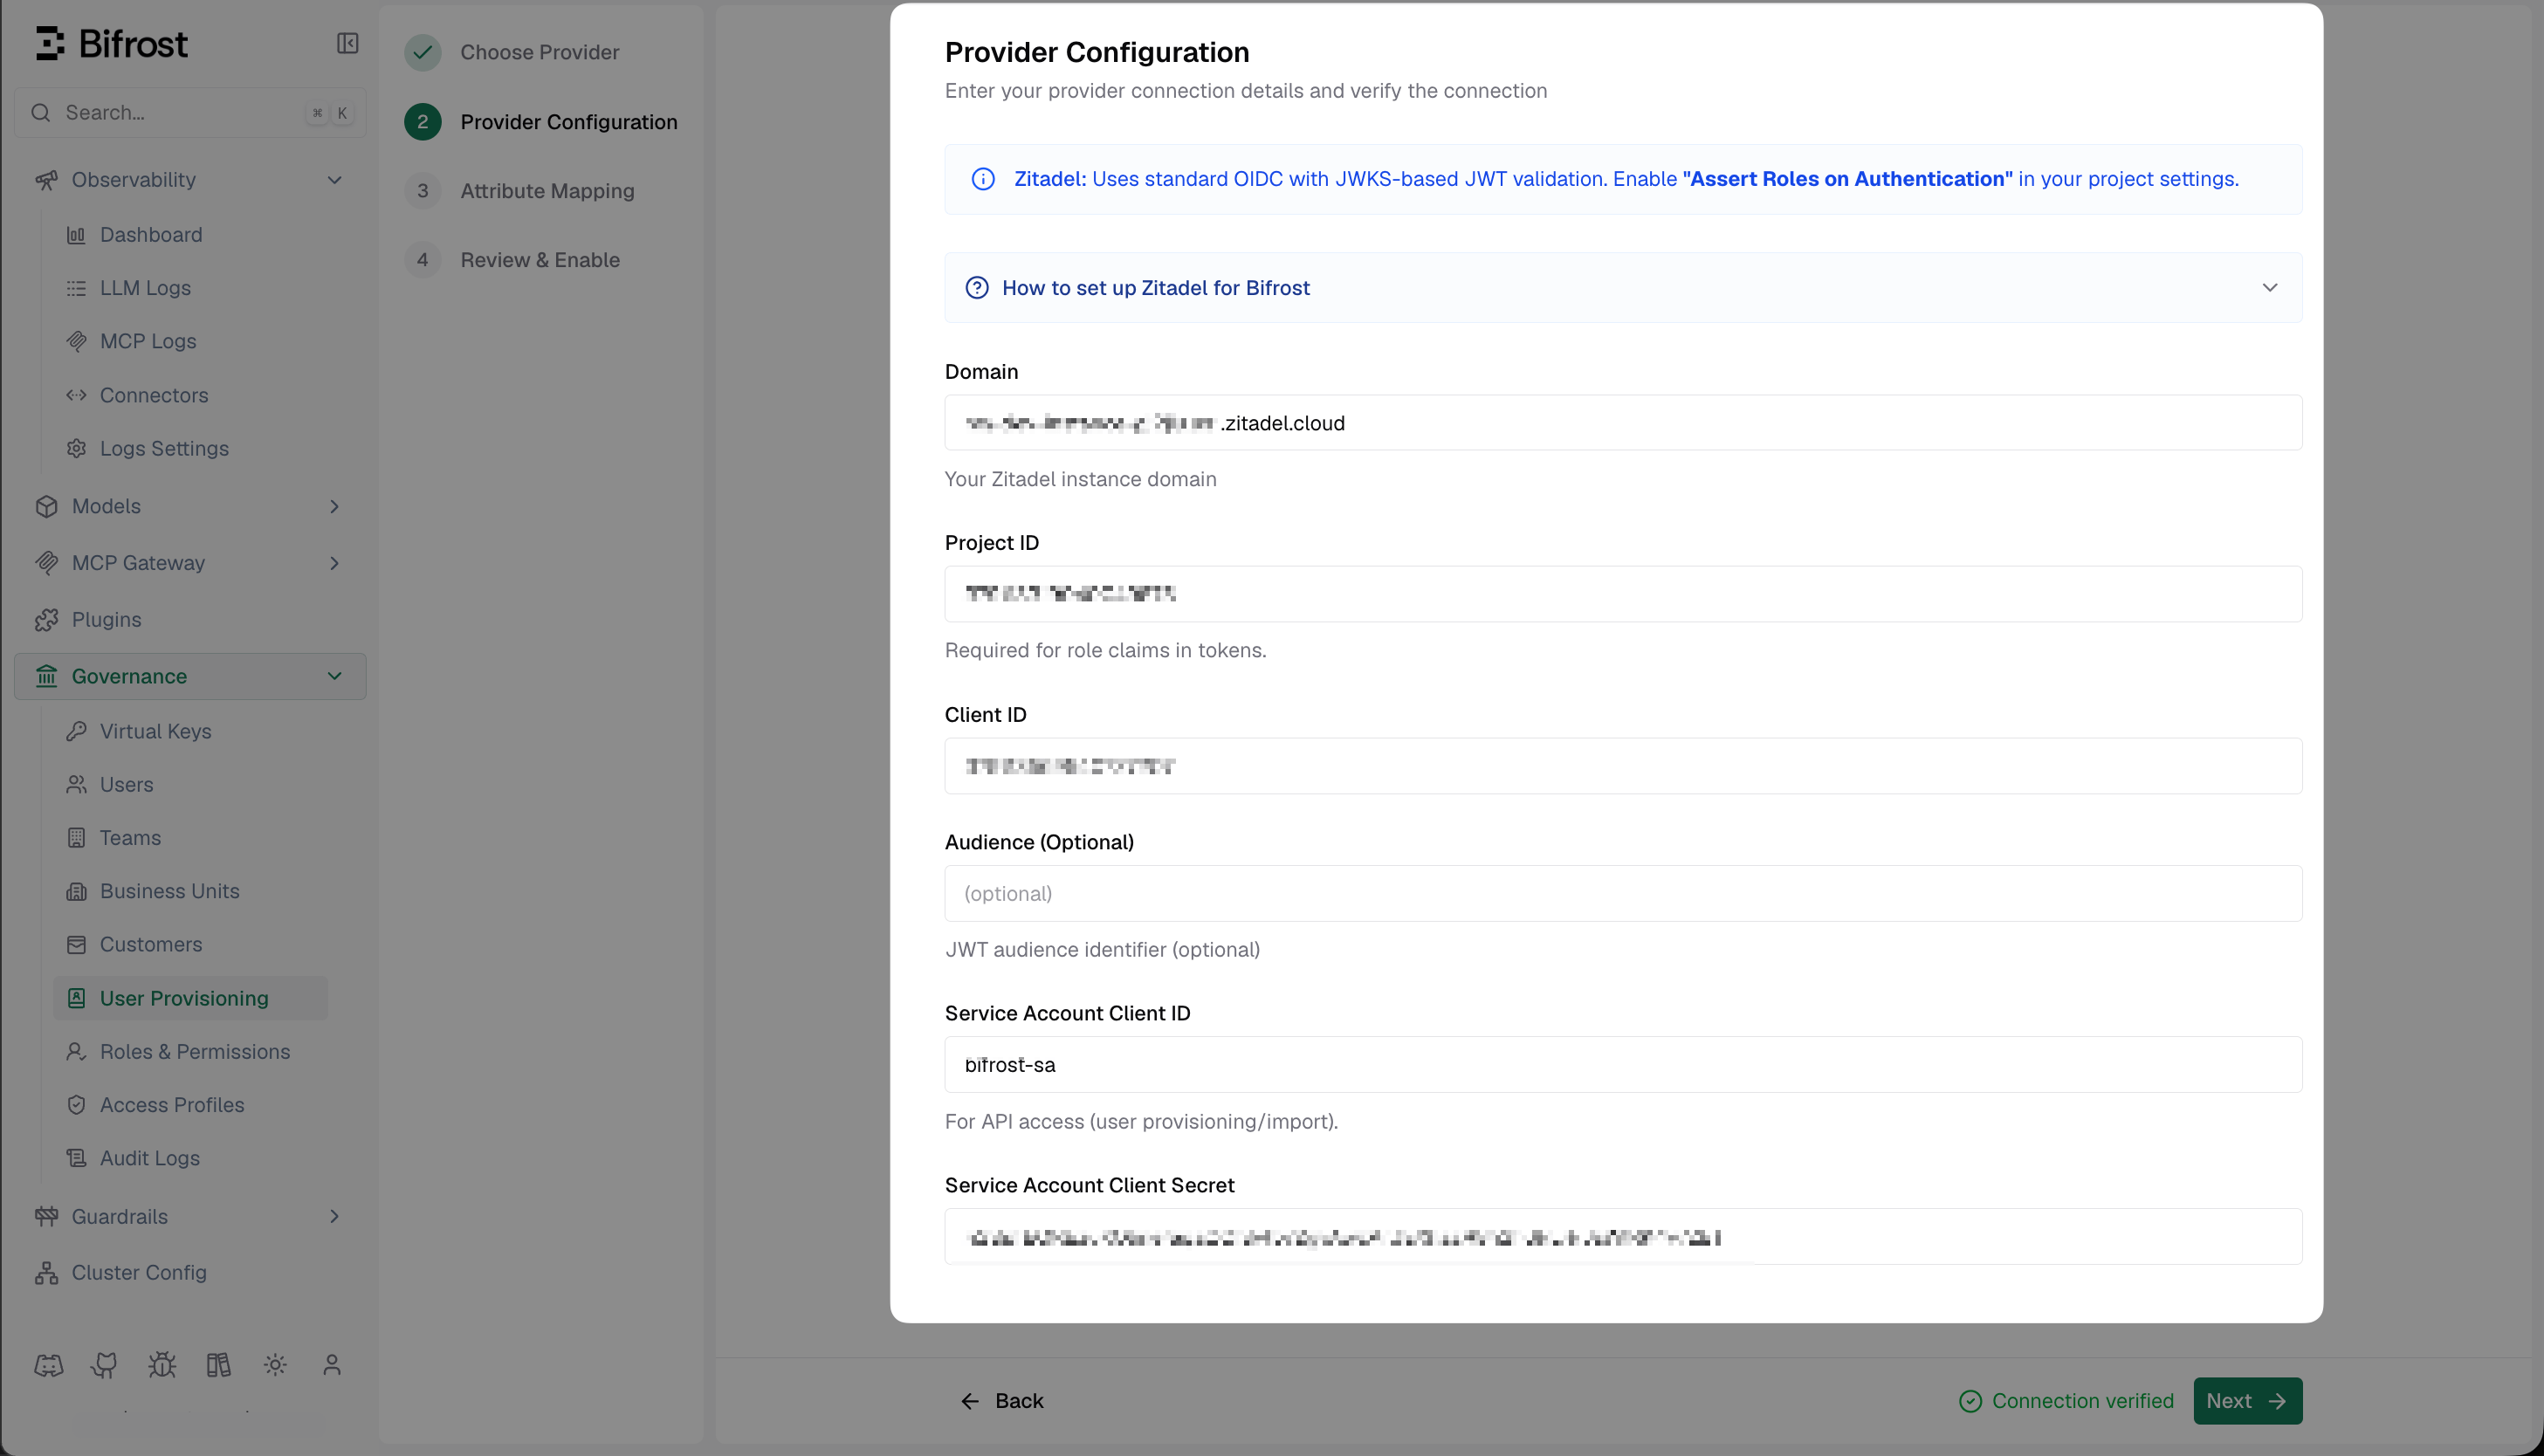
Provider Configuration - enter your Zitadel domain, Project ID, Client ID, and service account credentials, then verify the connection.
Discover claims
urn:zitadel:iam:org:project:roles claim is present before building your mappings.Set up attribute mappings
- The role with the most permissions (default)
- The first matching role, by list order (drag rows to set priority)
- Use a specific value (e.g.
engineering) to map that exact claim value to a named Bifrost team - Use
*as the value to sync the claim value directly as the team name - Use
${*}to extract part of the string - e.g.Bifrost Playground: ${*} TeammatchesBifrost Playground: Alpha Teamand creates team Alpha
- Use a specific value (e.g.
platform) to map that exact claim value to a named Bifrost business unit - Use
${*}to extract a substring as the business unit name - e.g.Bifrost Playground: ${*} BUmatchesBifrost Playground: Alpha BUand creates business unit Alpha - When a rule matches, the resolved business unit is assigned to all of that user’s teams
- Manually assigned teams are left unchanged
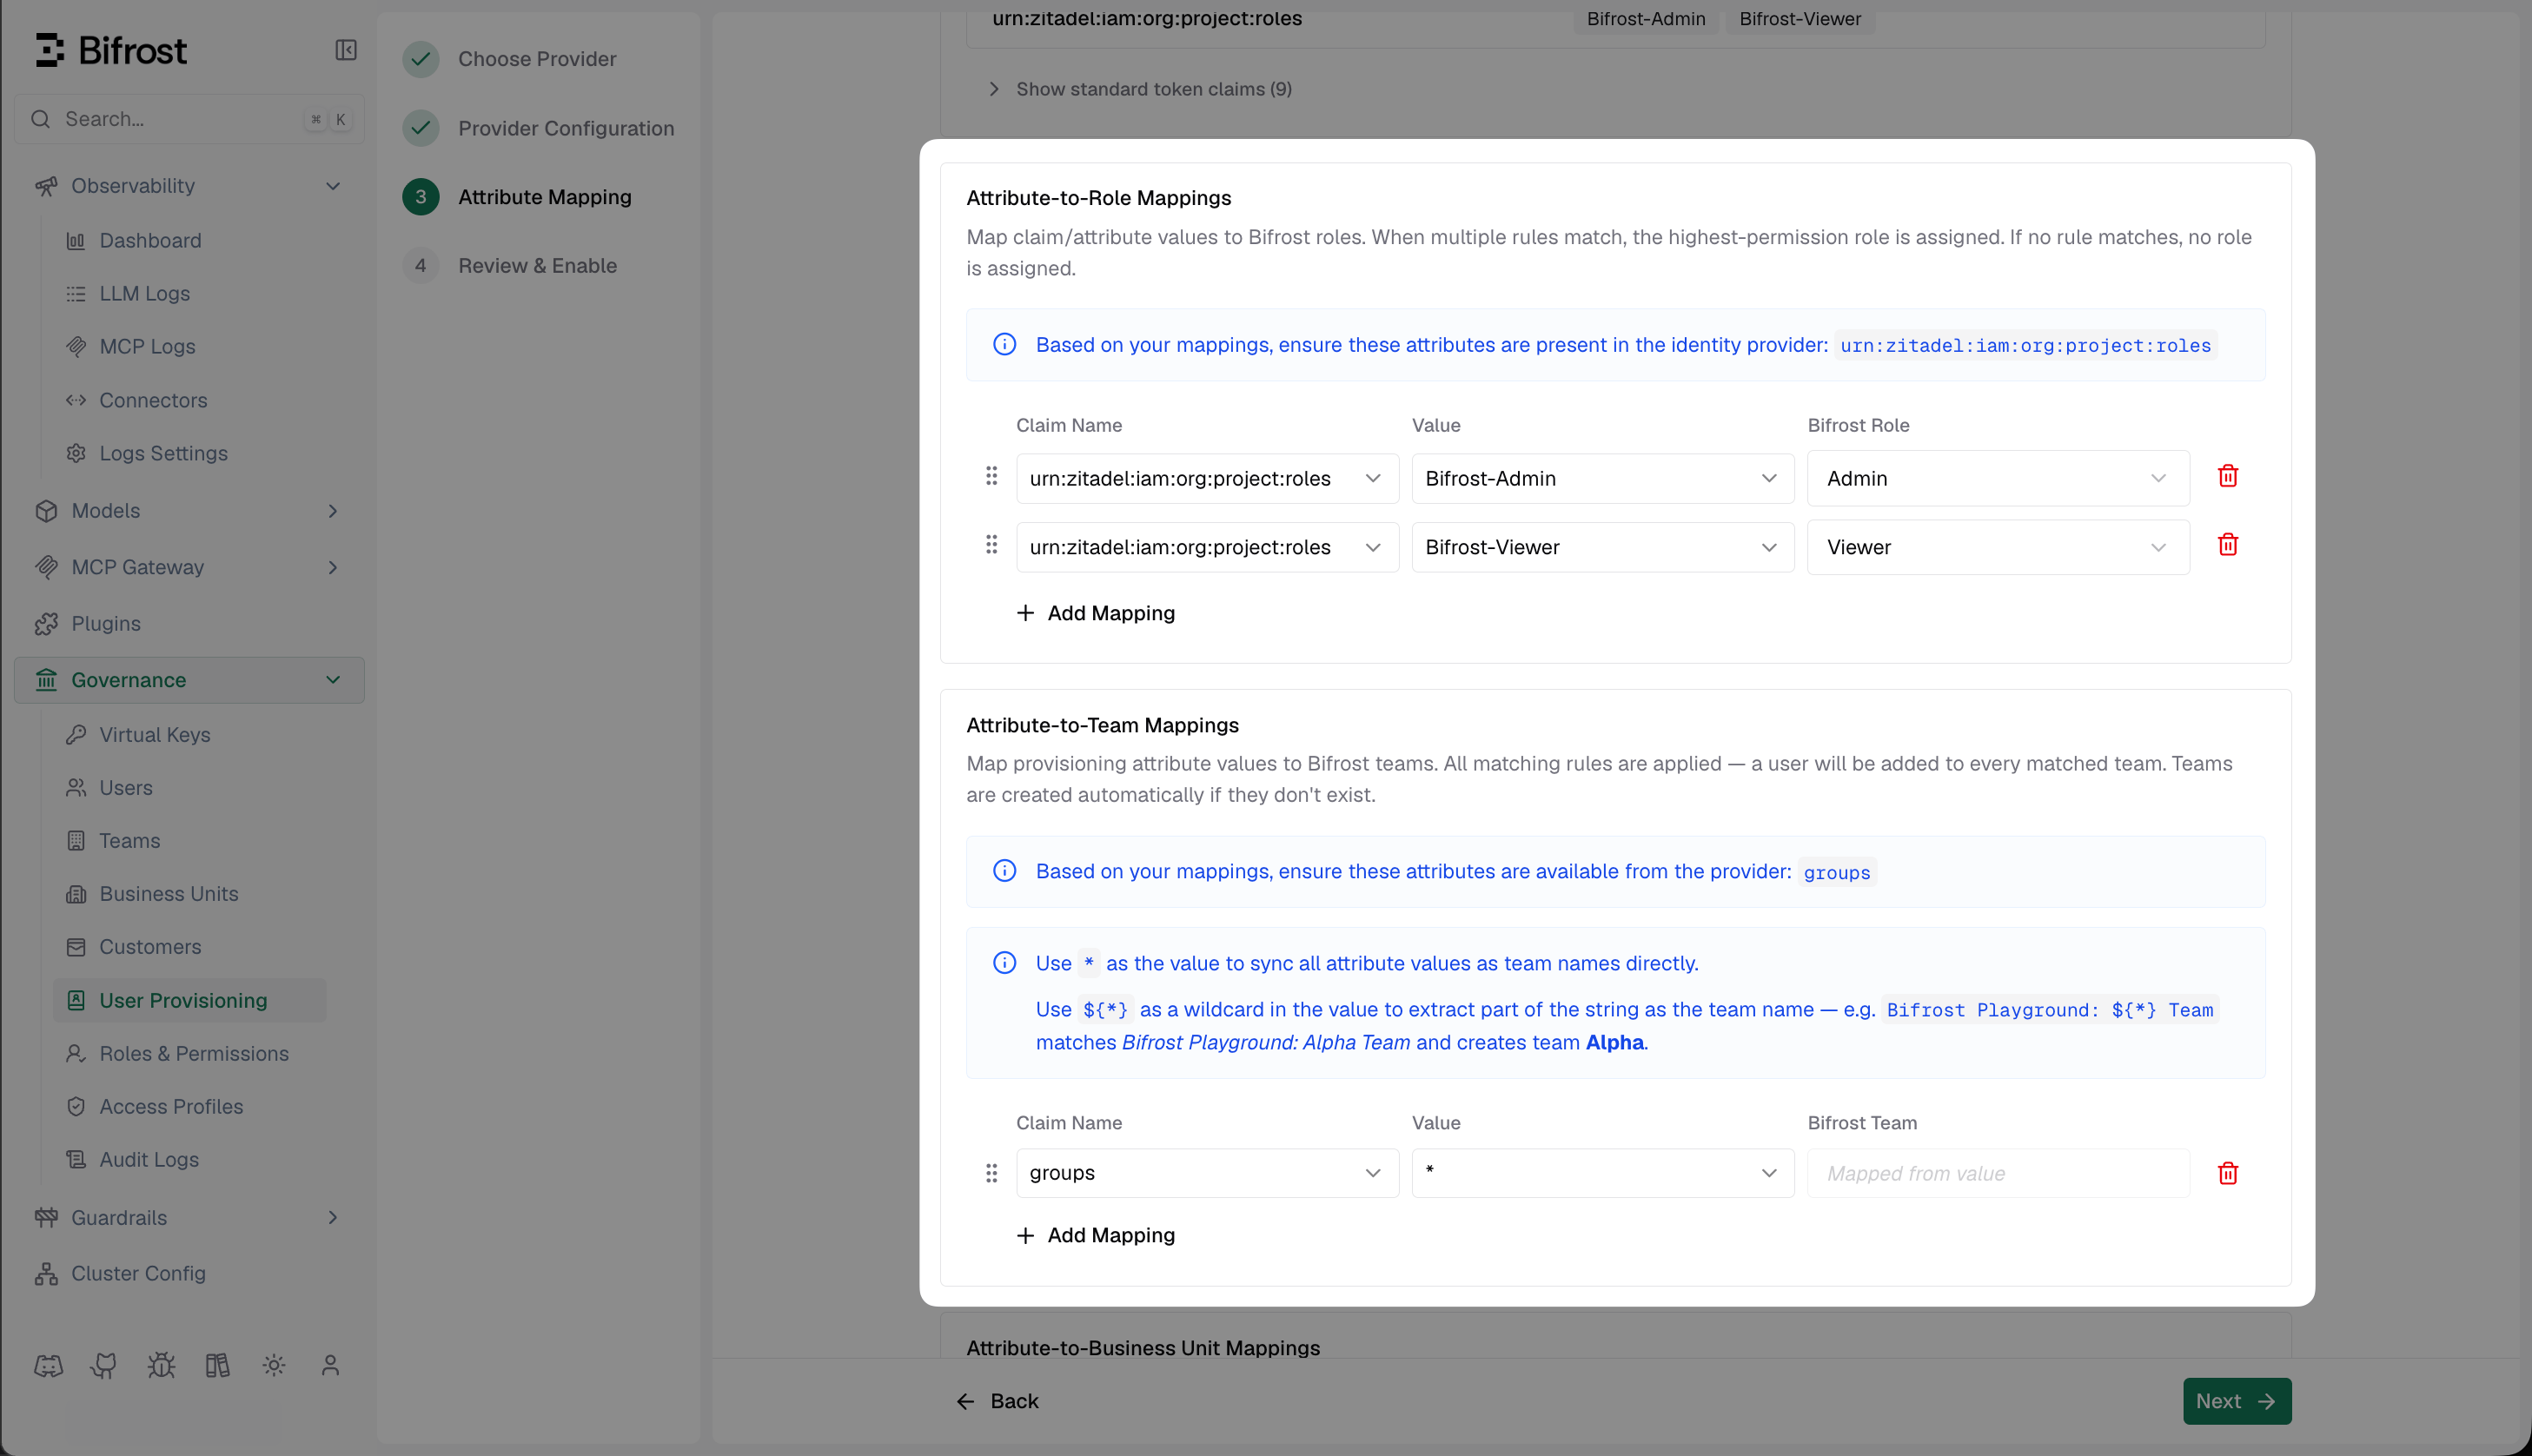
Attribute Mapping - map urn:zitadel:iam:org:project:roles values to Bifrost roles, and map groups to teams and business units.
Review and enable
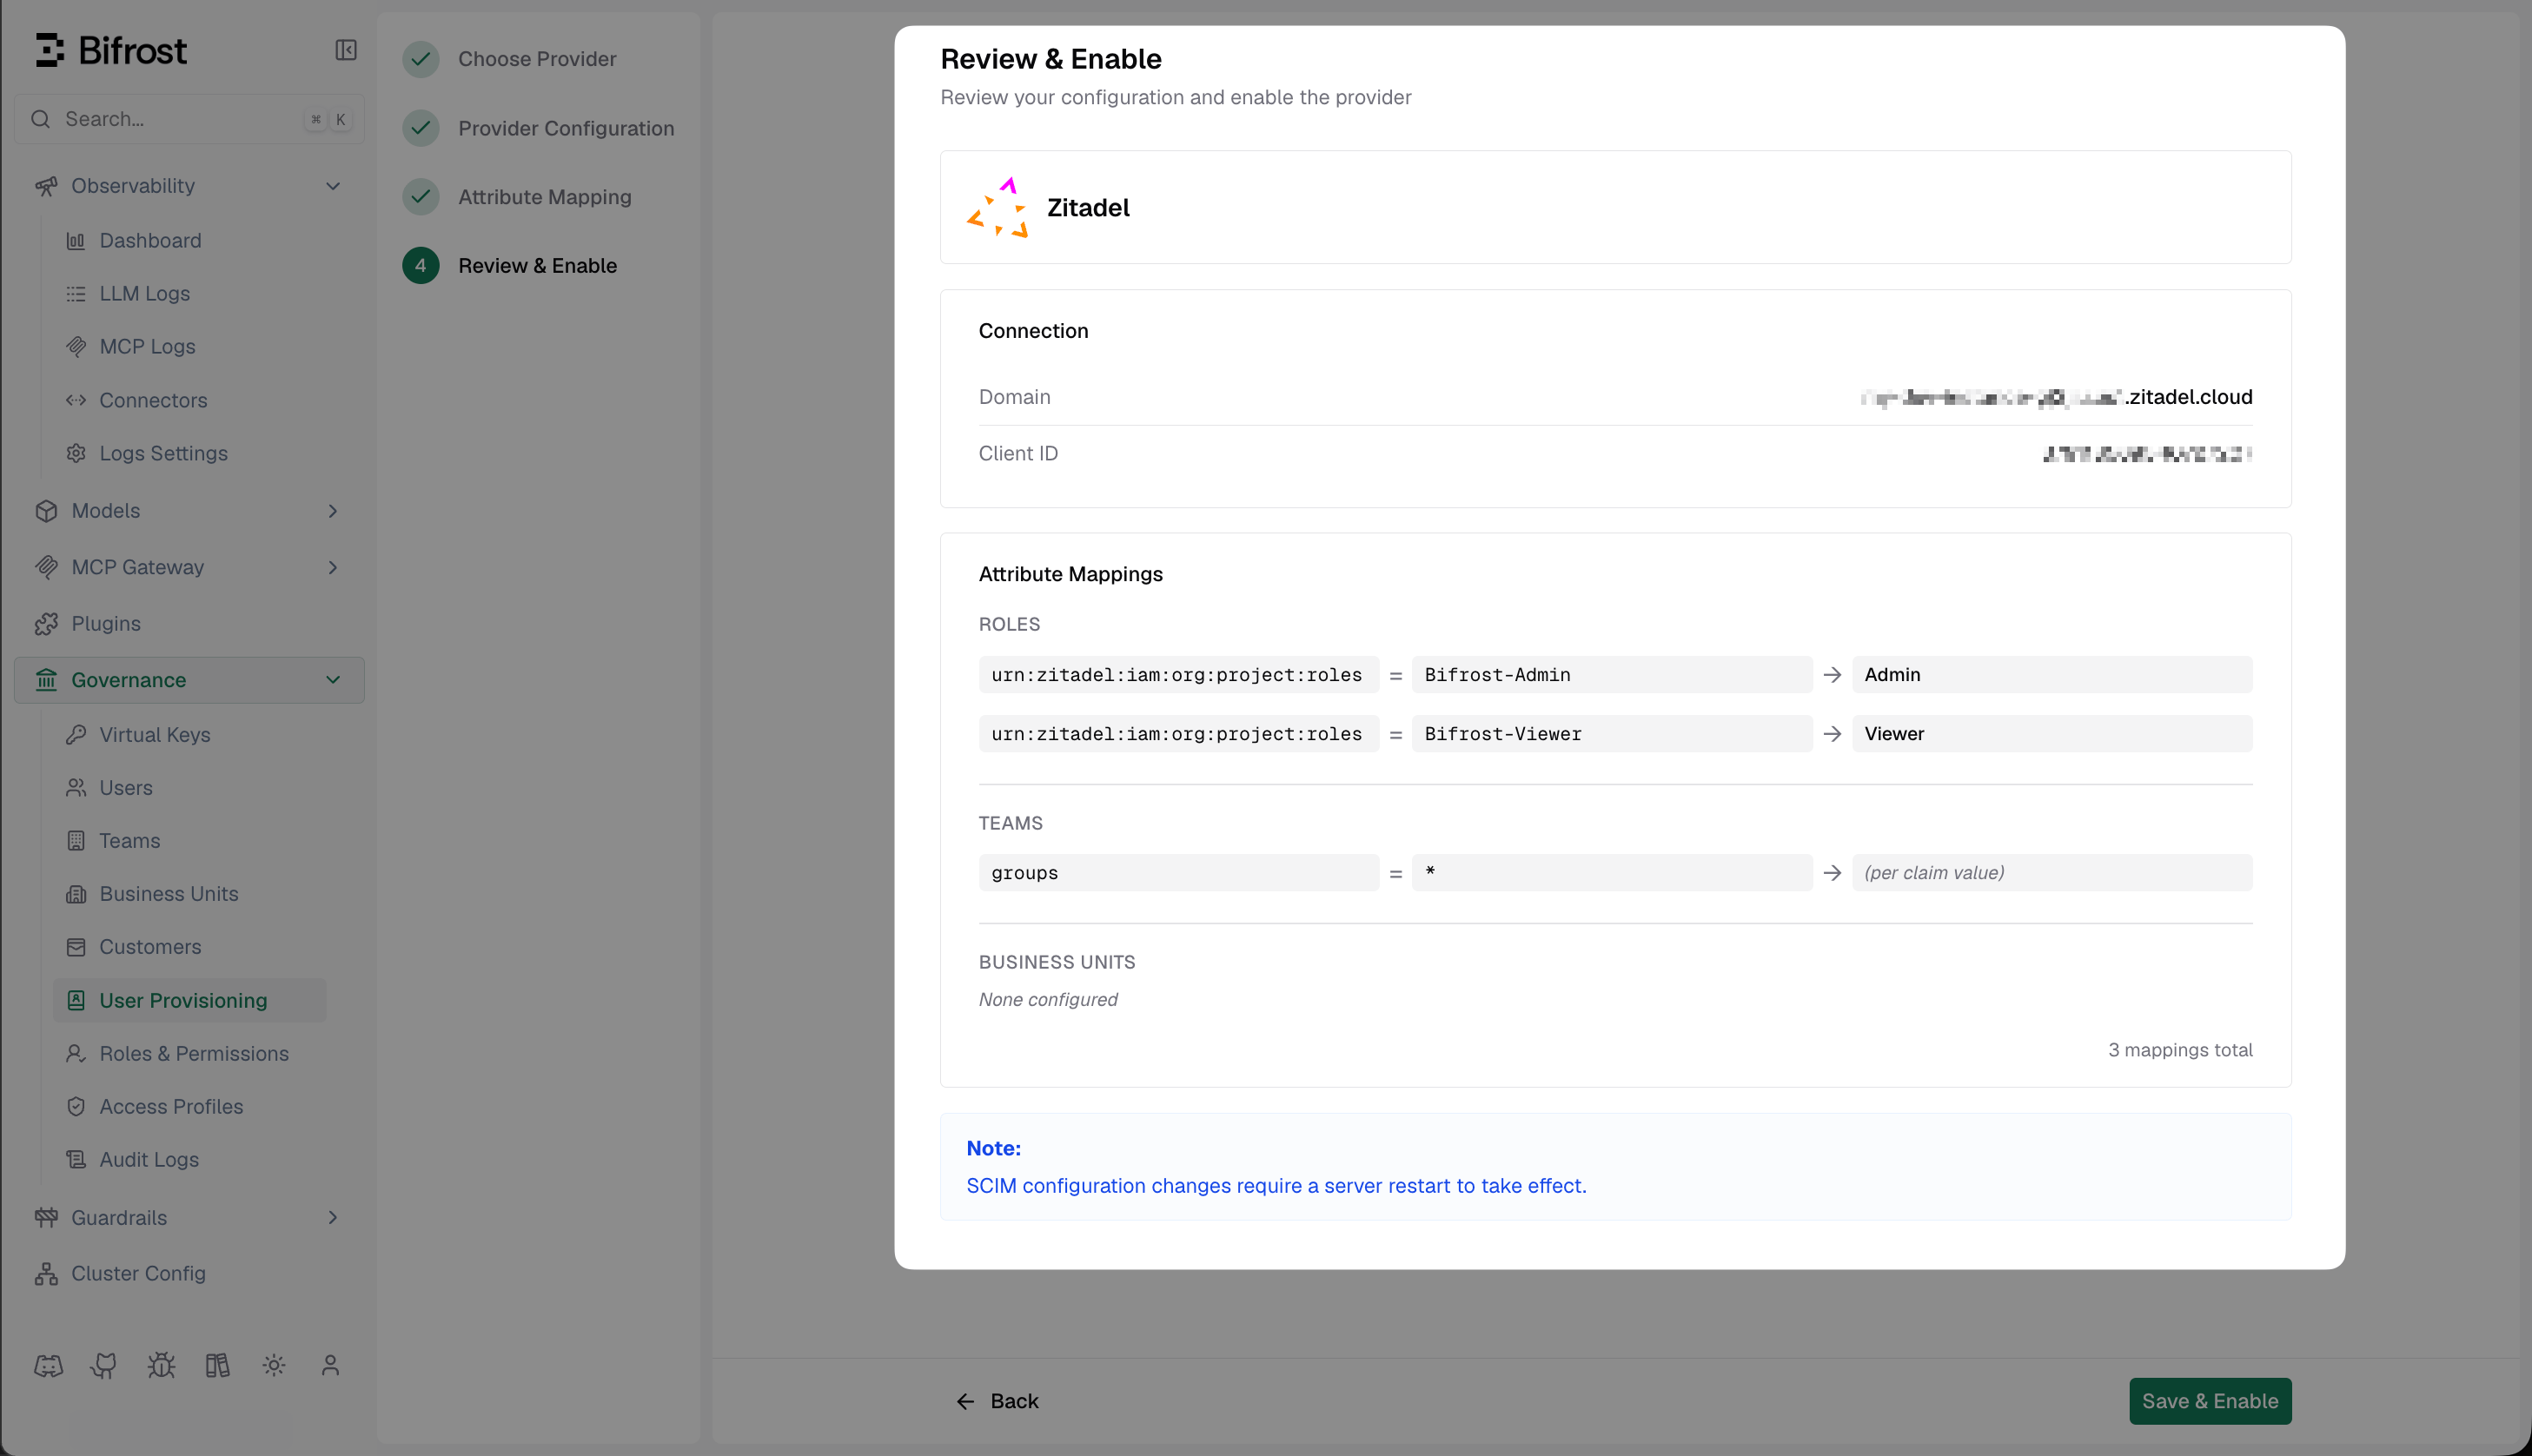
Review & Enable - confirm your Zitadel domain, Client ID, and attribute mappings before activating the provider.
How background sync works
Bifrost uses the service account credentials from this setup to sync users in the background every 24 hours. During that sync, Bifrost reconciles imported users, role mappings, team mappings, and business-unit mappings from Zitadel. Every 15 minutes, Bifrost also refreshes active OIDC sessions. If a session cannot be refreshed, Bifrost checks with Zitadel whether the user is still active; if Zitadel reports the user as inactive, Bifrost decommissions that user locally.Troubleshooting
Role claims missing in the token - enable Return user roles during authentication on the project (Step 2) and ensure the user has an active role authorization for the project.invalid audience when validating the JWT - check the audience field in Bifrost. It must match the aud claim issued by Zitadel. Leaving it empty uses the project resource owner as the audience.
Service account cannot list users - confirm the service account has Org User Manager or Org Owner Viewer role in the organization. Regenerate the client secret if you’ve lost it - the original cannot be retrieved.
Redirect URI mismatch - Zitadel requires an exact string match. Check for trailing slashes and http vs https.