Prerequisites
- A Microsoft Azure account with admin access to create app registrations in Entra ID
- Bifrost Enterprise deployed and accessible
- Your Bifrost callback URL:
https://<your-bifrost-domain>/login
Step 1: Register an application
Open App registrations
Fill in the registration form
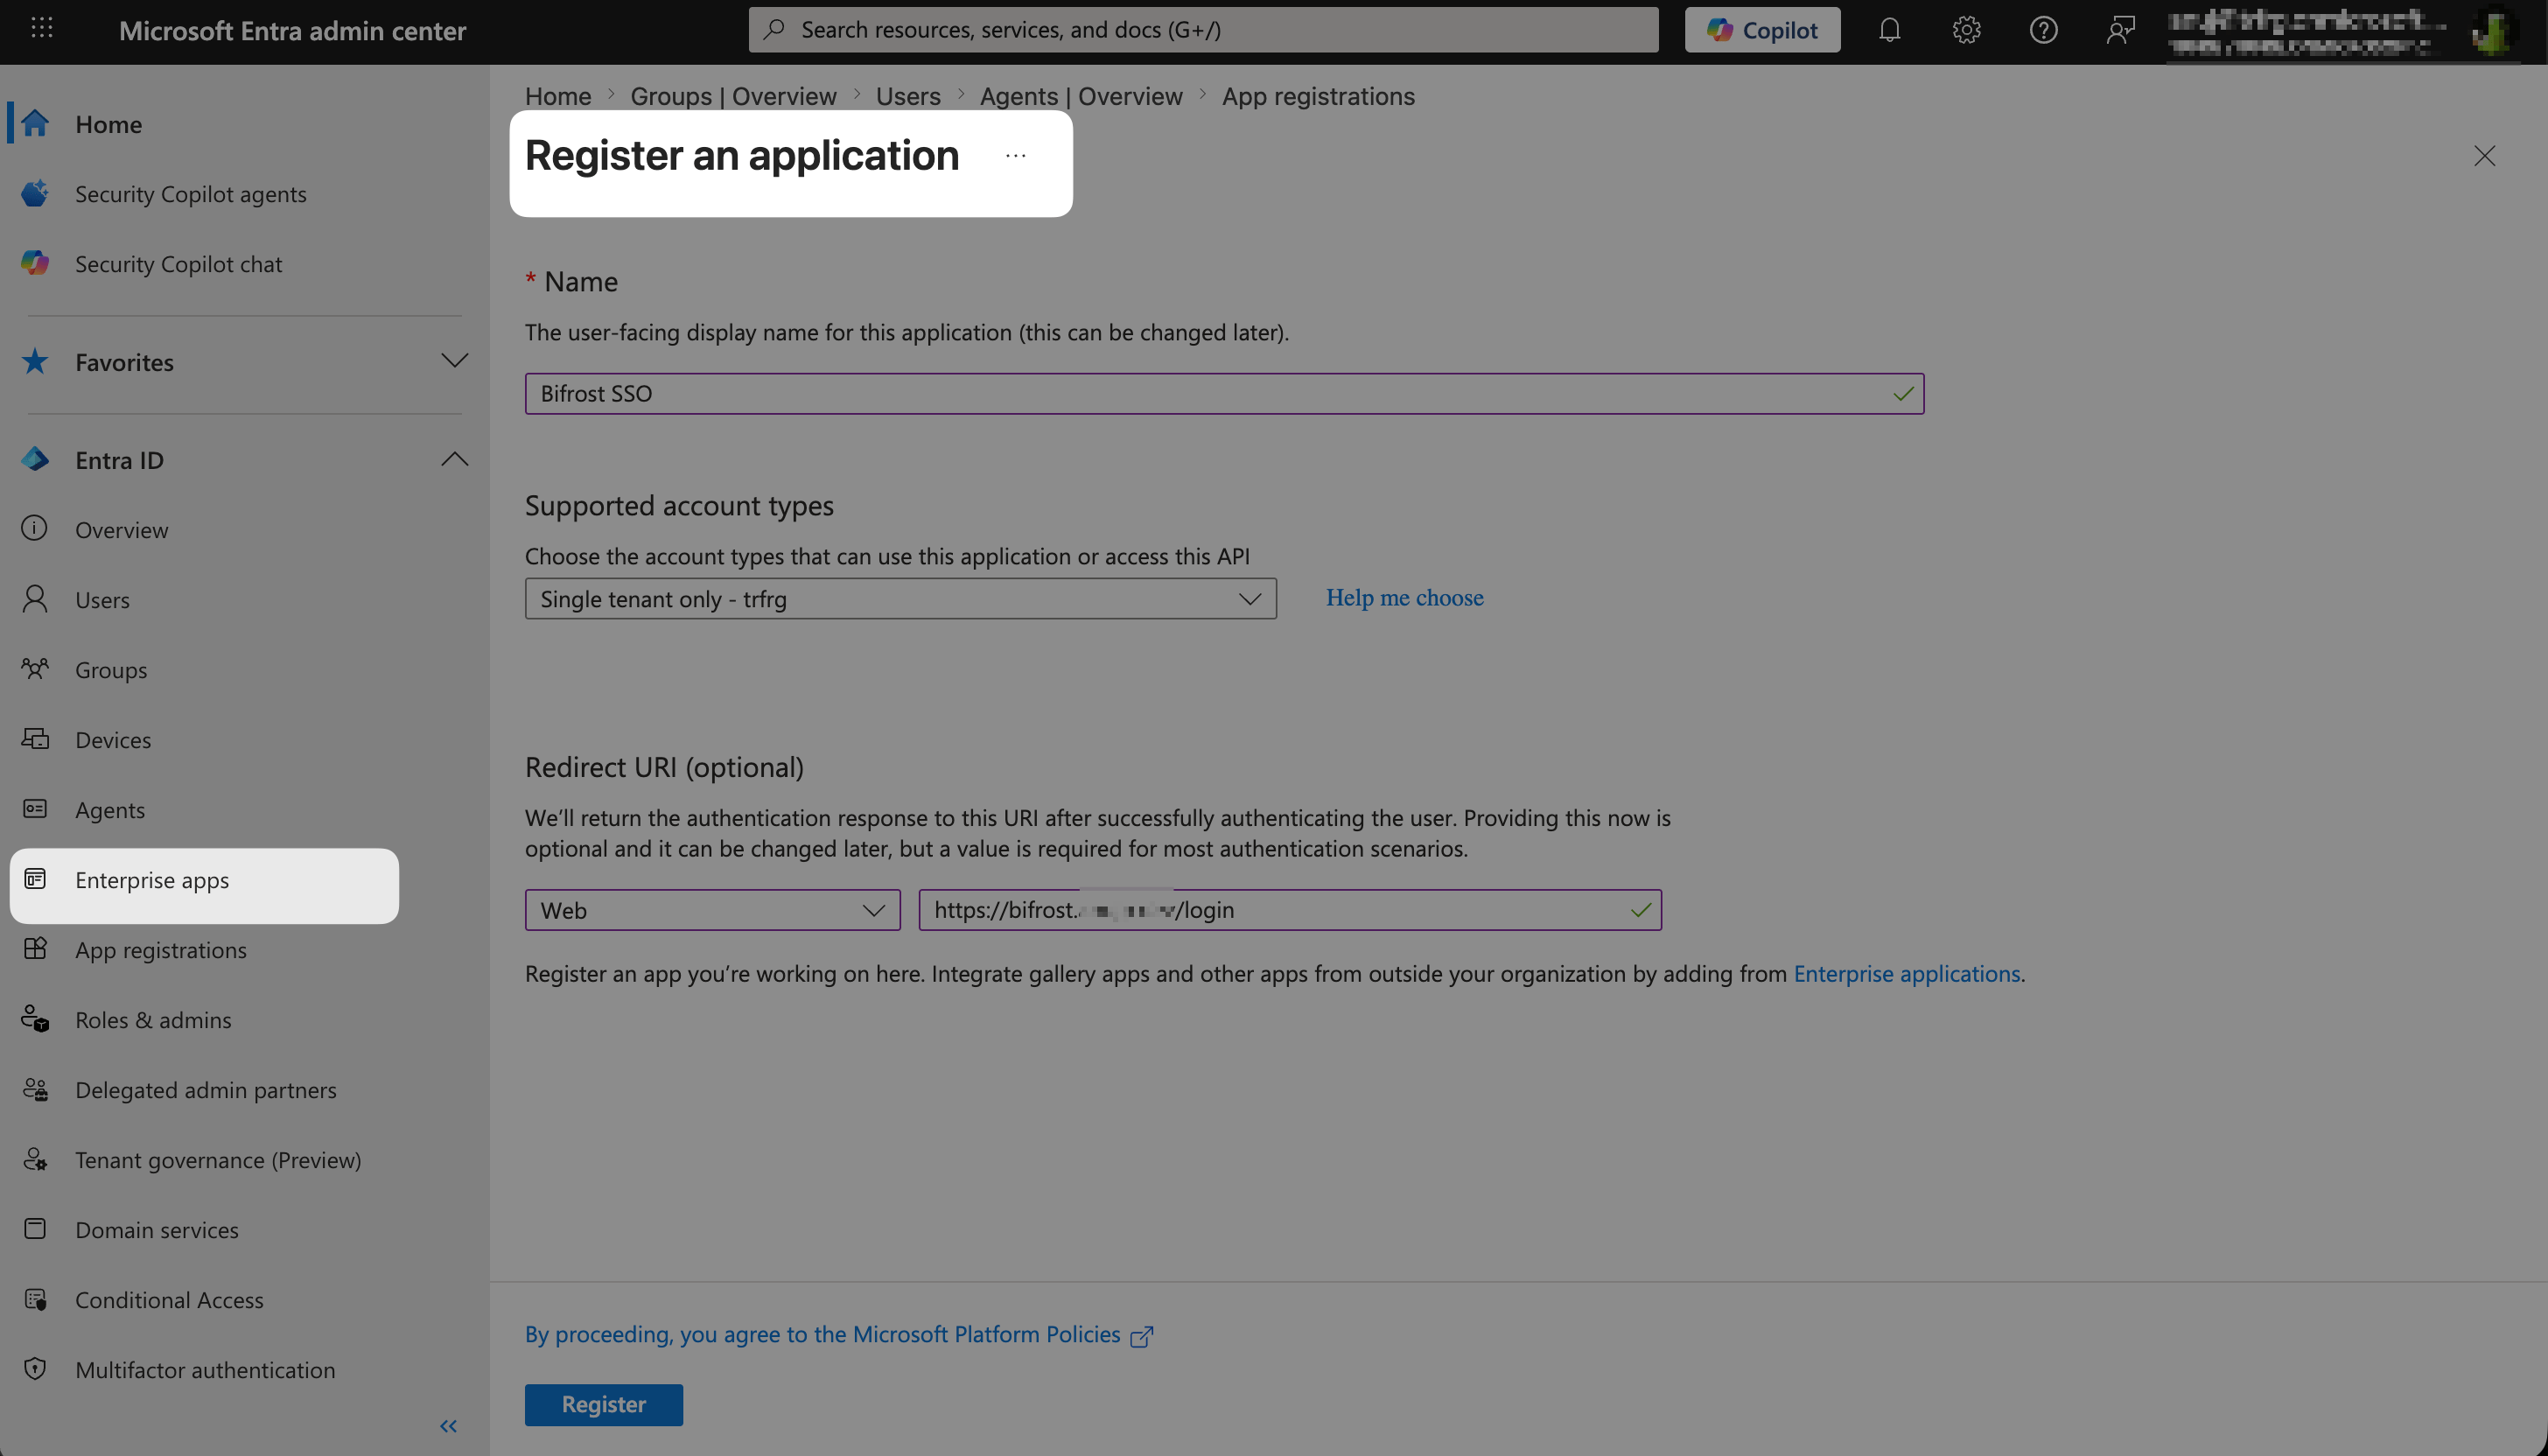
New application registration form — enter the app name, account type, and redirect URI.
Add the second redirect URI
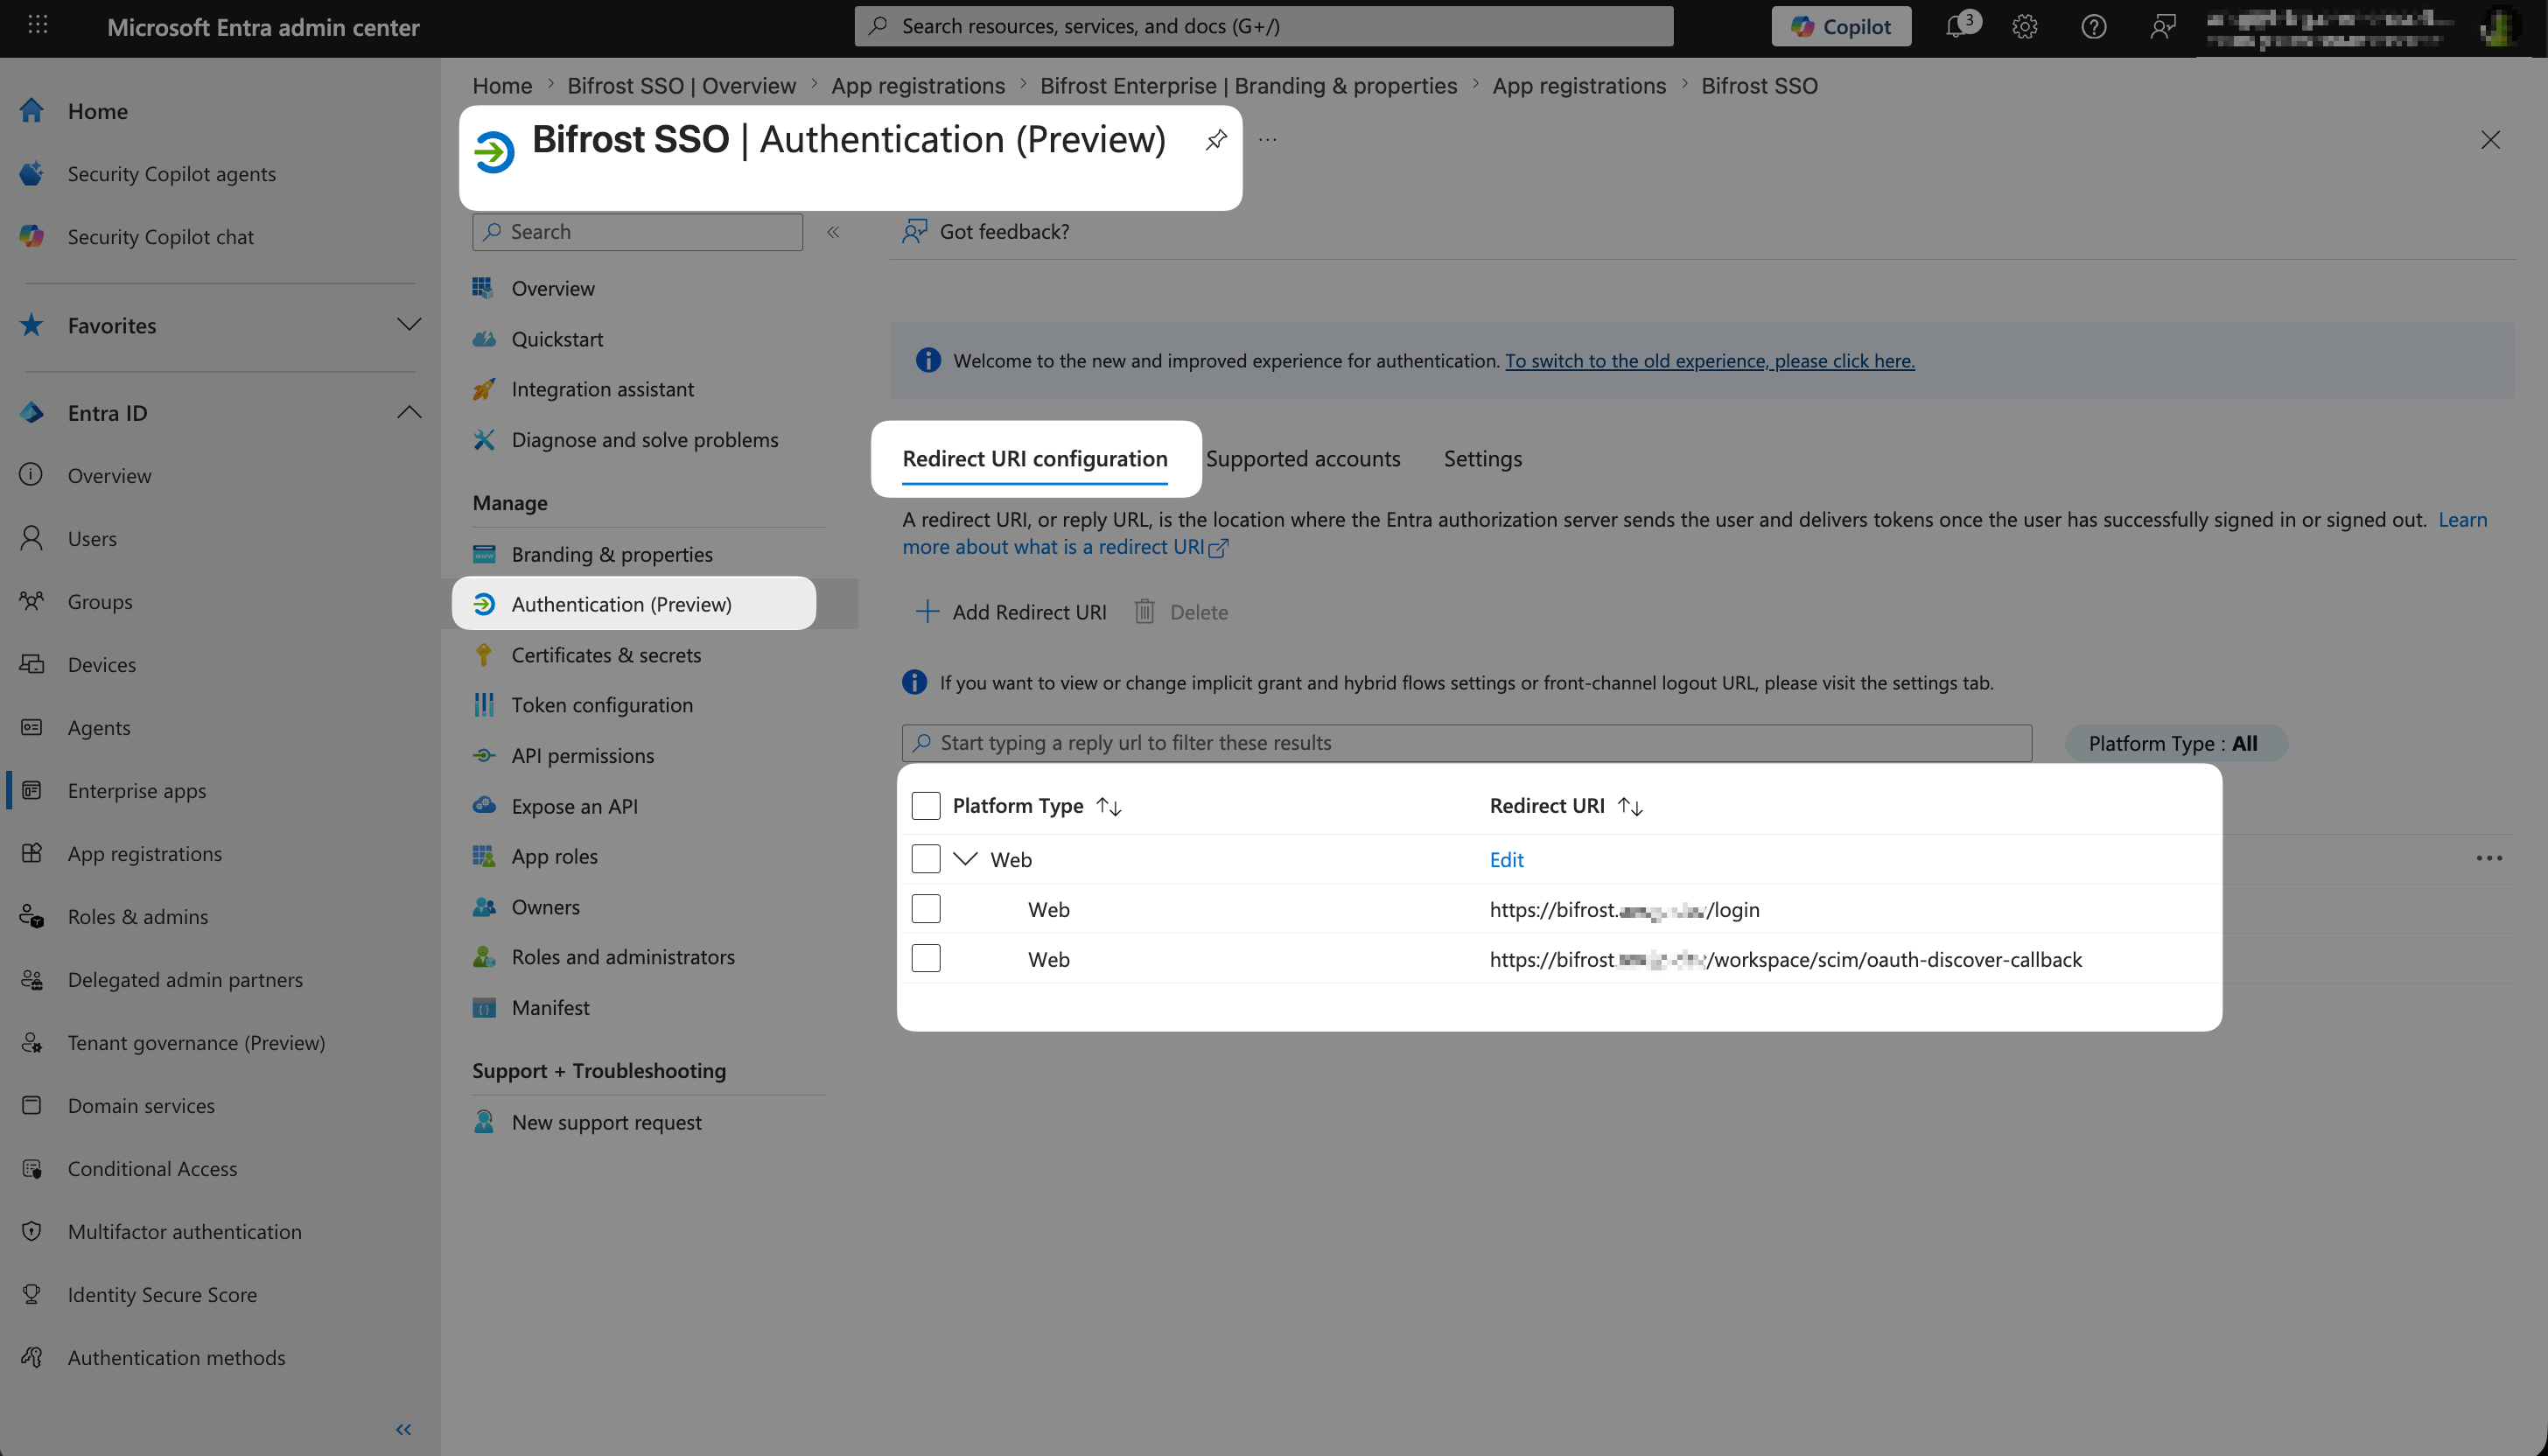
Authentication blade — confirm both redirect URIs are listed.
Step 2: Capture app registration information
Copy your Client ID and Tenant ID
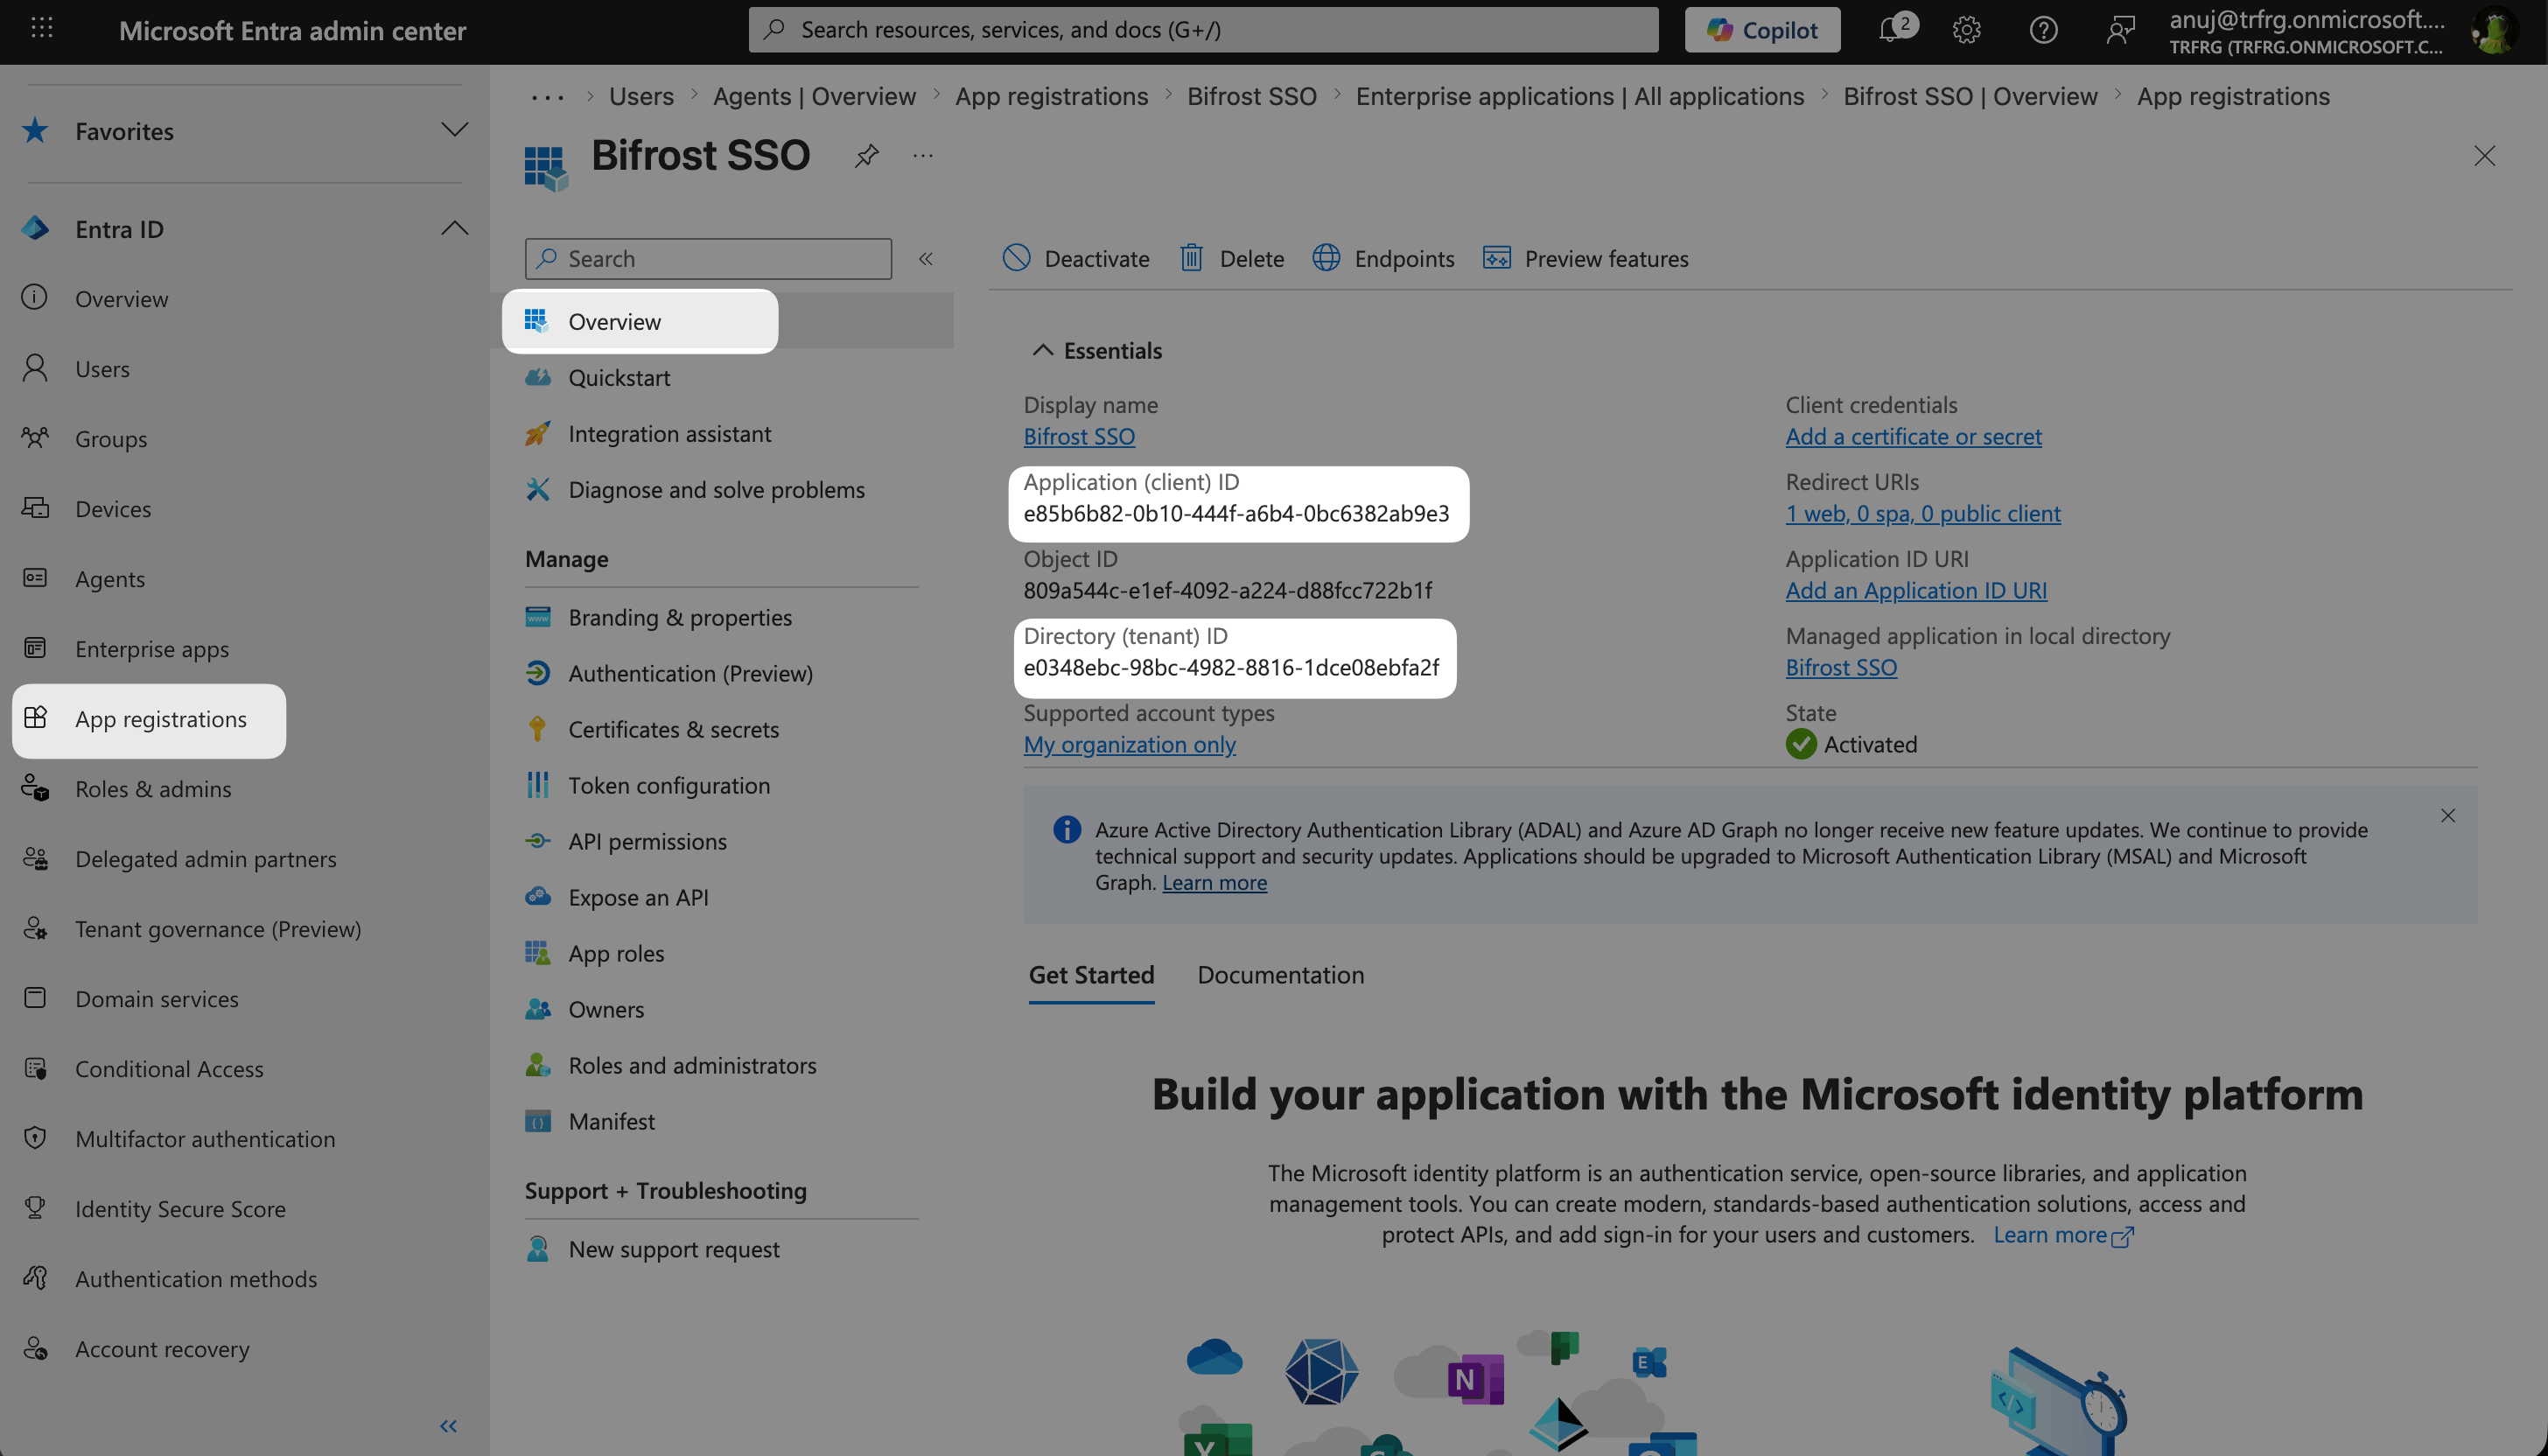
App Registration Overview — copy the Application (client) ID and Directory (tenant) ID from the Essentials section.
Step 3: Create app roles (optional)
Add roles to the app registration
developer and admin.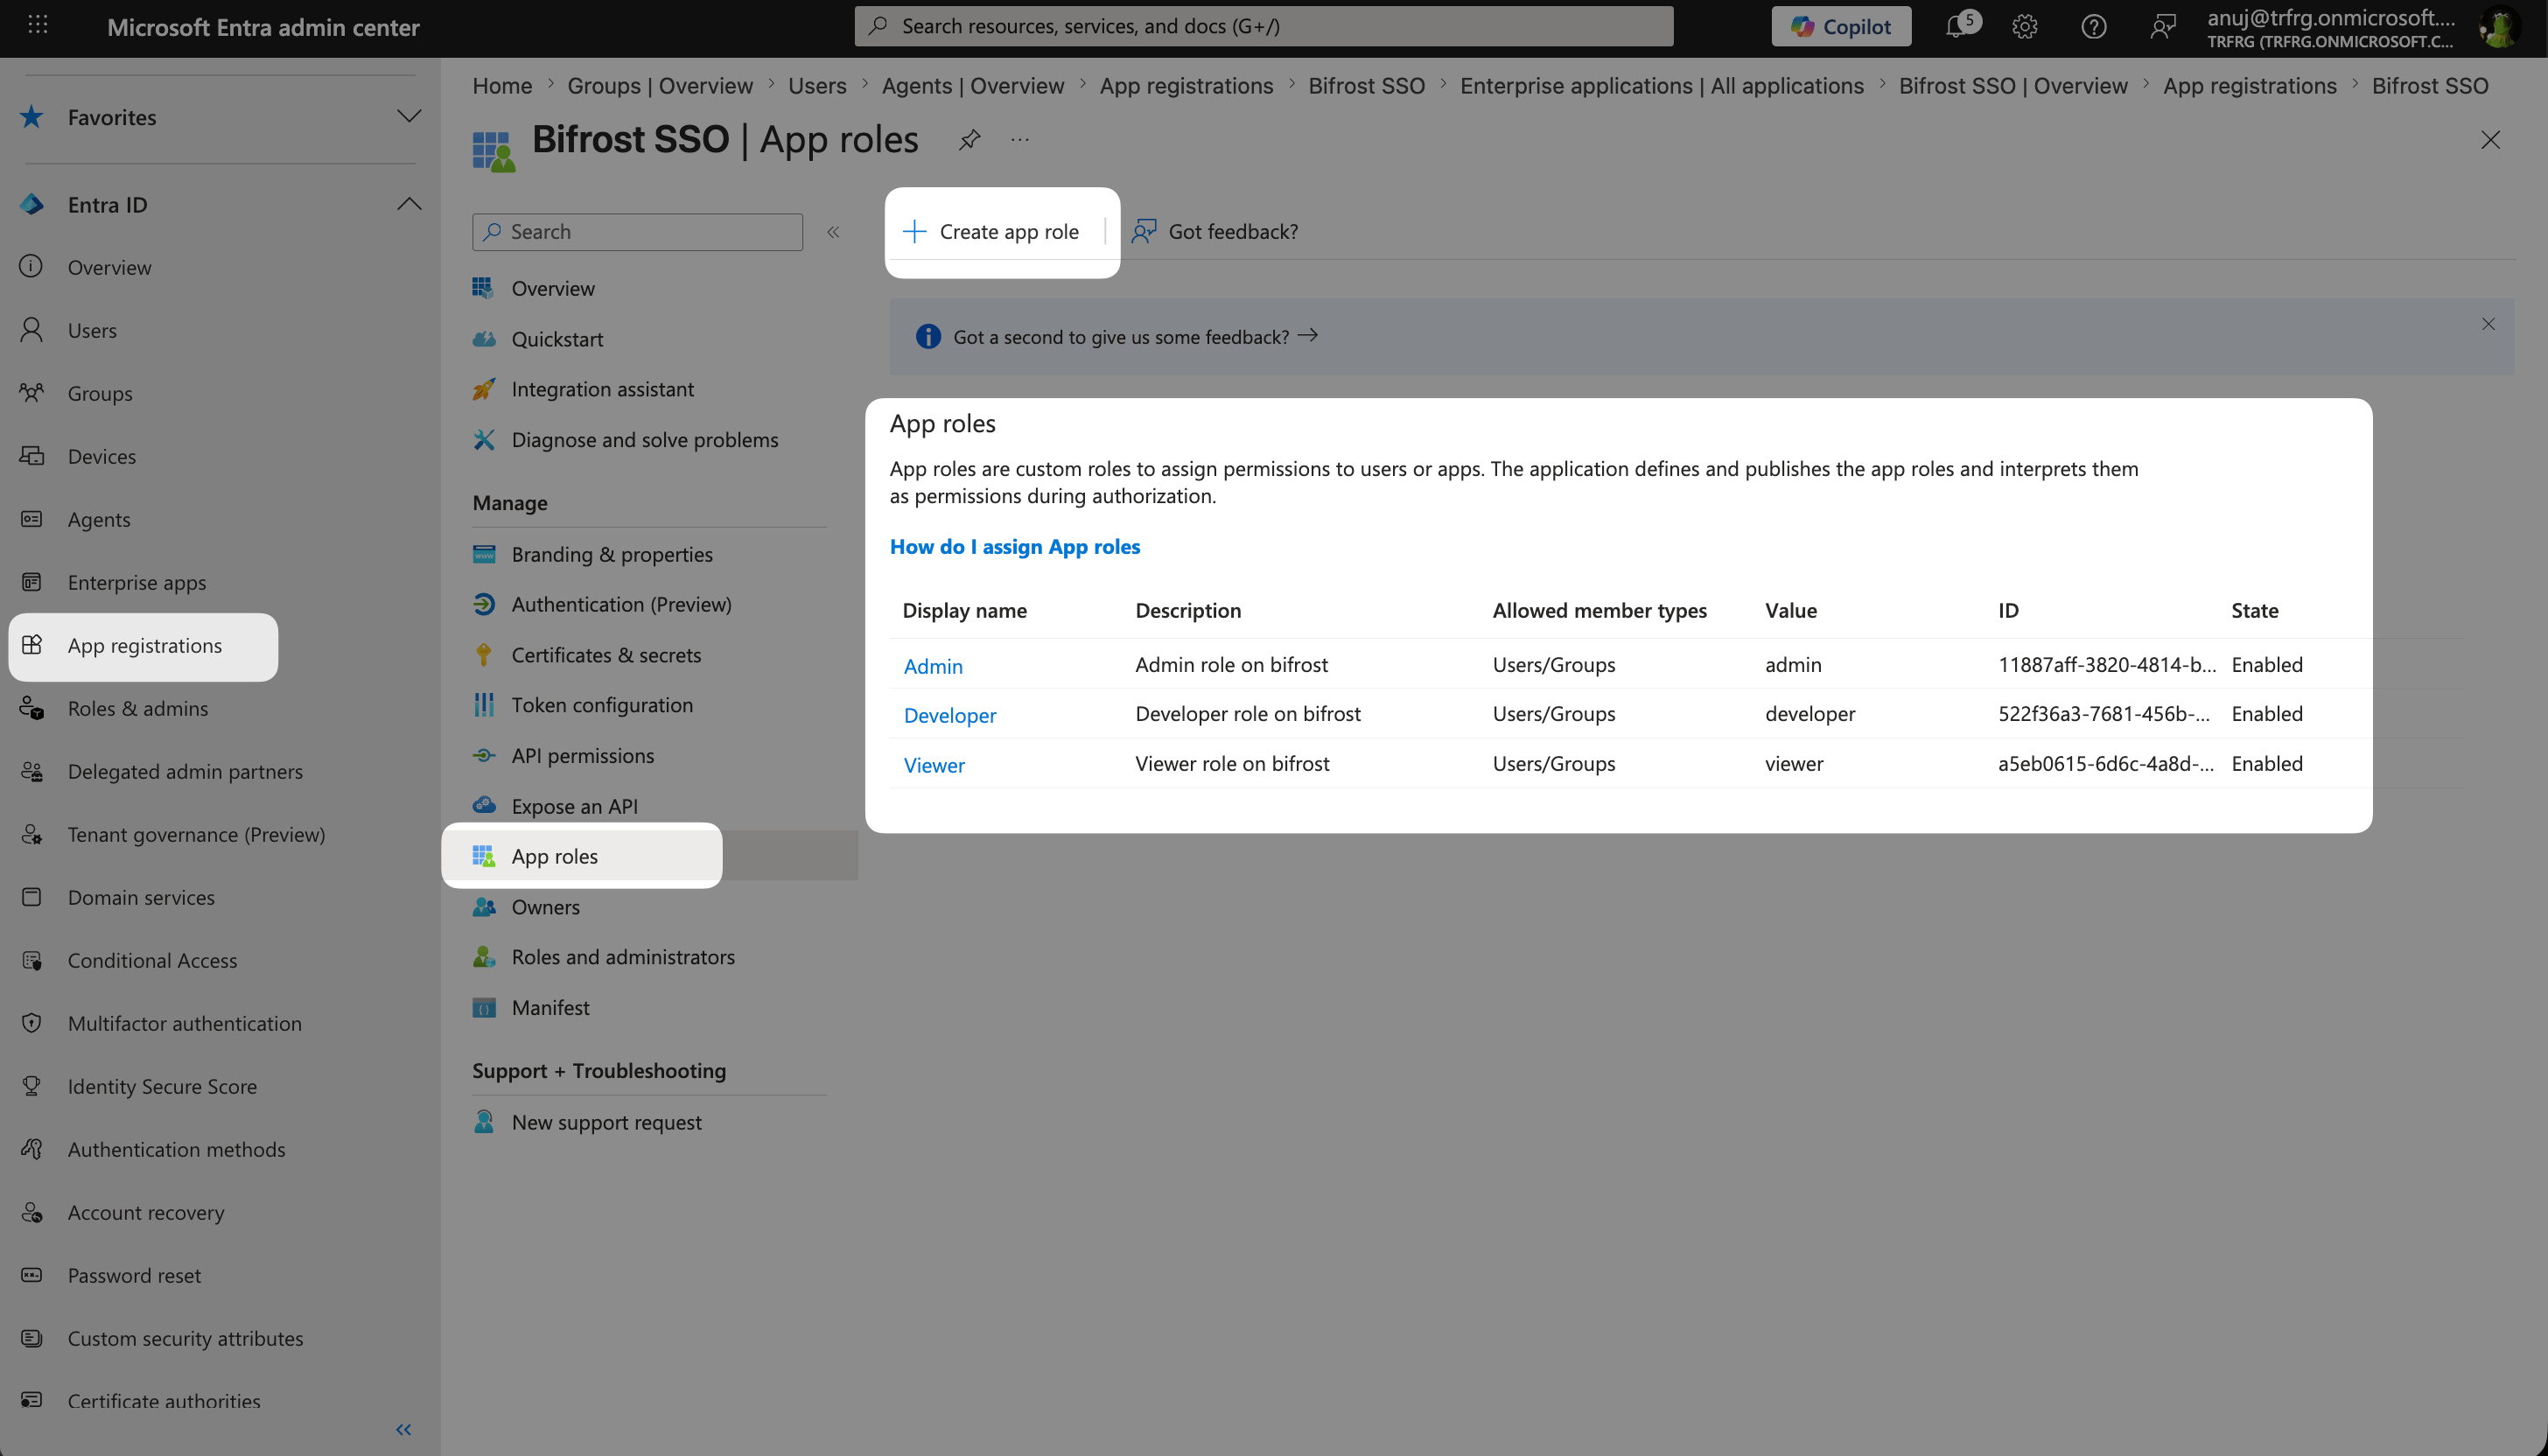
App Roles list — Admin, Developer, and Viewer roles configured for the application.
Step 4: Create a client secret
Generate a secret
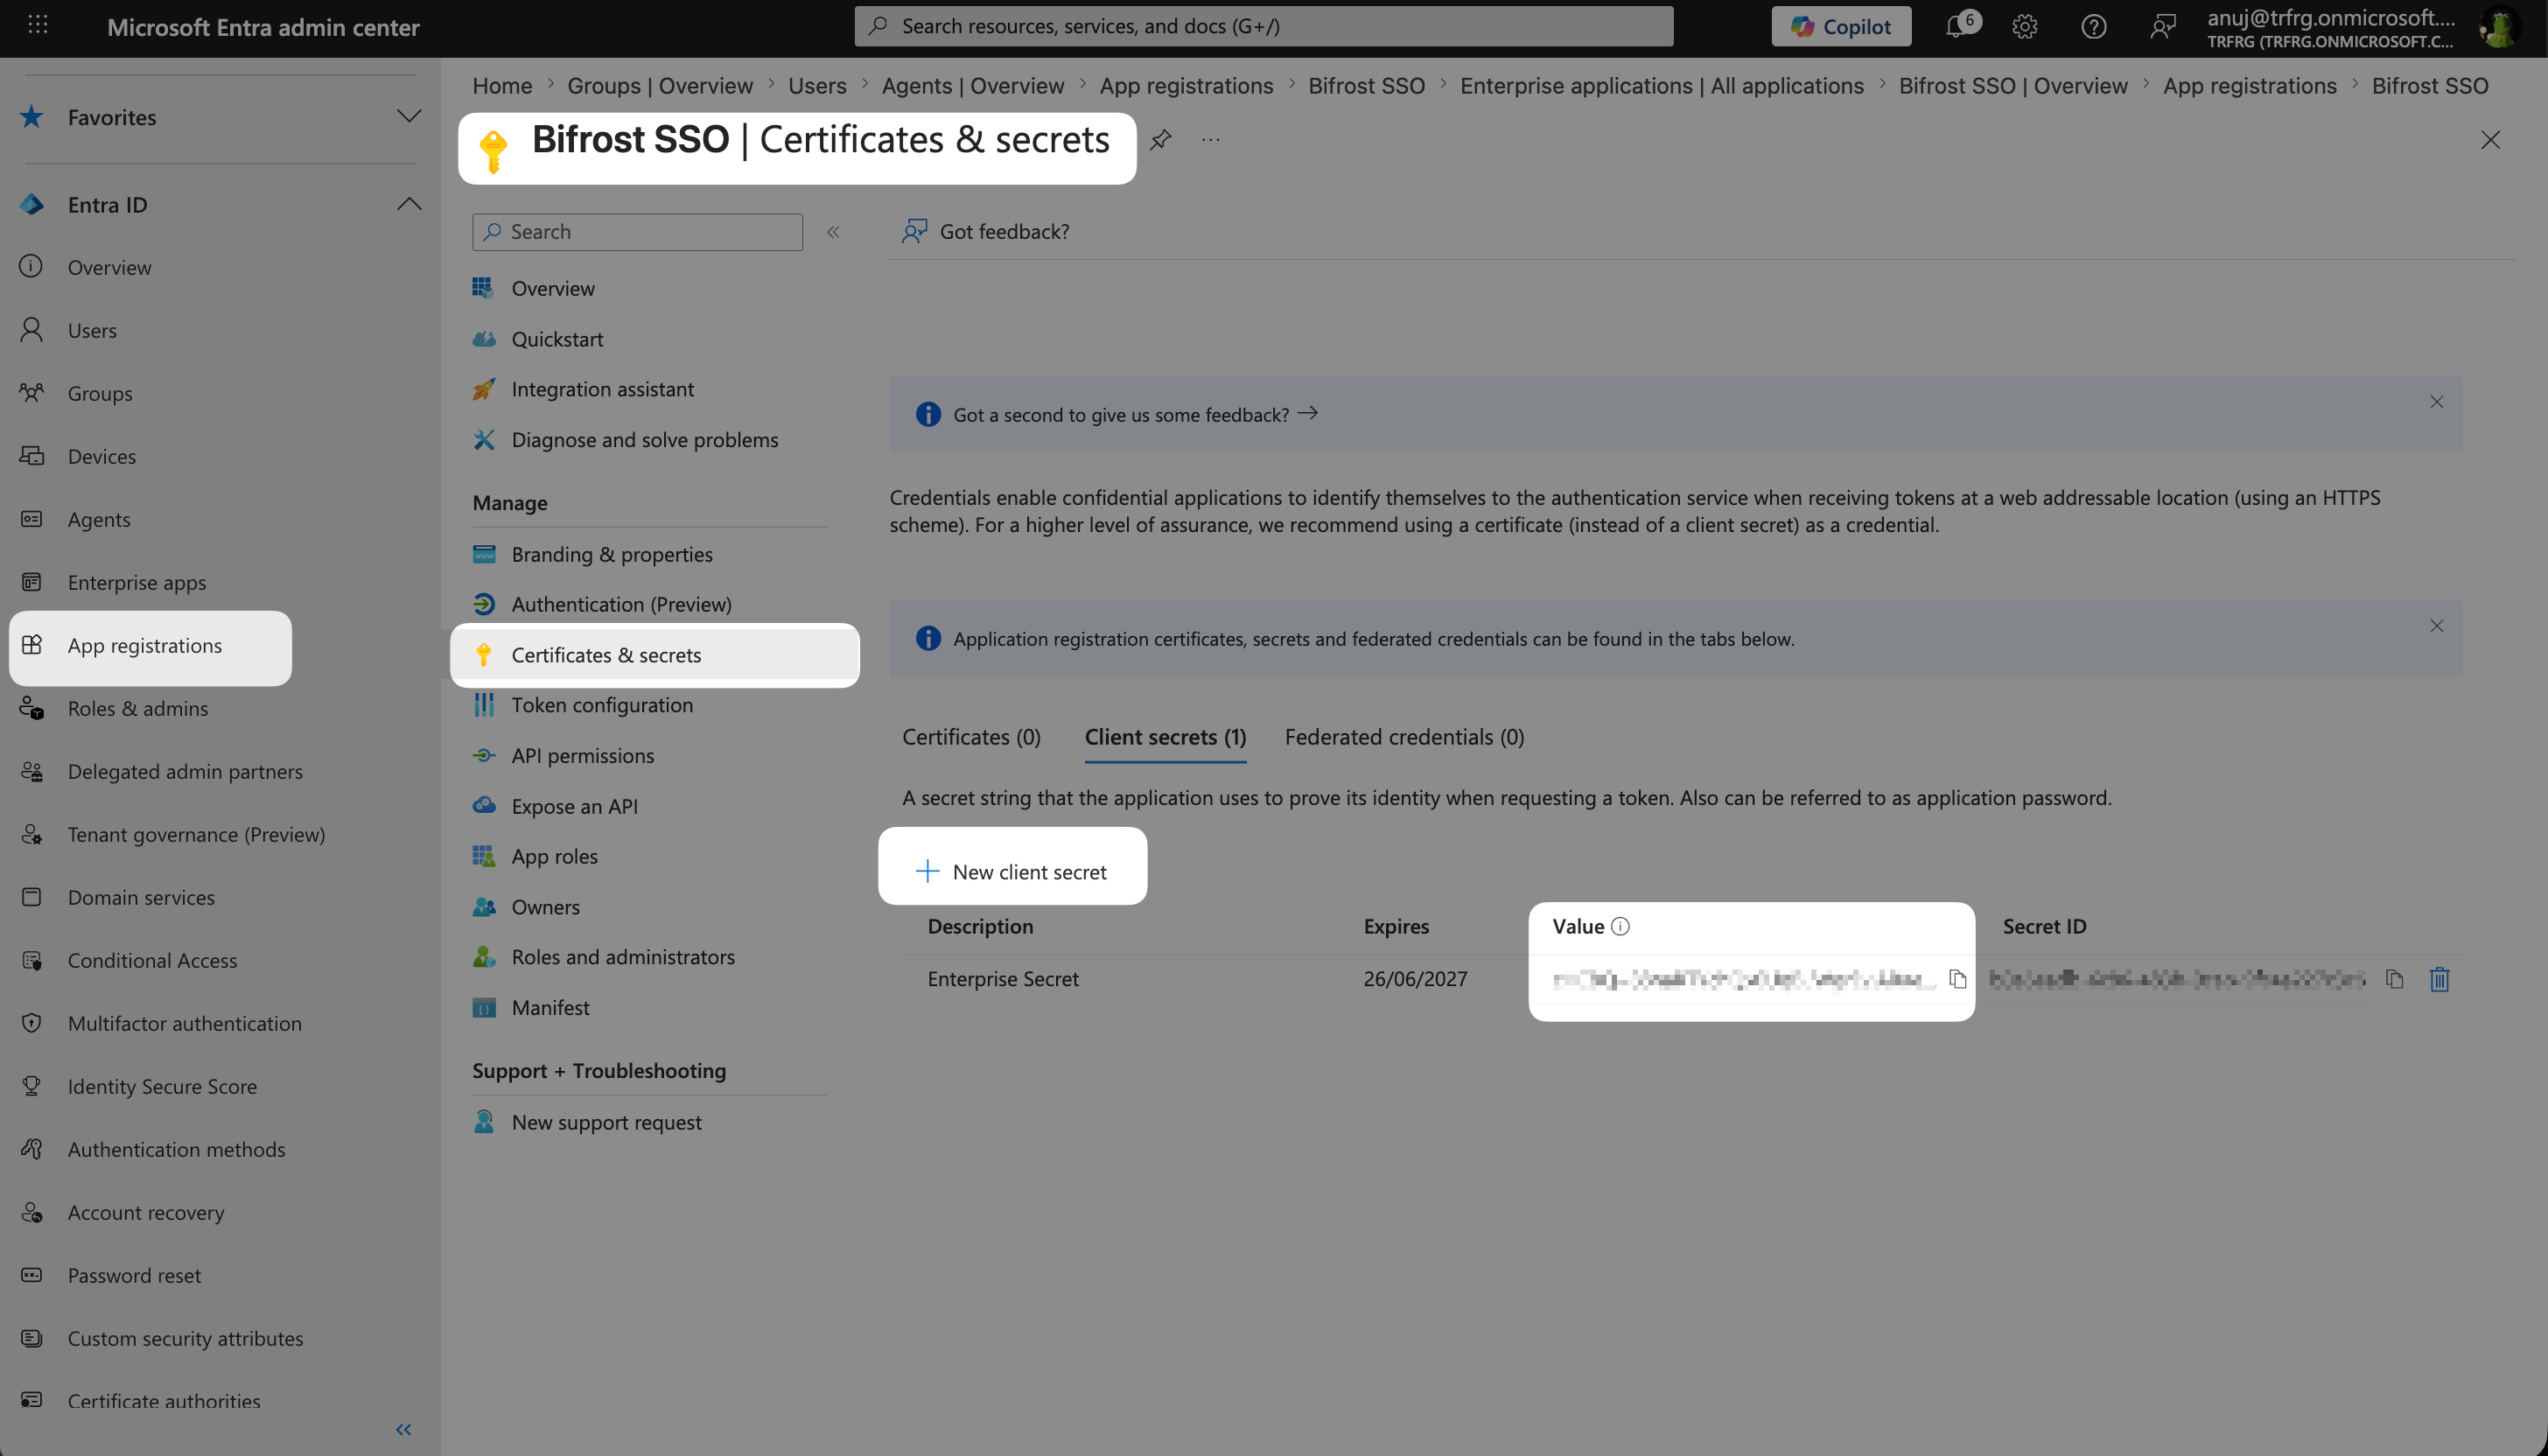
Certificates & secrets — click New client secret and copy the value immediately after saving.
Step 5: Configure API permissions (optional — bulk sync only)
Add the required permissions
openid,profile,email,offline_access,User.Read
User.Read.All,GroupMember.Read.All,Group.Read.AllApplication.Read.All— needed to read the app role catalog during bulk syncAppRoleAssignment.ReadWrite.All— needed to read each user’s app role assignments
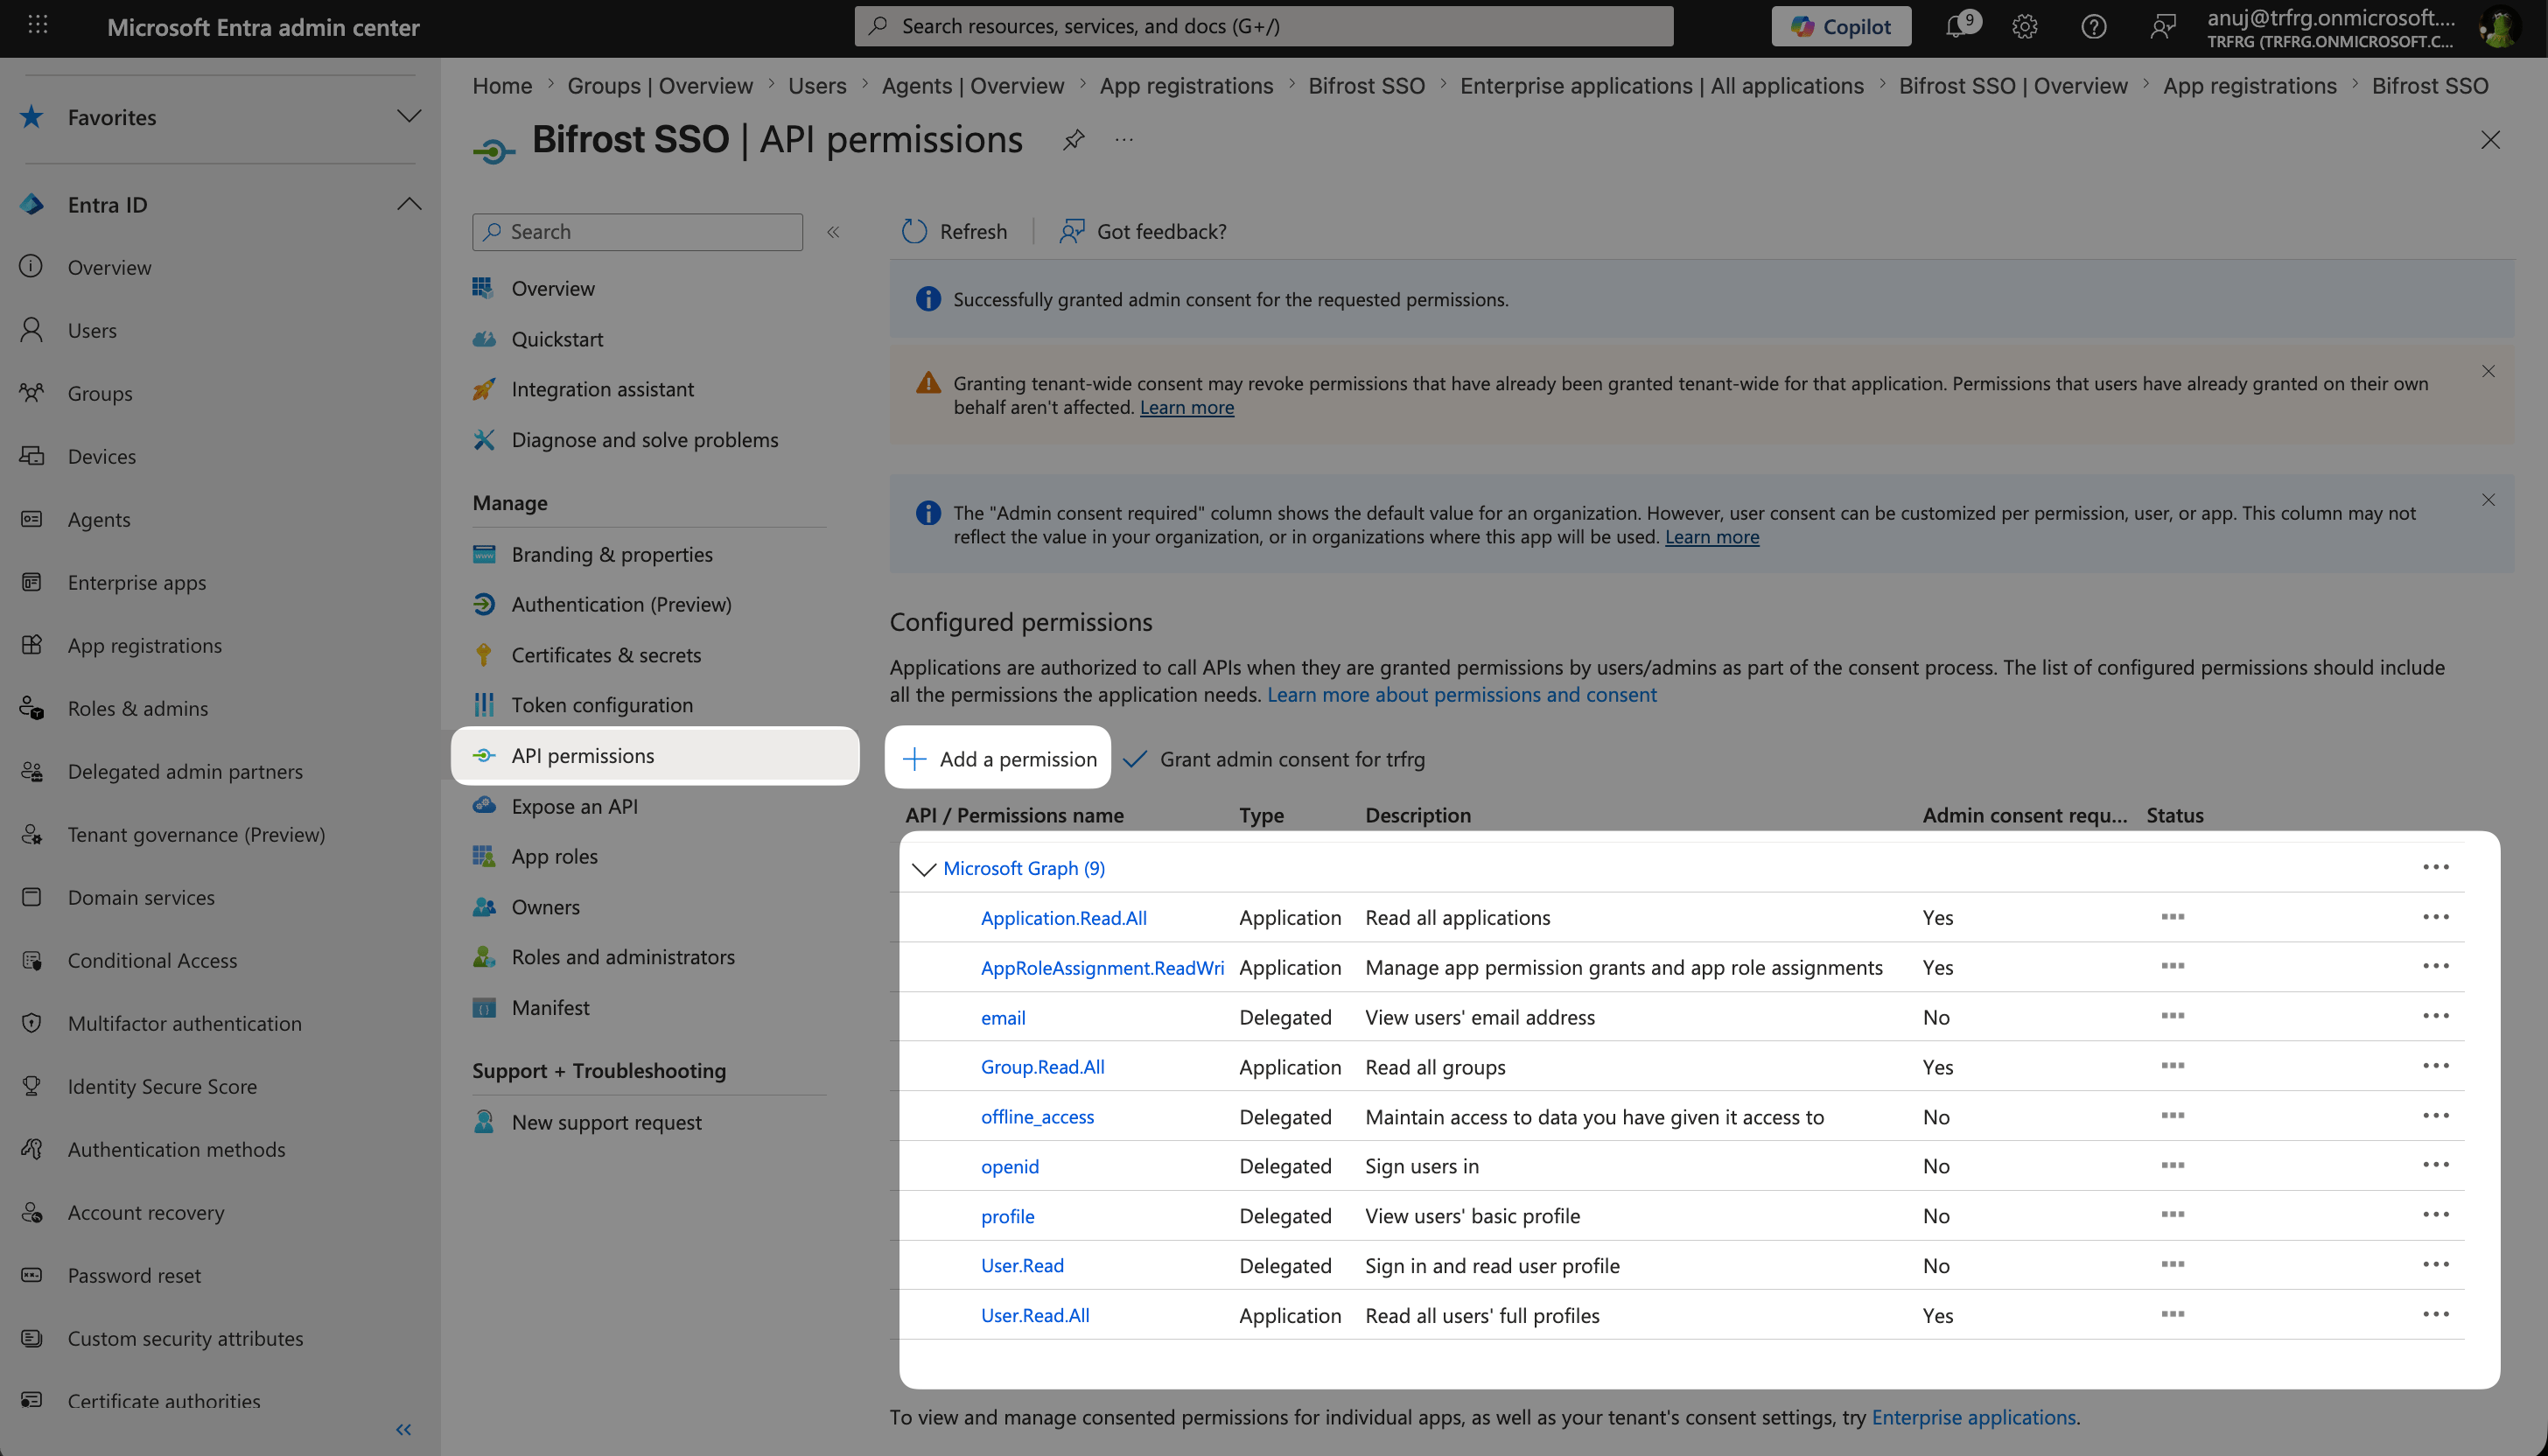
API permissions — Delegated and Application permissions granted with admin consent.
Grant admin consent
Step 6: Configure token claims
Add a groups claim
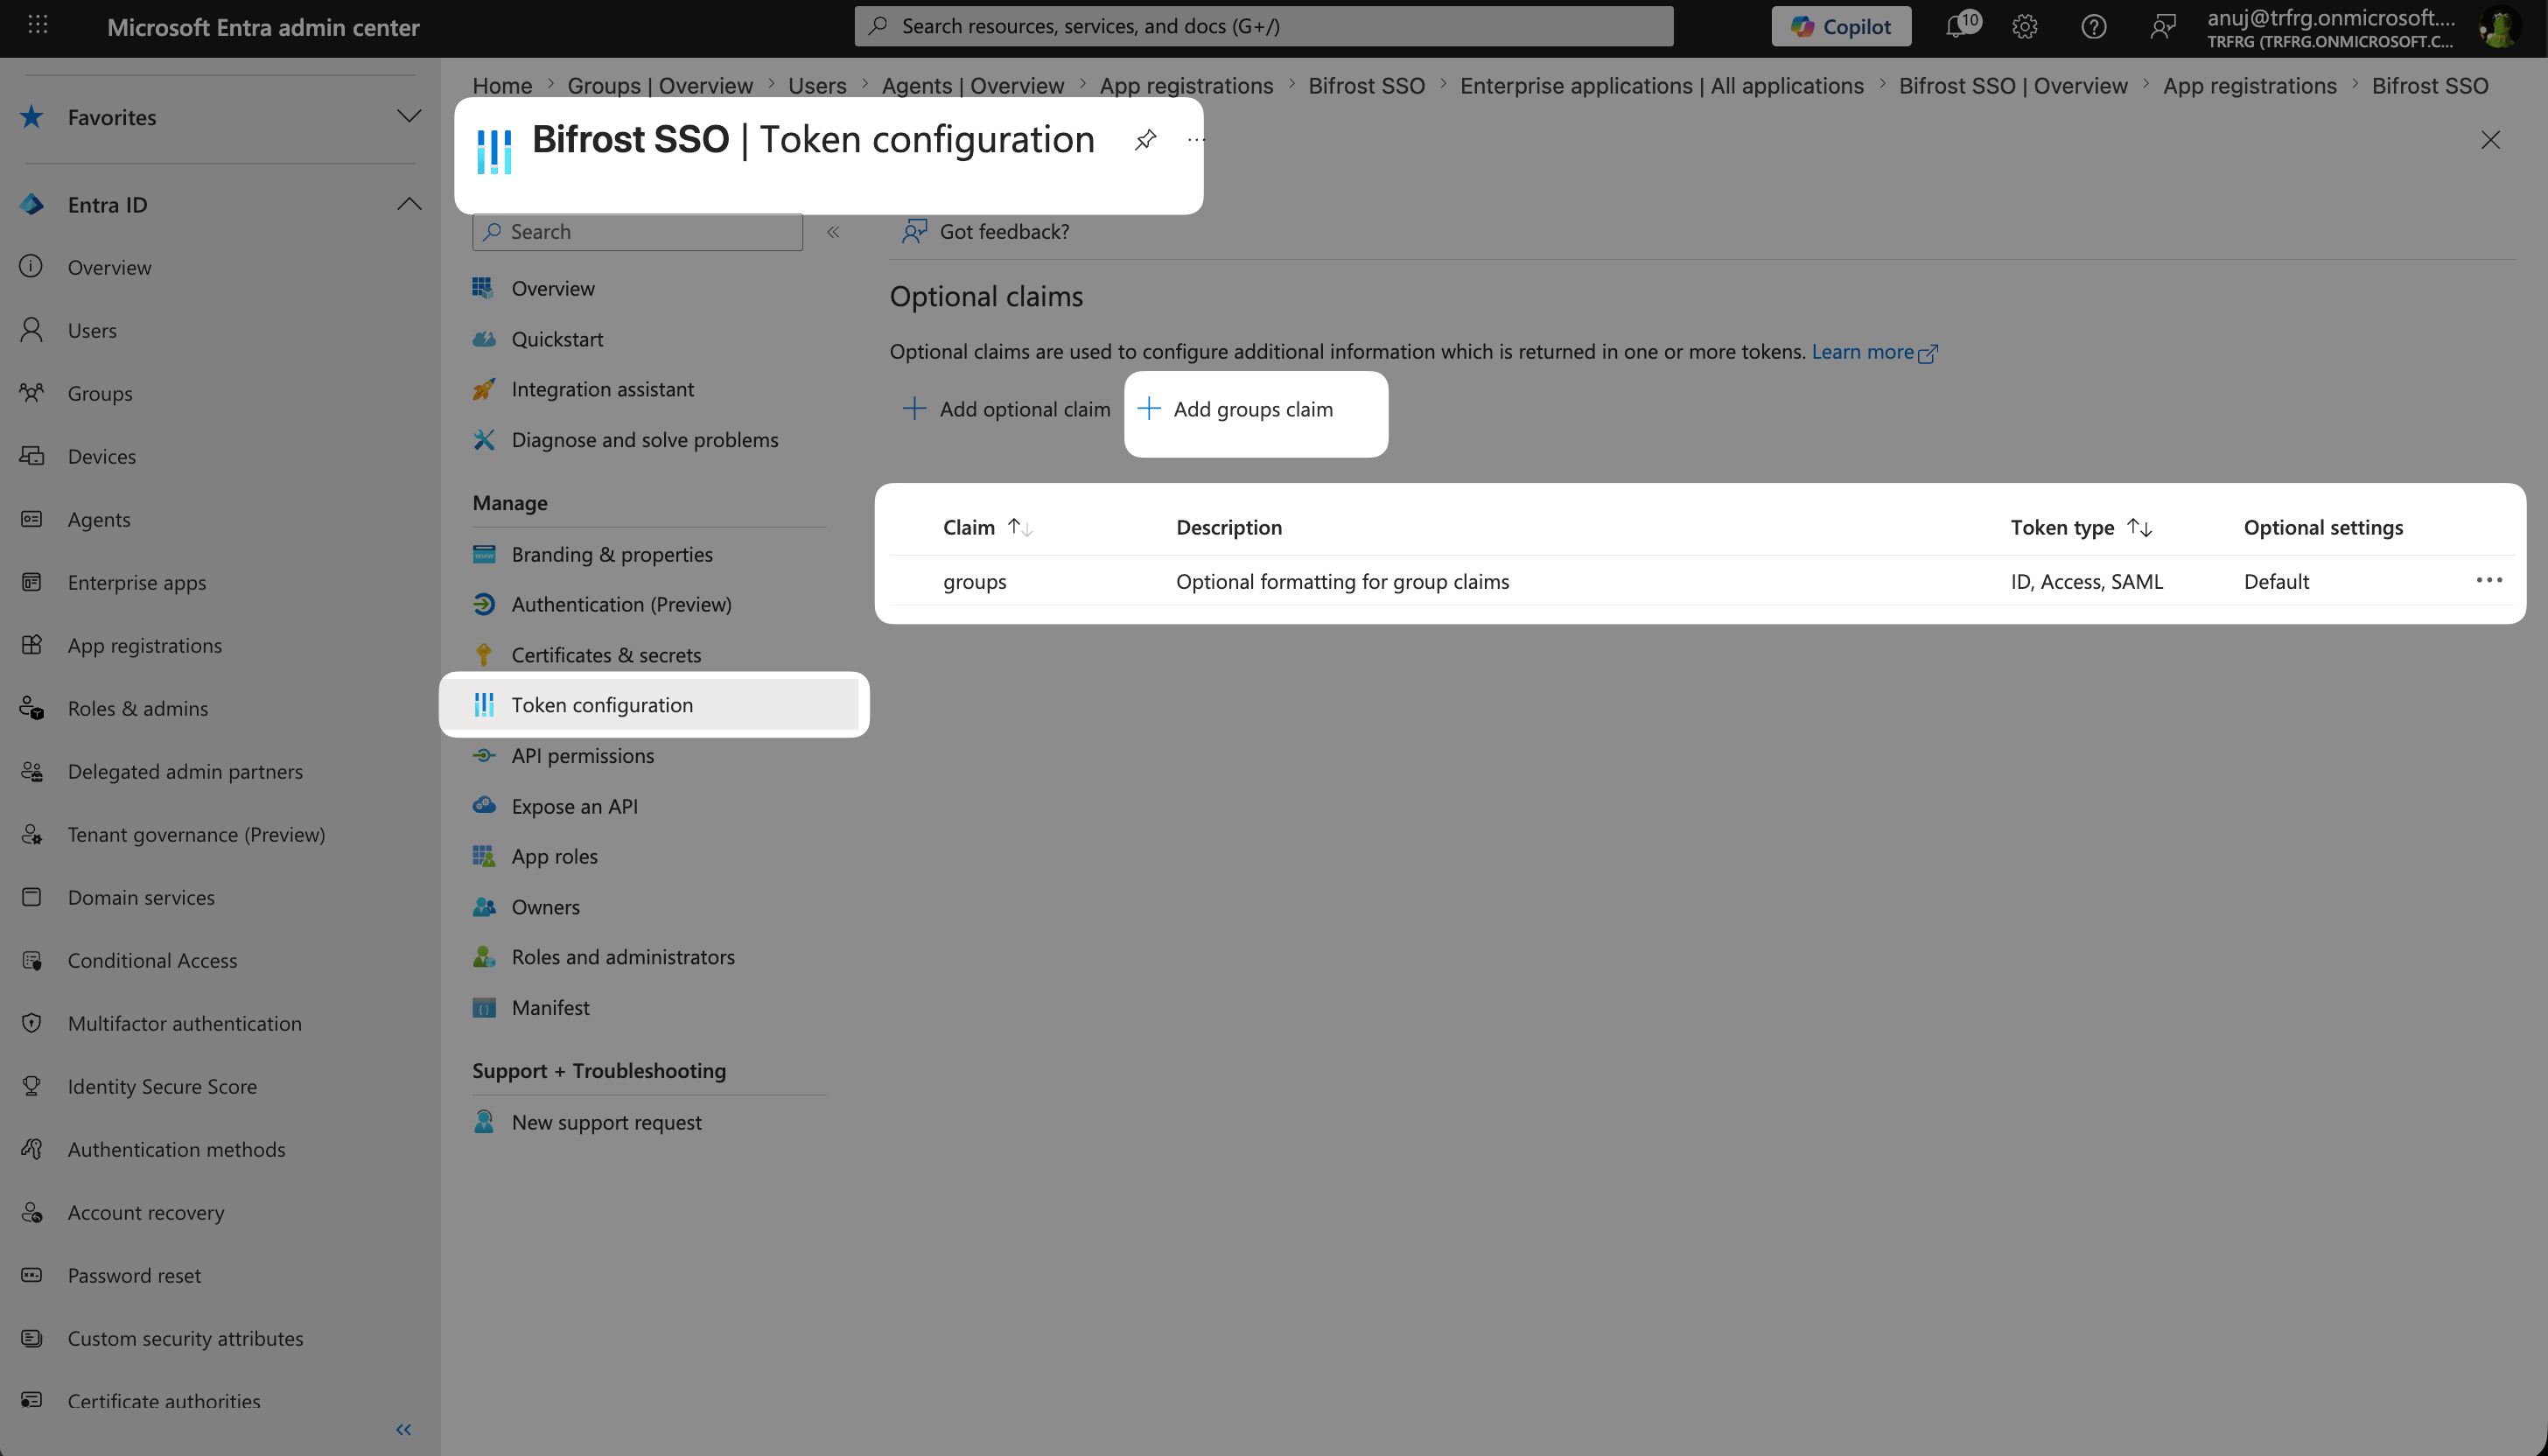
Token configuration — groups claim added for ID and Access tokens.
"requestedAccessTokenVersion": 2 (or "accessTokenAcceptedVersion": 2 for legacy registrations) and "groupMembershipClaims": "ApplicationGroup" to restrict the groups claim to only app-assigned groups.Step 7: Enable assignment requirement
Open the Enterprise Application
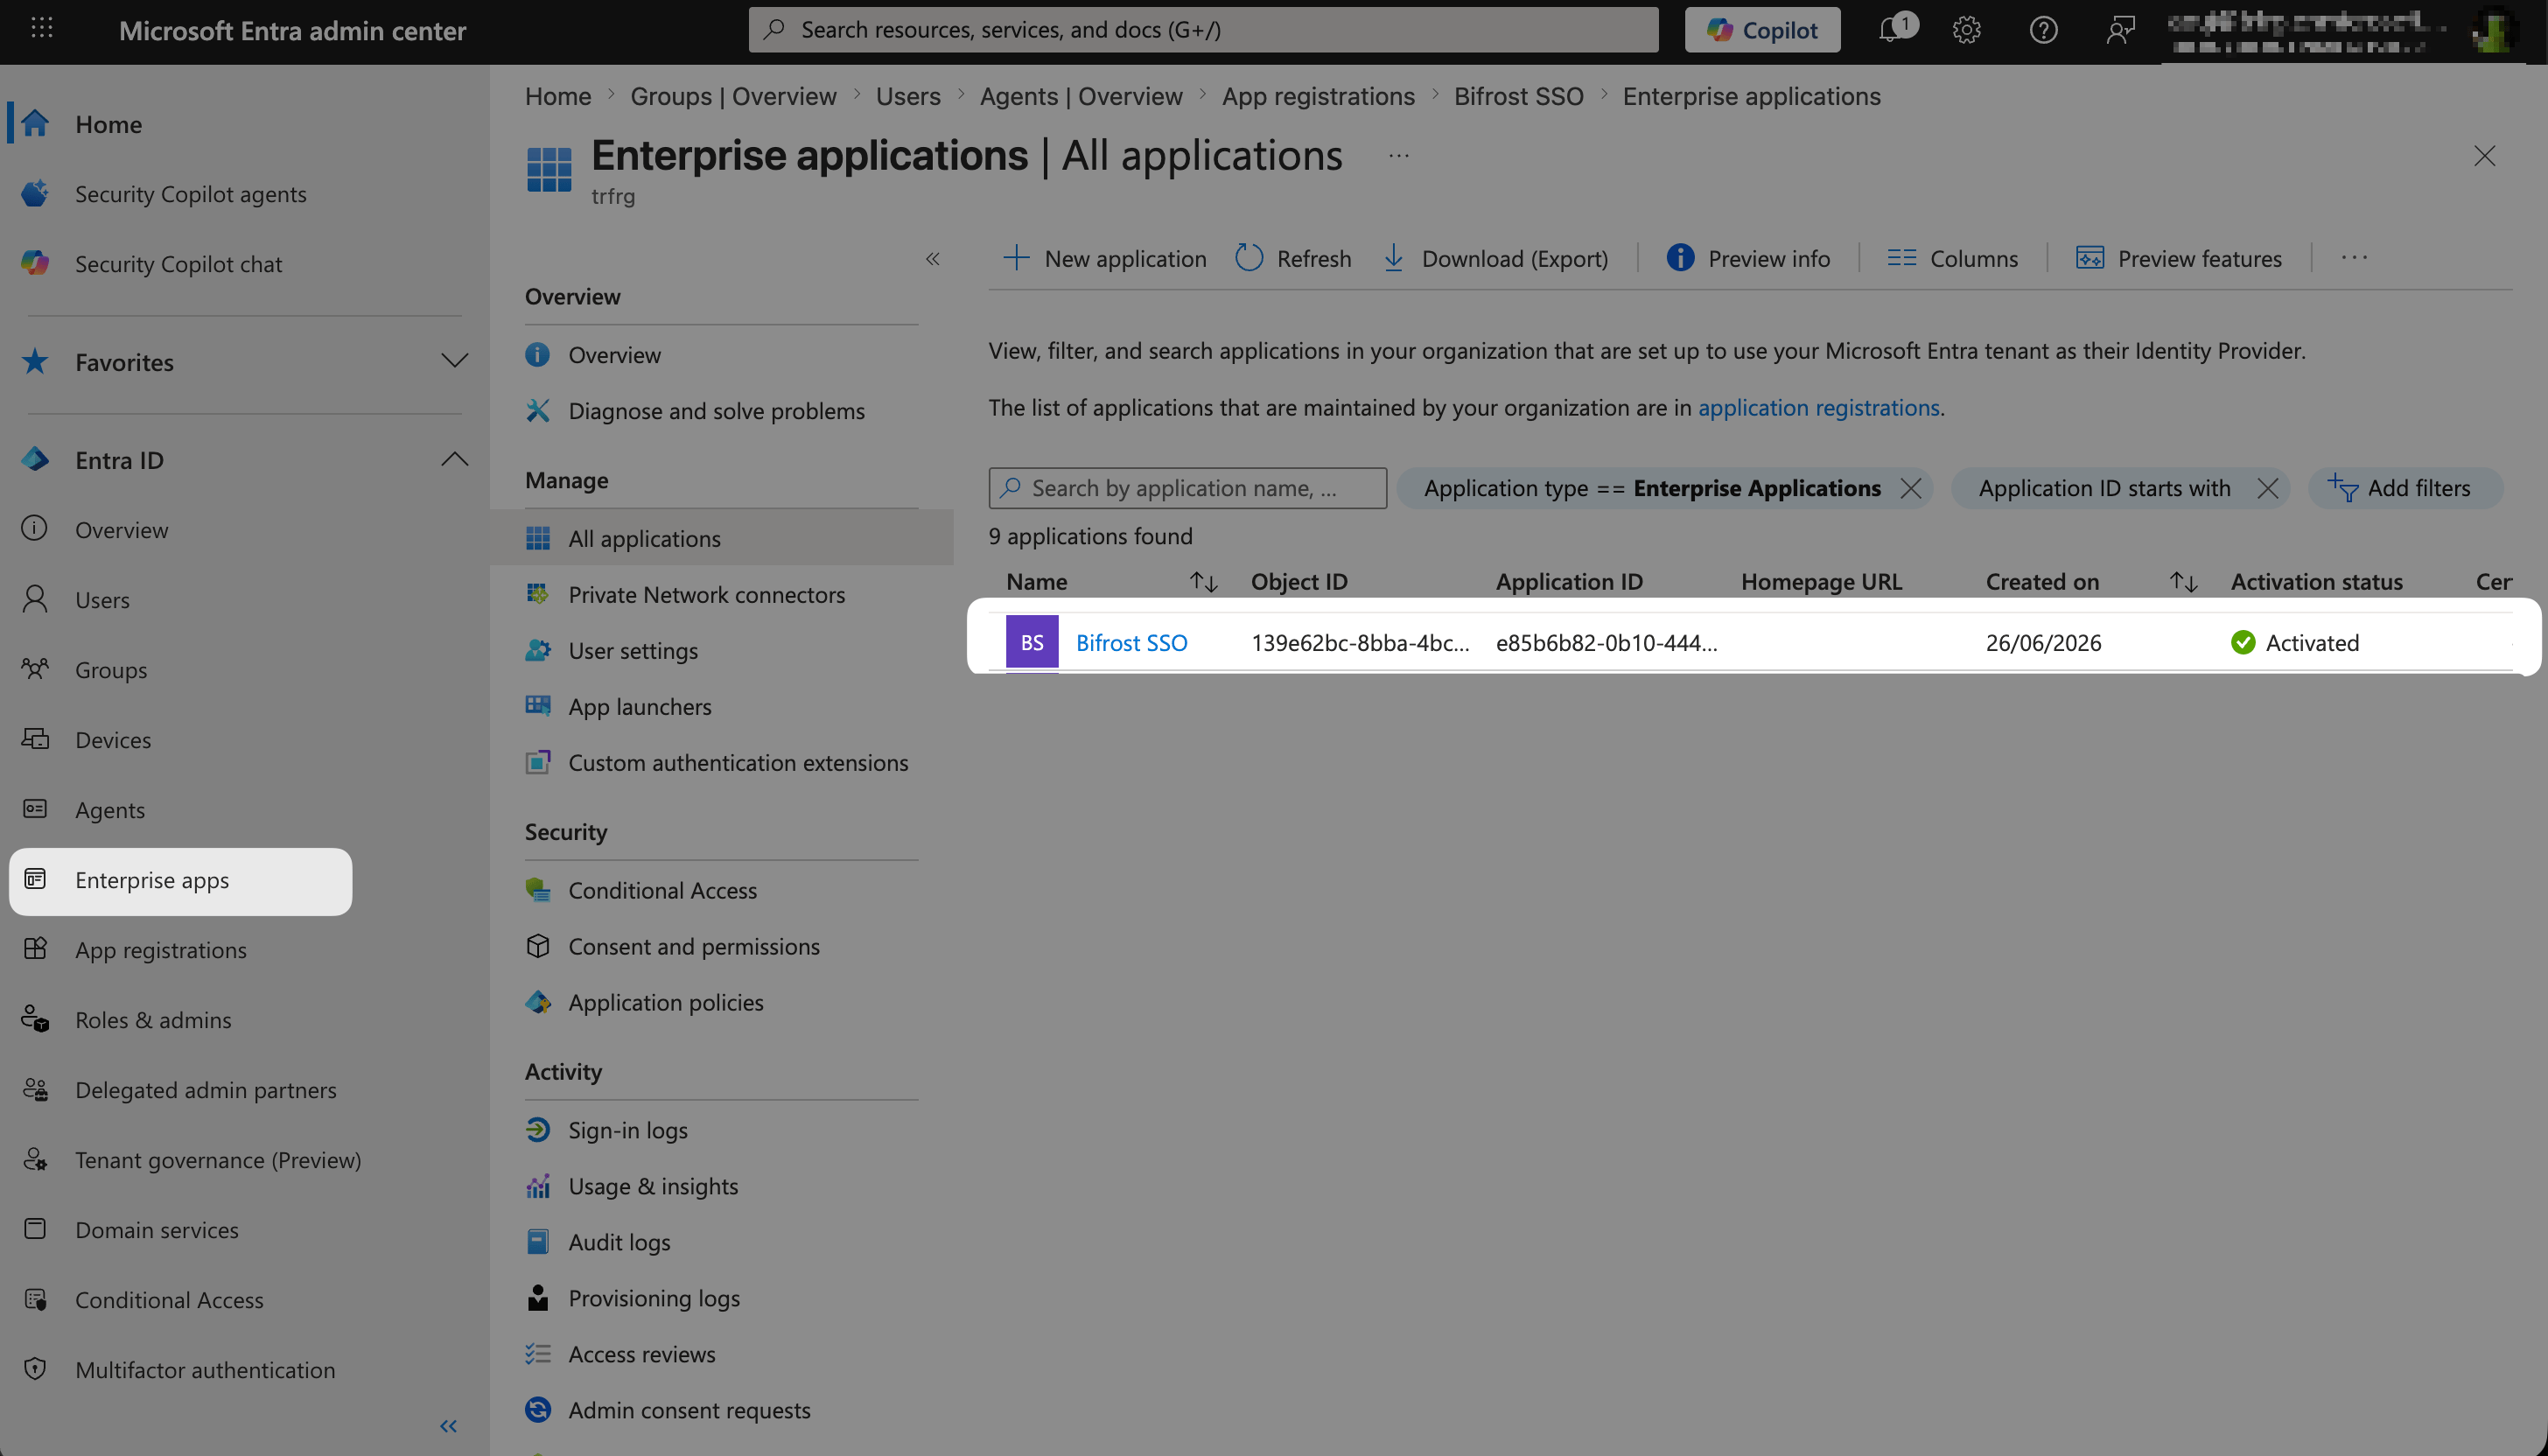
Enterprise Applications list — select Bifrost SSO to open the enterprise application settings.
Set assignment requirement
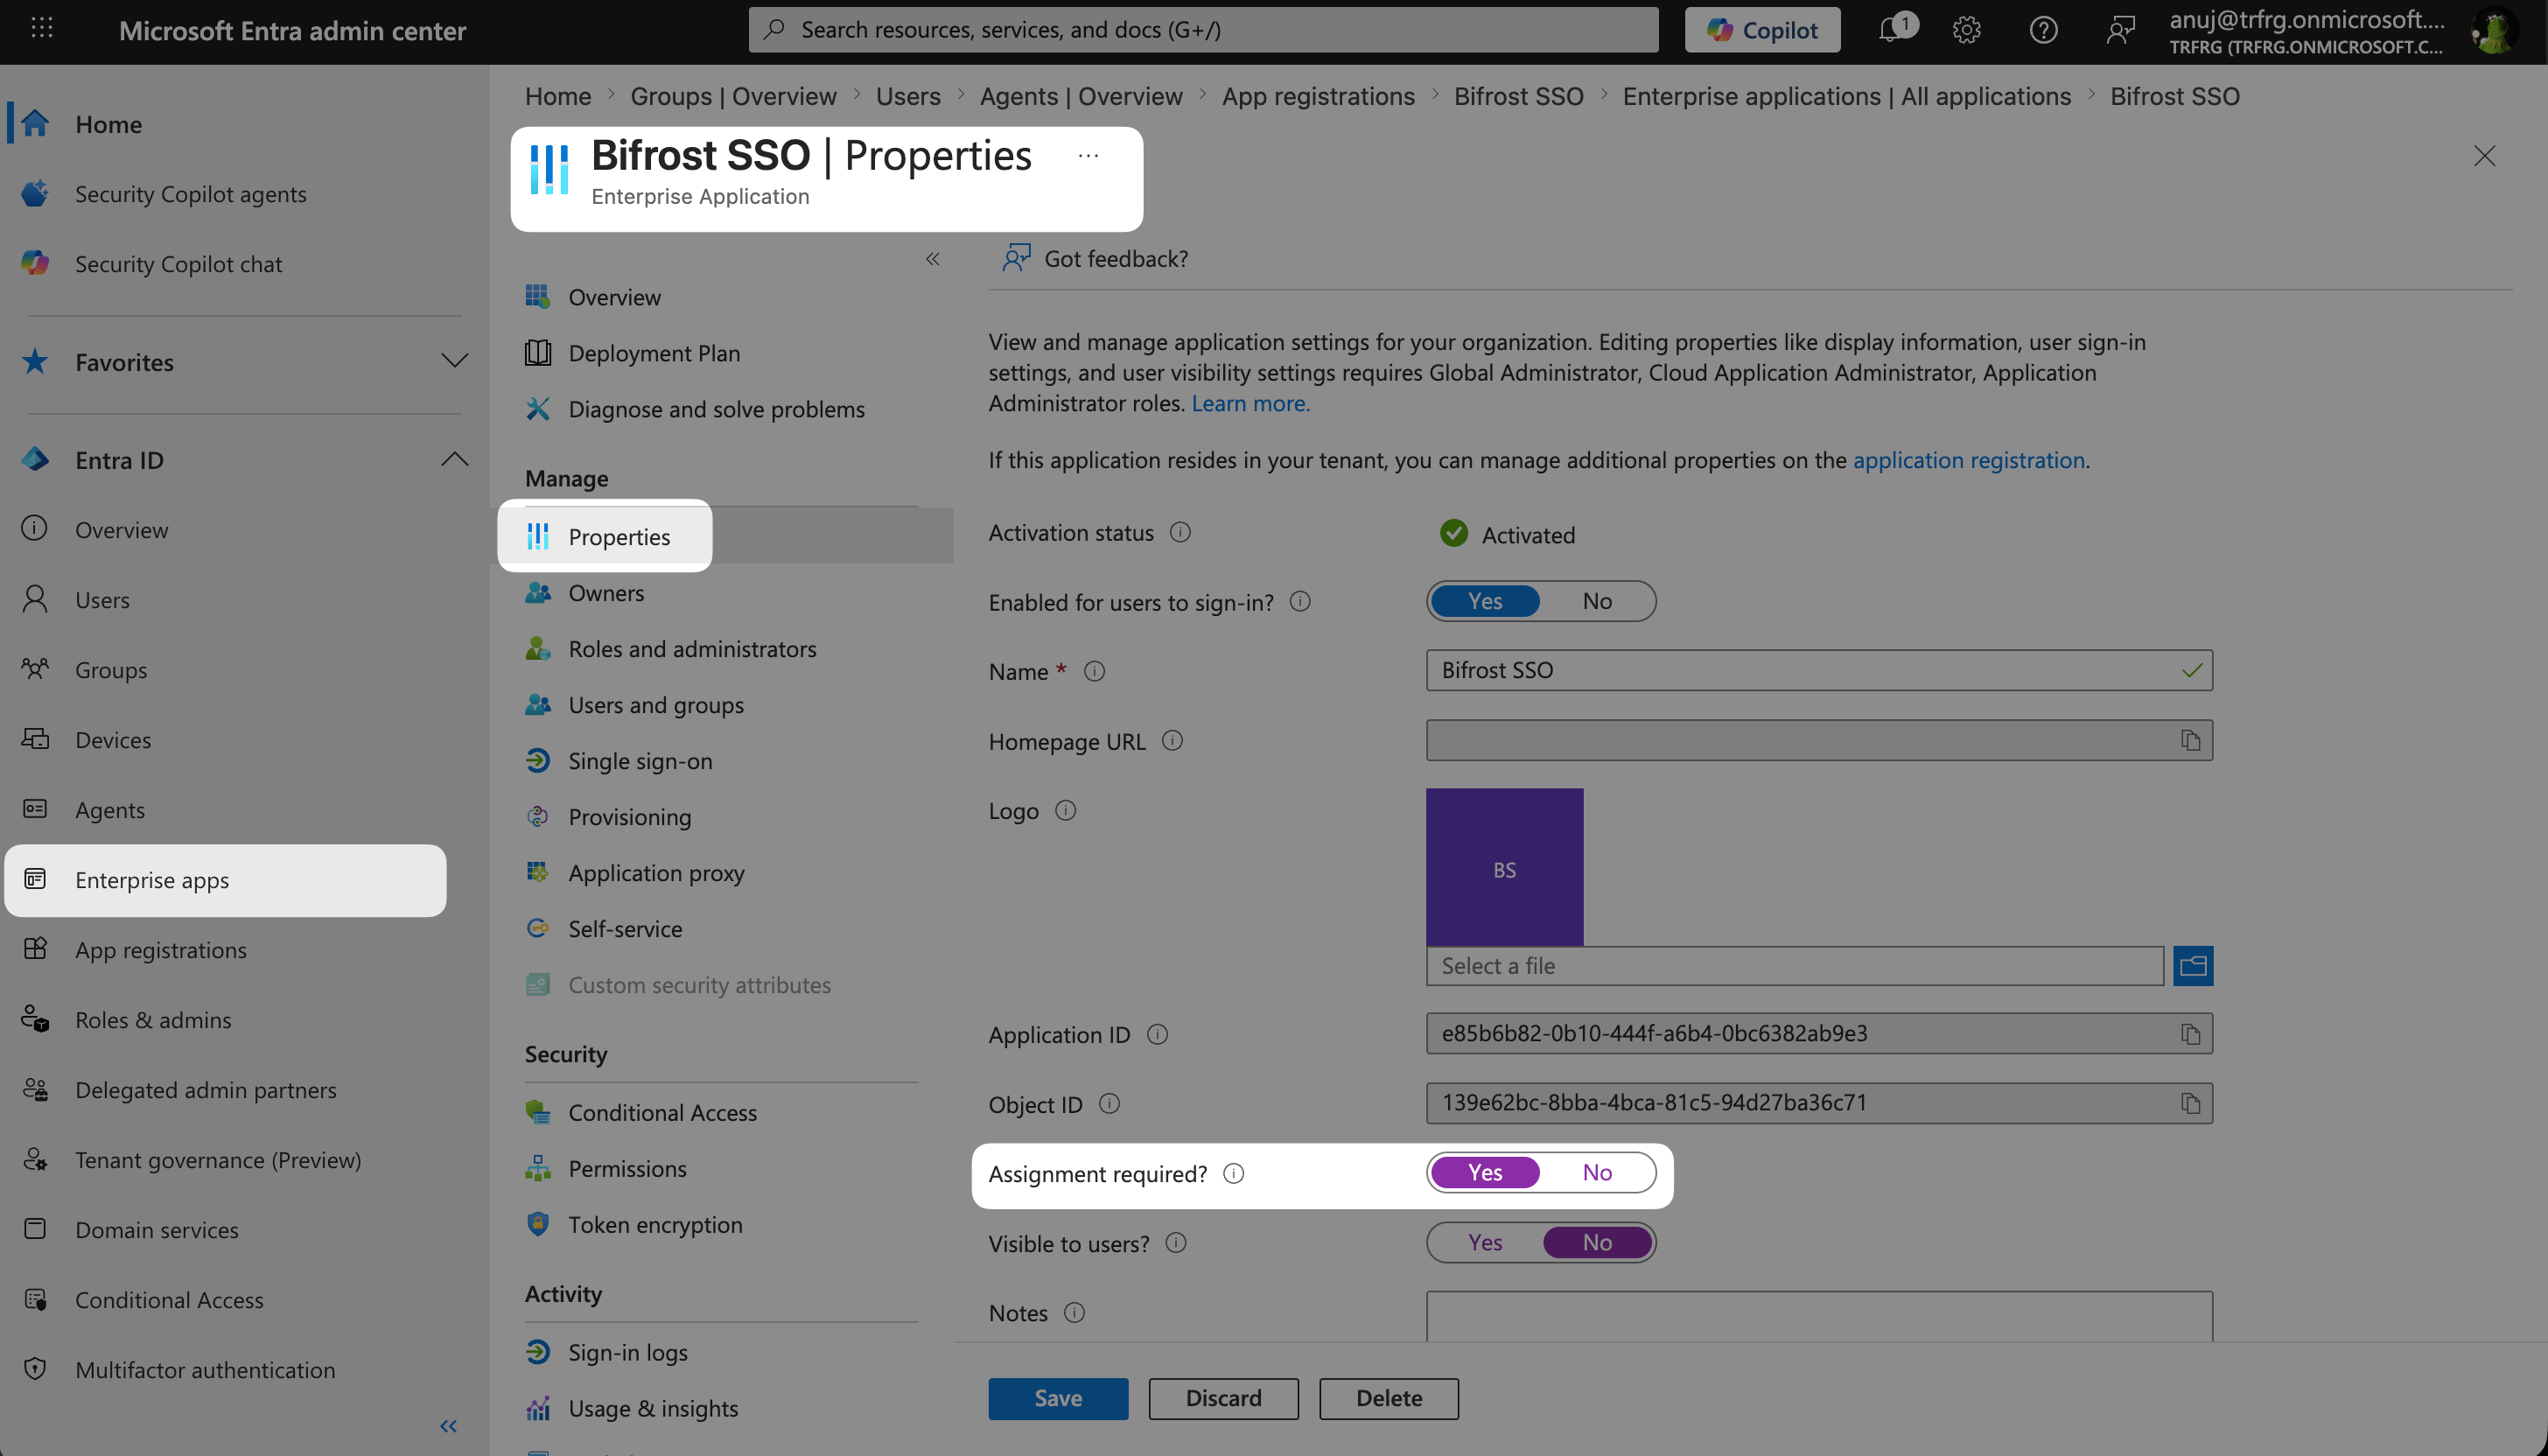
Enterprise Application Properties — set Assignment required to Yes so only assigned users can sign in.
Step 8: Assign users and roles
Assign users or groups to the application

Users and groups — assign each user or group with a role. A missing role causes the roles claim to be omitted from the token.
Step 9: Configure Bifrost
Open User Provisioning and choose Entra
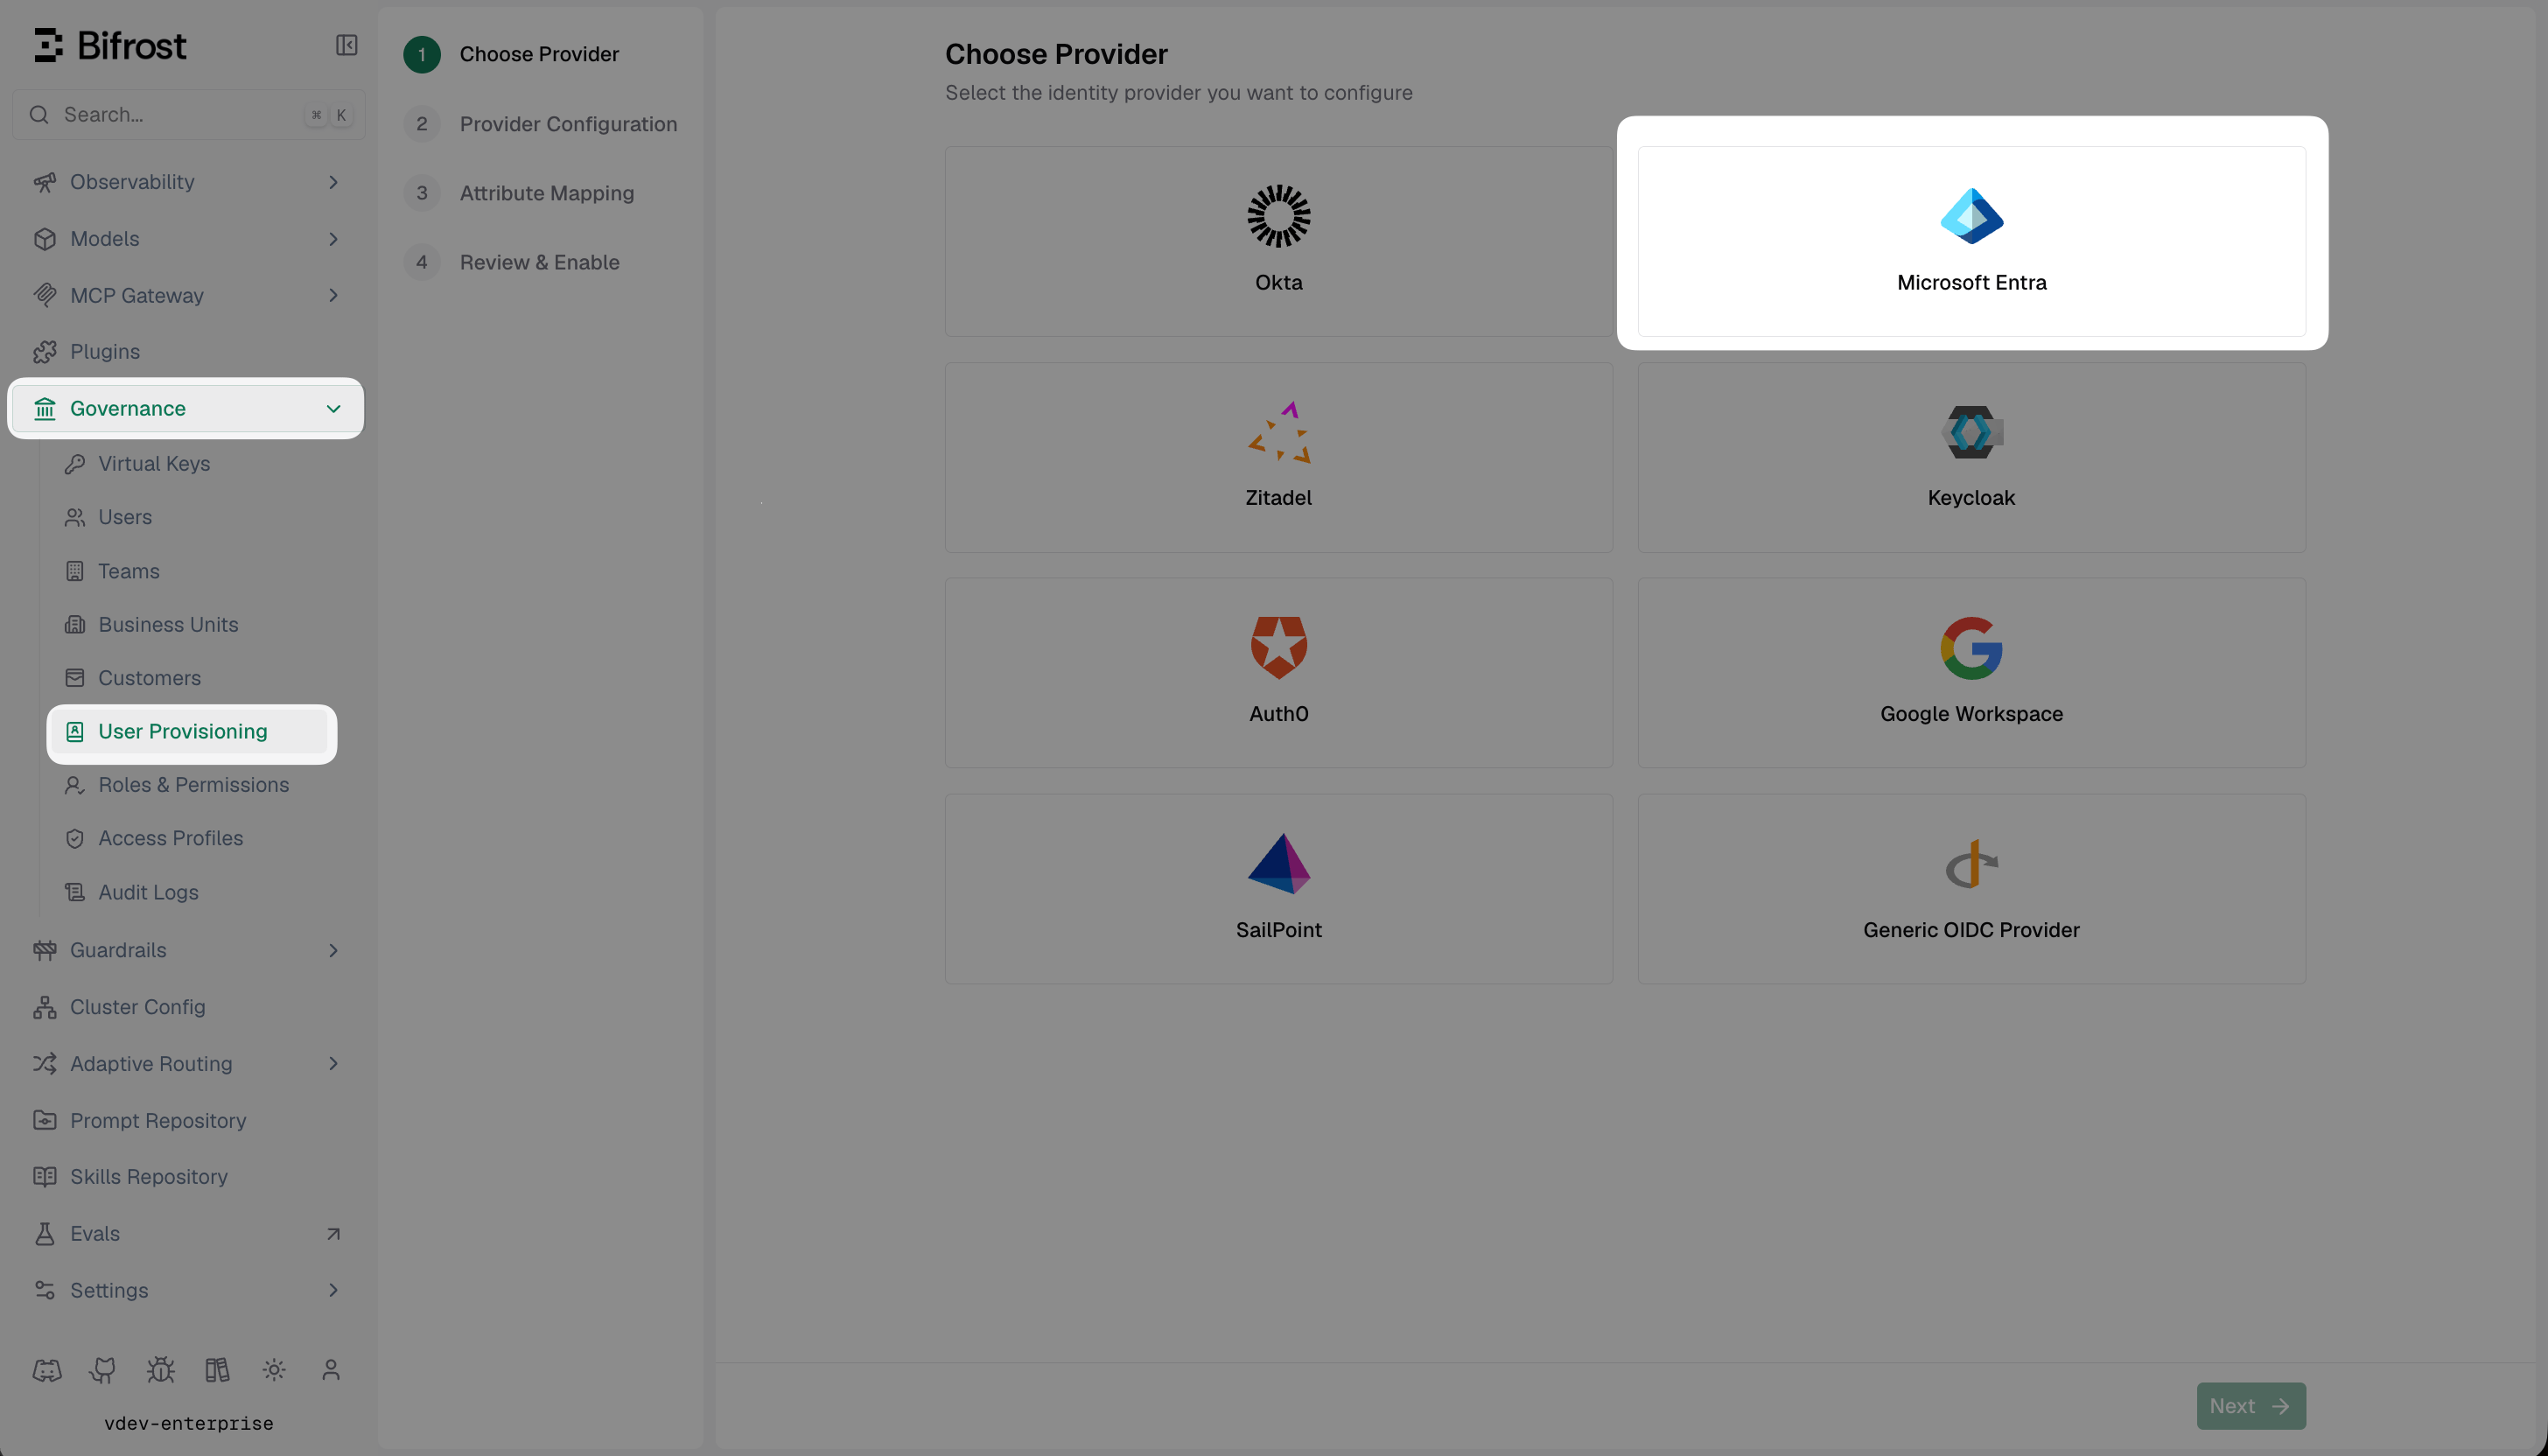
Select Microsoft Entra from the list of identity providers.
Fill in the provider configuration
Discover claims
roles and groups — are present before building your mappings.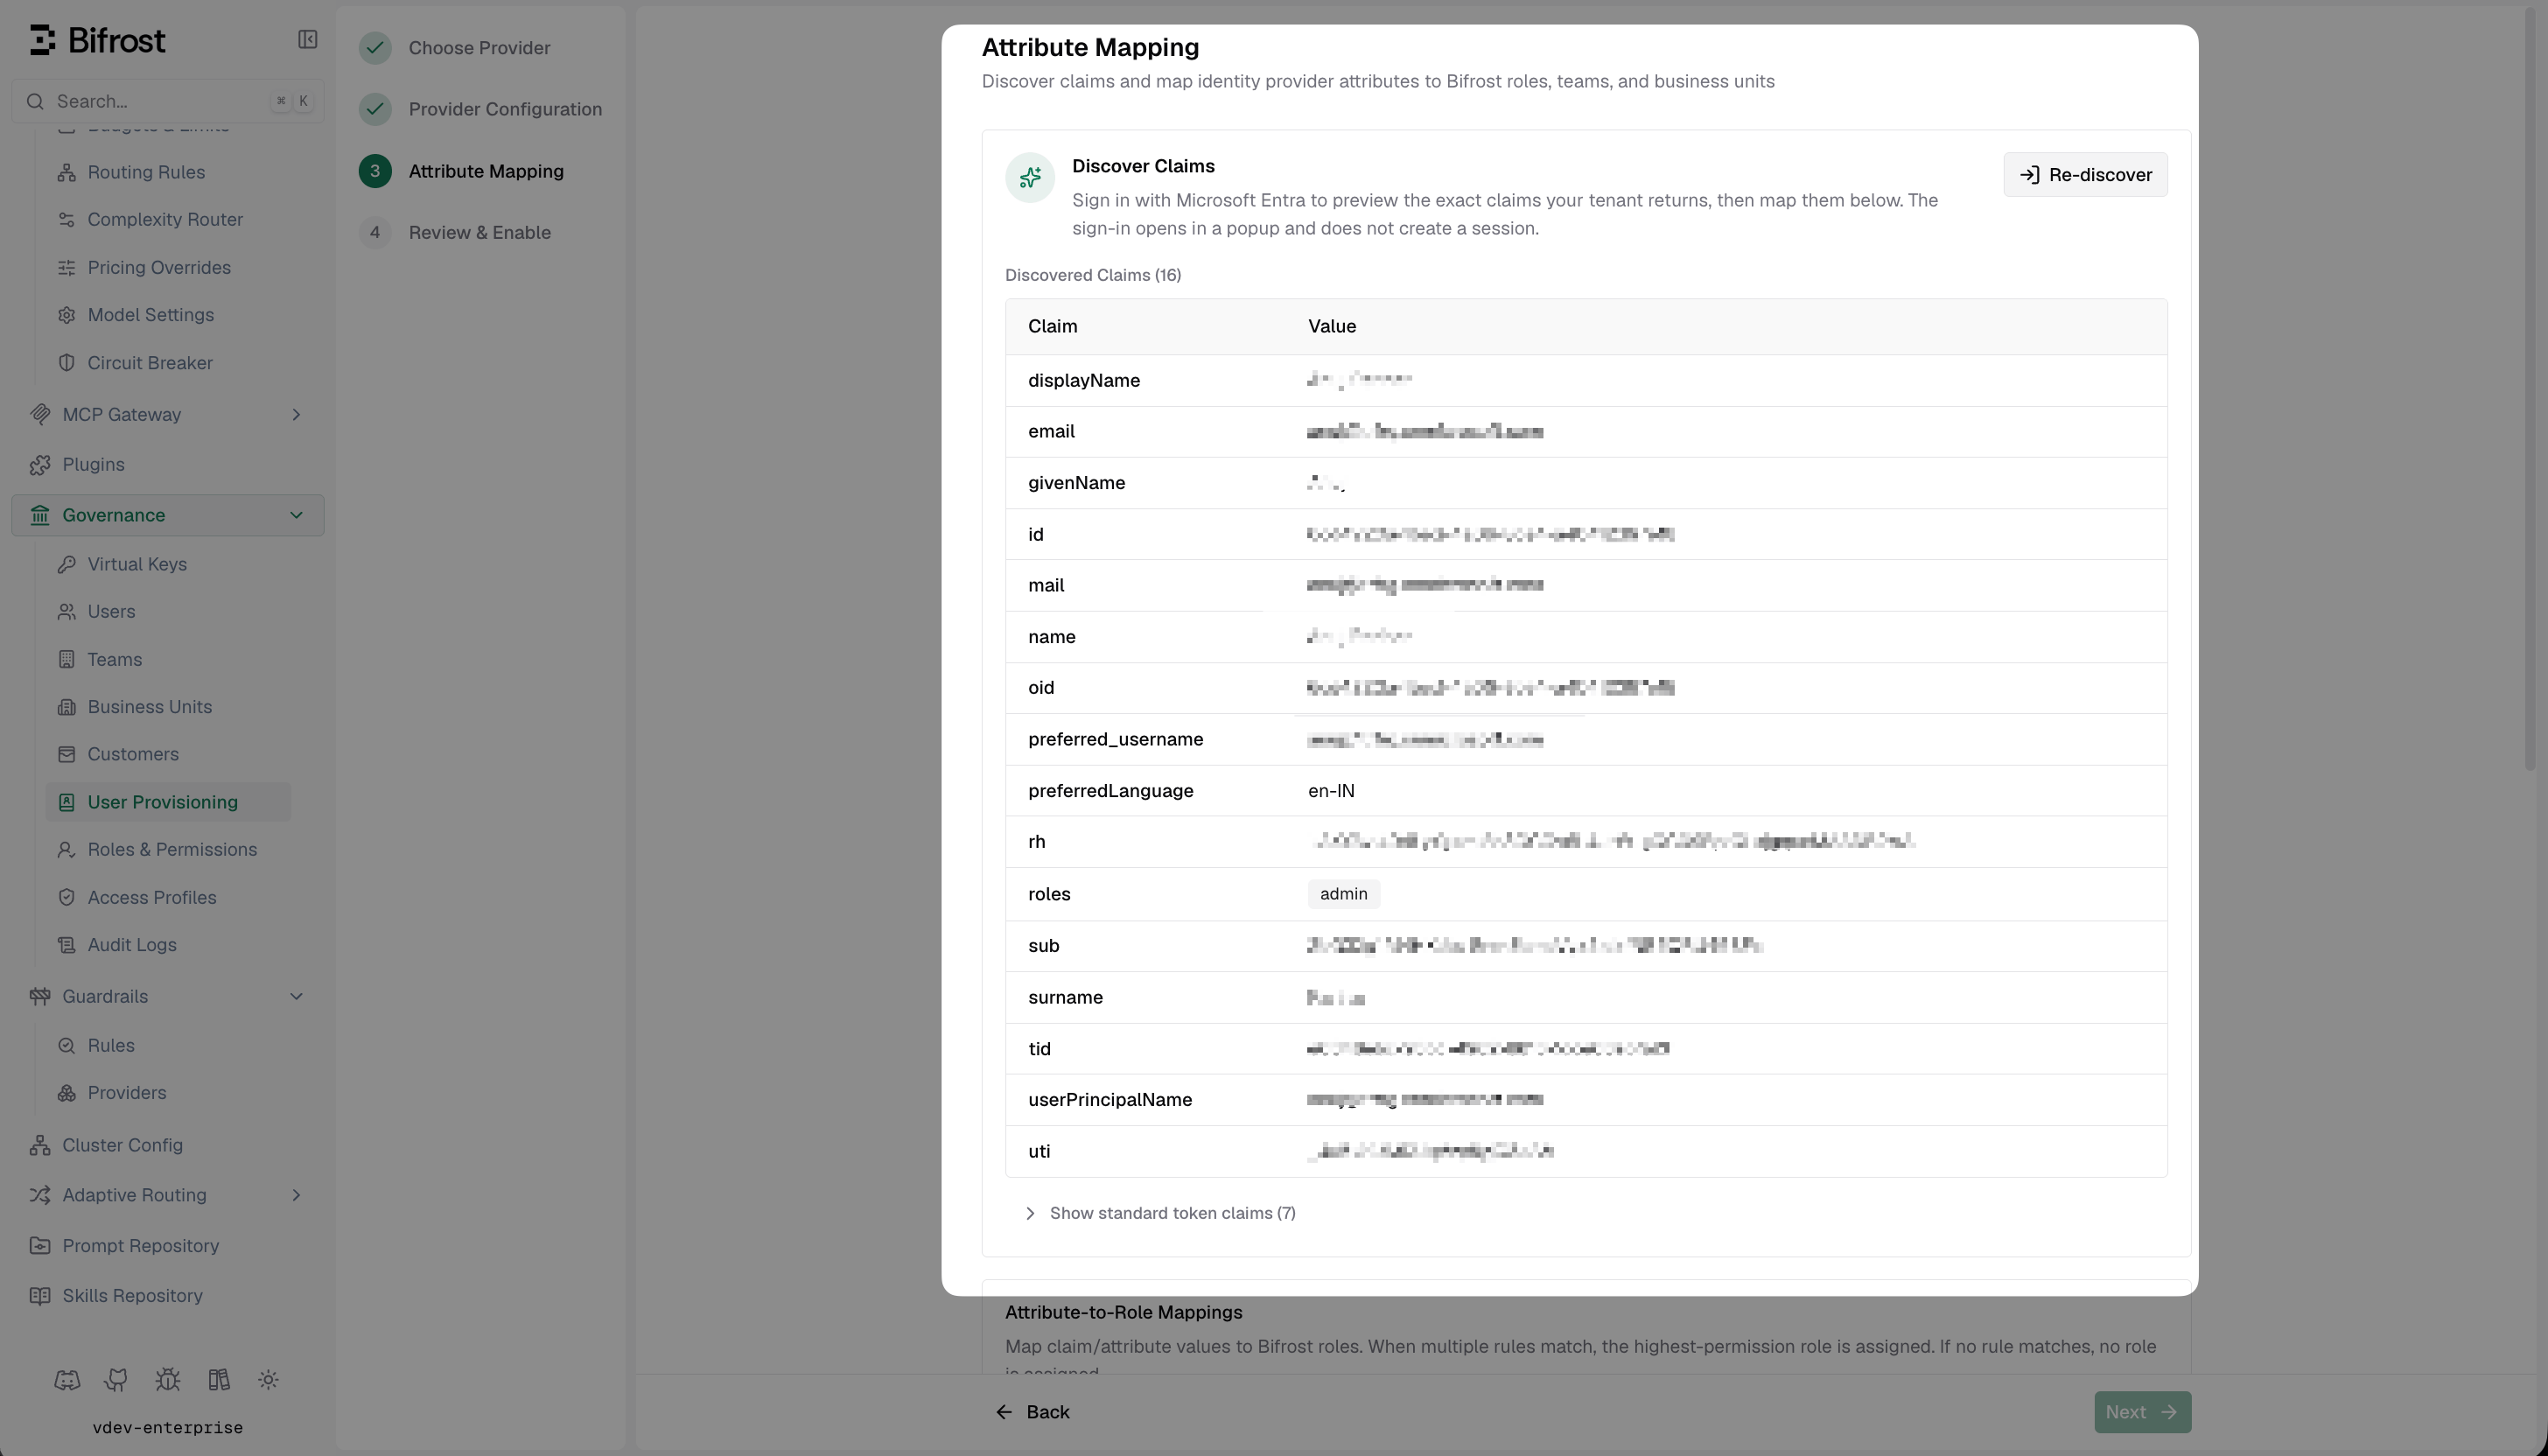
Discover Claims — shows the exact claims Entra is returning in the JWT, including roles, groups, and any custom attributes.
Set up attribute mappings
- All matching rules are evaluated — if multiple rules match, the role with the highest permissions is assigned
- If no rule matches, the user is not assigned a role and login is denied
- Use a specific value (e.g.
engineering) to map that exact claim value to a named Bifrost team - Use
*as the value to sync the claim value directly as the team name - Use
${*}to extract part of the string — e.g.Bifrost Playground: ${*} TeammatchesBifrost Playground: Alpha Teamand creates team Alpha
- Use a specific value (e.g.
platform) to map that exact claim value to a named Bifrost business unit - Use
${*}to extract a substring as the business unit name - When a rule matches, the resolved business unit is assigned to all of that user’s teams
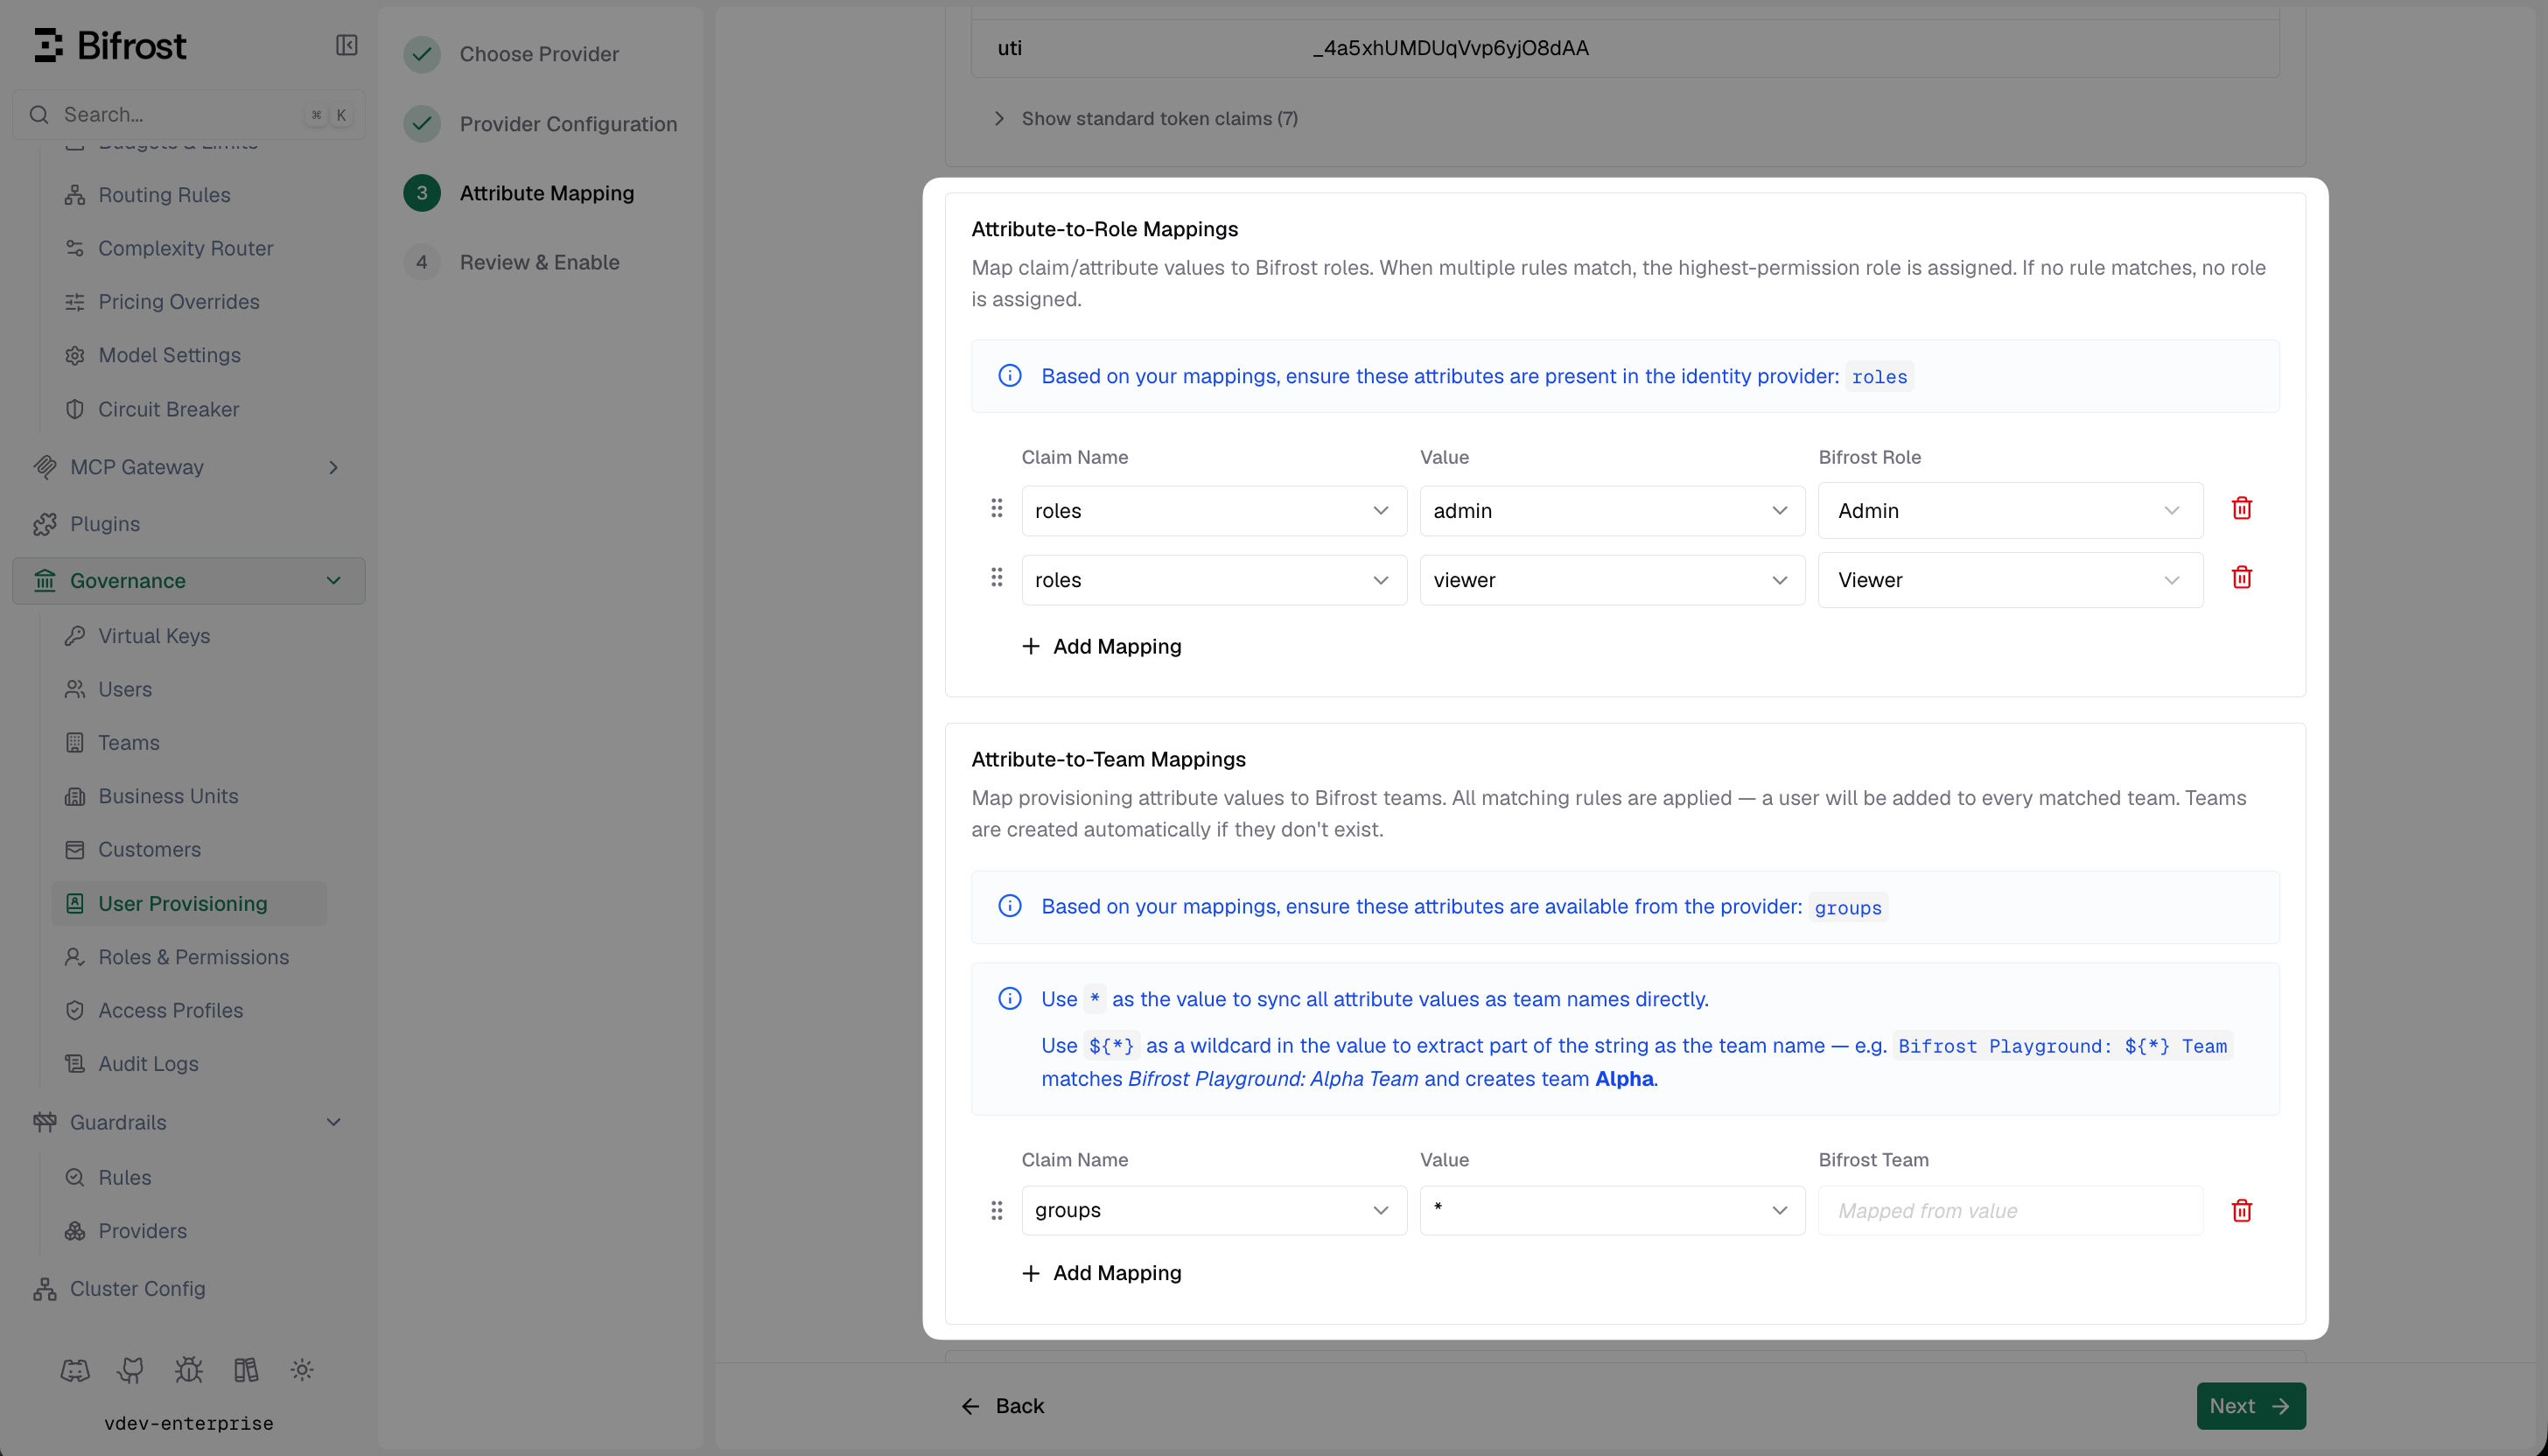
Attribute Mapping — configure role, team, and business unit rules based on the claims Entra sends.
* maps the claim value directly as the entity name. Value comparisons are case-insensitive.Review and enable
How background sync works
Bifrost uses the app credentials from this setup to sync users in the background every 24 hours. During that sync, Bifrost reconciles imported users, role mappings, team mappings, and business-unit mappings from Entra. Every 15 minutes, Bifrost also refreshes active OIDC sessions. If a session cannot be refreshed, Bifrost checks with Entra whether the user is still active; if Entra reports the user as inactive, Bifrost decommissions that user locally.Optional next steps
Sync users and groups in real time — OIDC alone provisions users on first login. To keep Bifrost in sync with Entra as users are created, deactivated, or moved between groups, set up SCIM with Entra.Troubleshooting
User is not redirected to Microsoft login — verify the provider is enabled in Bifrost and the server was restarted after saving. Check that the Tenant ID and Client ID are correct.AADSTS50011: The reply URL does not match — verify both redirect URIs in Authentication (Step 1) exactly match your Bifrost URLs. Check for trailing slashes or http vs https mismatches.
AADSTS7000215: Invalid client secret — regenerate the client secret in Azure and ensure you are copying the secret Value, not the secret ID. Check for leading/trailing whitespace.
Claim "roles" is not present in the token — the user signed in but Entra did not emit a roles claim. Common causes:
- User isn’t assigned a role at the Enterprise Application level — edit the assignment in Step 9 and select a role
- Role assignment is via a group that isn’t itself assigned to the app — the group must appear in Users and groups with a role selected
- Optional
rolesclaim is missing from the manifest — confirm Step 6 includesrolesunderoptionalClaims.idToken(see the Note at the bottom of Step 6) - Sign out and back in to clear the cached token
Application.Read.All and AppRoleAssignment.ReadWrite.All are granted with admin consent (Step 5). Server logs will contain [ENTRA-ROLES] failed to fetch app role catalog: ... 403 if the permission is missing.
Token validation errors — ensure the Tenant ID matches your Azure directory, the Client ID is correct, and the app registration is in the same tenant as your users.