Looking for comprehensive provider routing documentation?For a detailed guide covering governance-based routing, adaptive load balancing, Model Catalog, and how they interact, see the Provider Routing Guide.This page focuses specifically on configuring governance routing via Virtual Keys.
Overview
Bifrost’s governance-based routing capabilities offer granular control over how requests are directed to different AI models and providers through Virtual Key configuration. By configuring routing rules on a Virtual Key, you can enforce which providers and models are accessible, implement weighted load balancing strategies, create automatic fallbacks, and restrict access to specific provider API keys. This powerful feature enables key use cases like:- Resilience & Failover: Automatically fall back to a secondary provider if the primary one fails.
- Environment Separation: Dedicate specific virtual keys to development, testing, and production environments with different provider and key access.
- Cost Management: Route traffic to cheaper models or providers based on weights to optimize costs.
- Fine-grained Access Control: Ensure that different teams or applications only use the models and API keys they are explicitly permitted to.
This page covers static governance routing through Virtual Key provider configuration. If you want routing decisions to depend on runtime request attributes such as headers, budgets, or request-content complexity, use Routing Rules. For complexity-based tiering specifically, see Complexity Router.
Provider/Model Restrictions
Virtual Keys can be restricted to use only specific provider/models. When provider/model restrictions are configured, the VK can only access those designated provider/models, providing fine-grained control over which provider/models different users or applications can utilize. How It Works:- No Provider Configs (default): VK blocks all providers (deny-by-default). You must add provider configurations to allow traffic.
- With Provider Configs: VK limited to only the specified provider/models. Configured providers participate in weighted load balancing only if their
weightis set to a numeric value, while providers withweight: nullremain configured but are opted out of weighted selection.
allowed_models: ["*"]: Allow all models supported by the provider (uses the Model Catalog for validation).- Empty
allowed_models: Deny all models (deny-by-default). - Explicit model list: Only those specific models are permitted.
- Model Catalog Sync: On startup and provider updates, Bifrost calls each provider’s list models API. If this fails, you’ll see a warning:
{"level":"warn","message":"failed to list models for provider <name>: failed to execute HTTP request to provider API"}
Cross-provider routing does NOT happen automatically. For example, requests for
gpt-4o will NOT be routed to Anthropic unless you explicitly add "gpt-4o" to Anthropic’s allowed_models in the Virtual Key configuration. Each provider only handles models it actually supports (determined by the Model Catalog).Weighted Load Balancing
When you configure multiple providers on a Virtual Key, Bifrost automatically implements weighted load balancing. Each provider can be assigned a weight, and requests are distributed proportionally. Theweight field is optional - omitting it (or setting it to null) excludes the provider from weighted selection while still allowing it to be used for direct provider/model requests or as a fallback.
Example Configuration:
- For
gpt-4o: 80% Azure, 20% OpenAI (both providers have it in allowed_models) - For
gpt-4o-mini: 100% OpenAI (only OpenAI has it in allowed_models) - For
claude-3-sonnet: ❌ Rejected (neither provider has it in allowed_models)
Weights are automatically normalized to a sum 1.0 based on the weights of all providers available on the VK for the given model.
allowed_models (allow all via Model Catalog):
- Request for
gpt-4o→ Routed to OpenAI (Model Catalog shows OpenAI supports this) - Request for
claude-3-sonnet→ Routed to Anthropic (Model Catalog shows Anthropic supports this) - Request for
gpt-4owill NOT route to Anthropic (Model Catalog shows Anthropic doesn’t support OpenAI models)
Automatic Fallbacks
When multiple providers are configured on a Virtual Key, Bifrost automatically creates fallback chains for resilience. This feature provides automatic failover without manual intervention. How It Works:- Only activated when: Your request has no existing
fallbacksarray in the request body - Fallback creation: Providers are sorted by weight (highest first) and added as fallbacks
- Respects existing fallbacks: If you manually specify fallbacks, they are preserved
- Primary request goes to weighted-selected provider (e.g., Azure with 80% weight)
- If Azure fails, automatically retry with OpenAI
- Continue until success or all providers exhausted
Setting Provider/Model Routing
- Web UI
- API
- config.json
- Go to Virtual Keys
-
Create/Edit virtual key
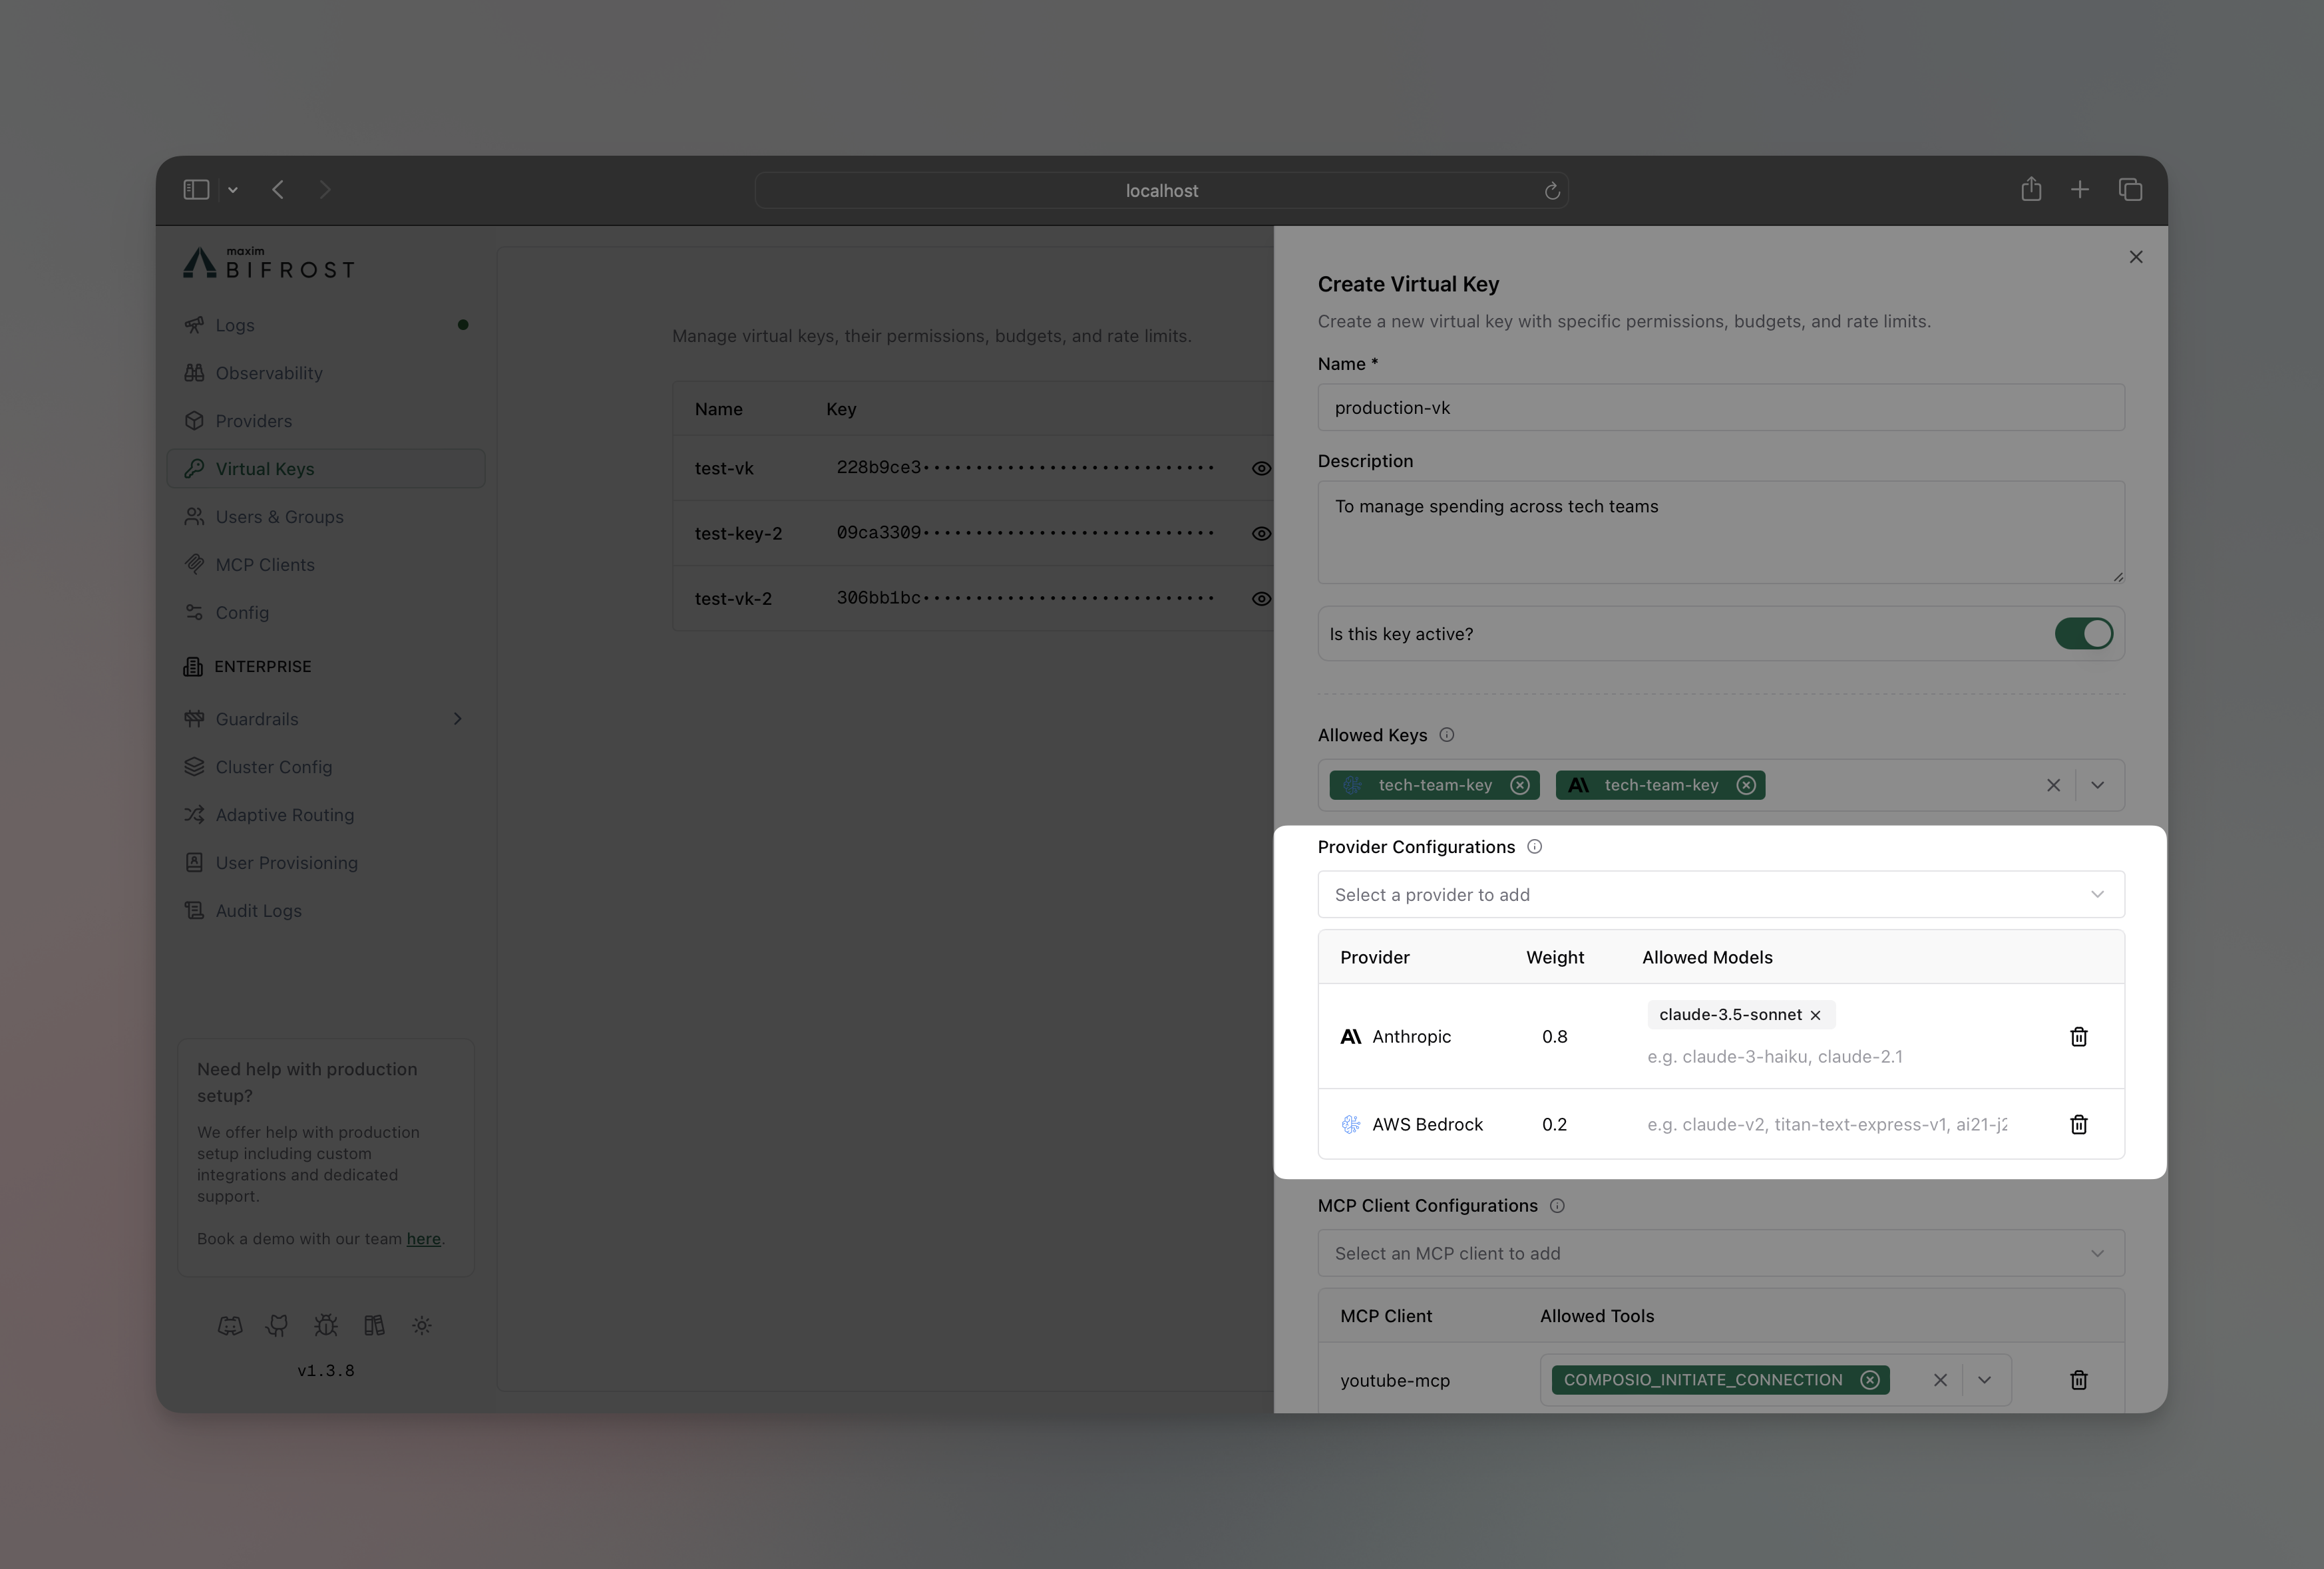
- In Provider Configurations section, add the provider you want to restrict the VK to
-
Allowed Models:
- Specify models: Enter specific models (e.g.,
["gpt-4o", "gpt-4o-mini"]) to explicitly whitelist only those models ["*"]: Allow all models (uses the Model Catalog for validation).- Leave blank: Deny all models (deny-by-default).
- Specify models: Enter specific models (e.g.,
- Optionally add a weight for this provider (numeric value for weighted load balancing, or leave blank to exclude from weighted routing while keeping the provider available for direct requests and fallbacks)
- Click on the Save button
API Key Restrictions
Virtual Keys can be restricted to use only specific provider API keys. When key restrictions are configured, the VK can only access those designated keys, providing fine-grained control over which API keys different users or applications can utilize. How It Works:- No Restrictions (
key_ids: ["*"]): VK can use any available provider keys based on load balancing - With Restrictions: VK limited to only the specified key IDs, regardless of other available keys
- All Blocked (
key_ids: []or field omitted): VK cannot use any provider keys (deny-by-default)
- Web UI
- API
- config.json
- Go to Virtual Keys
-
Create/Edit virtual key
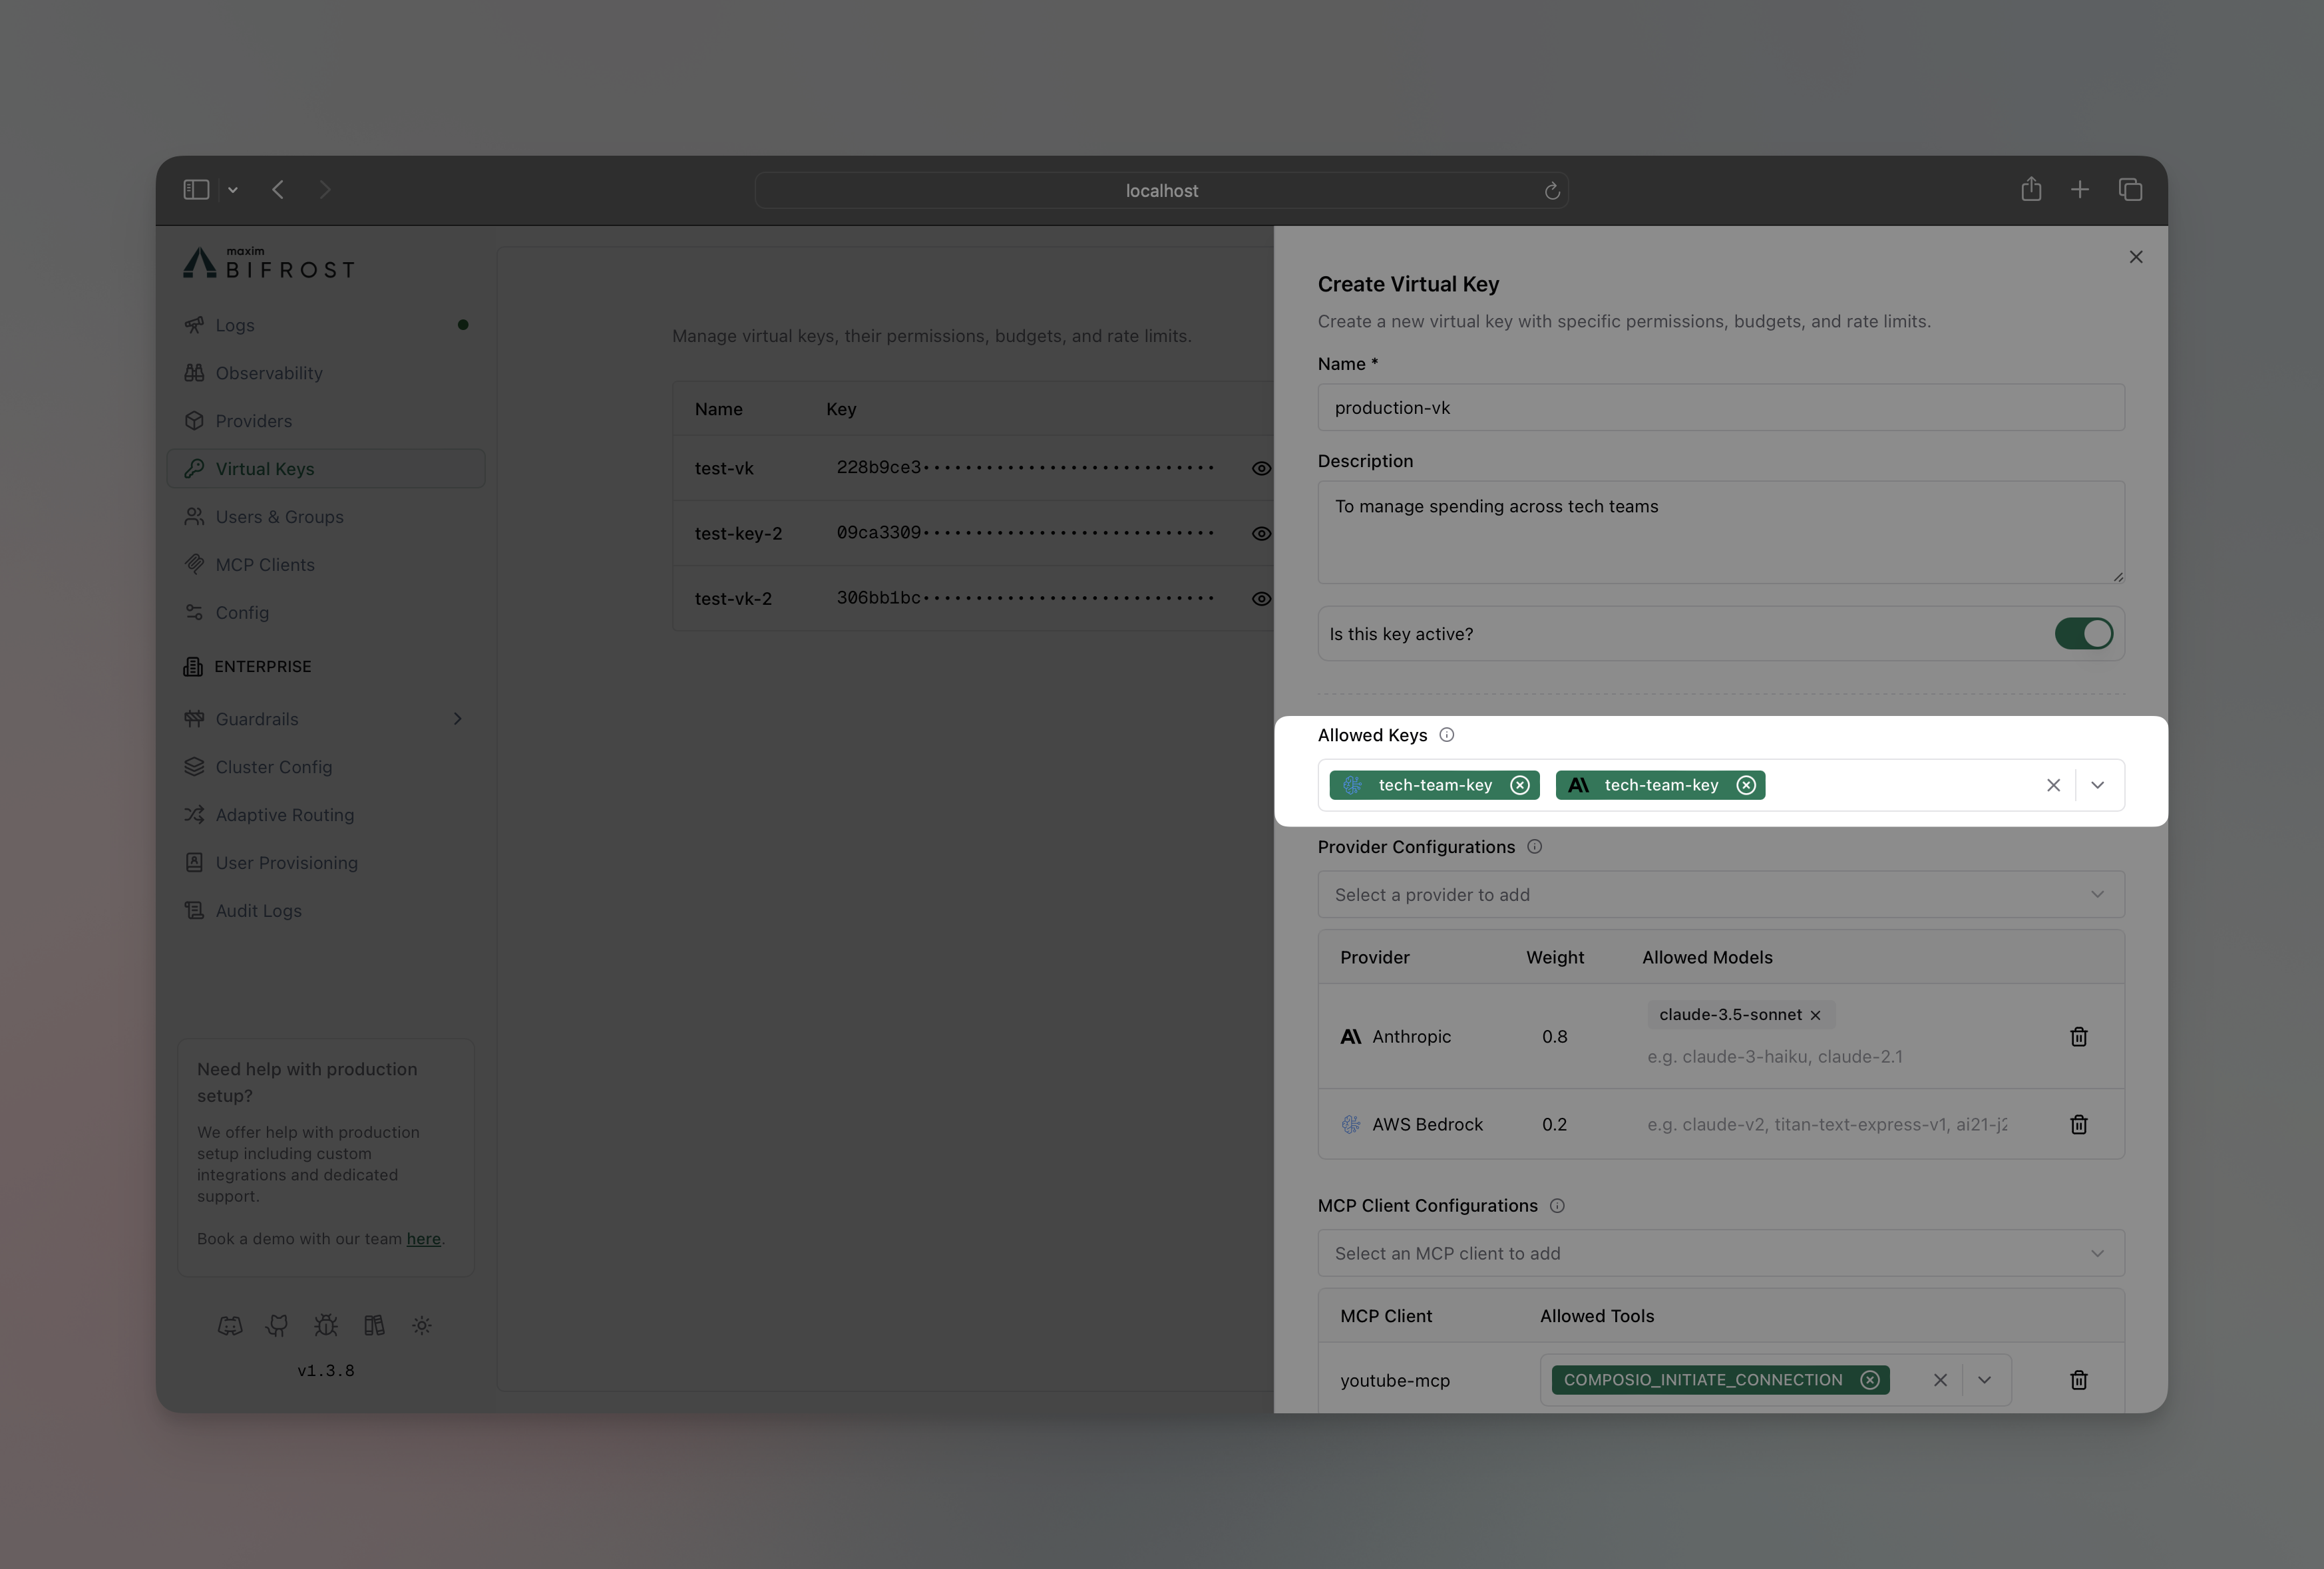
- In Allowed Keys section, select the API key you want to restrict the VK to
- Click on the Save button
- Environment Separation - Production VKs use production keys, dev VKs use dev keys
- Cost Control - Different teams use keys with different billing accounts
- Access Control - Restrict sensitive keys to specific VKs only
- Compliance - Ensure certain workloads only use compliant/audited keys
The models restrictions applied on the keys of individual providers will always be applied and will work together with the provider/model or api key restrictions set on the virtual key.
Troubleshooting
Model Catalog Sync Failures
If you see warnings like this in your Bifrost logs during startup or provider updates:- Bifrost attempted to call the provider’s list models API to populate the Model Catalog
- The request failed (network issue, provider unavailable, incorrect credentials, etc.)
- If your Virtual Key has
allowed_models: [](empty) for this provider, all models will be denied. Use["*"]to allow all models.
- Check that the provider is correctly configured and accessible
- Verify network connectivity to the provider’s API
- Ensure API credentials are valid
- Use
allowed_models: ["*"]to allow all models, or specify an explicit list for critical providers